 Thursday Theory: The Pros & Cons of Big Website Headlines
 Ask PSD.FanExtra Episode #1
 Thursday Theory: What Makes Great Typography?
Have every post delivered to your inbox and get access to hundreds of useful design freebies.
The Vignette is an increasingly popular design trend. So, just what is it?
Vignetting has been used in photography for some time, and is a reduction of an image’s brightness or saturation at the periphery. Essentially, the center of the image is the brightest, whilst the edges often form a circular border of shadow.
Often Vignetting occurs in photography unintentionally due to camera settings and lens limitations. However, the effect can also be integrated with special filters and post processing procedures.
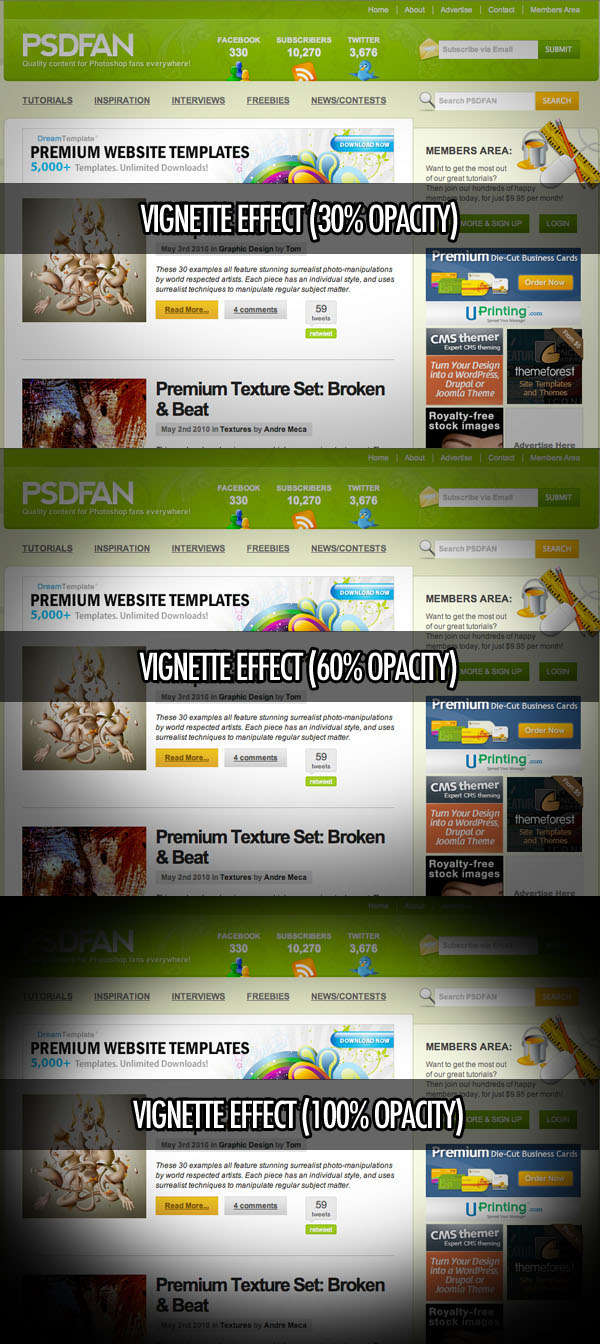
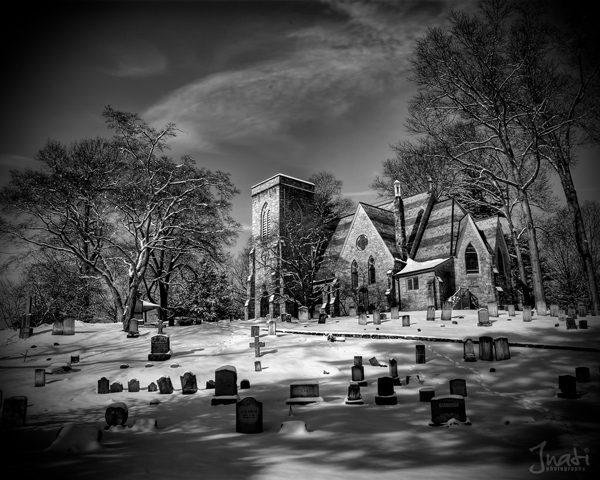
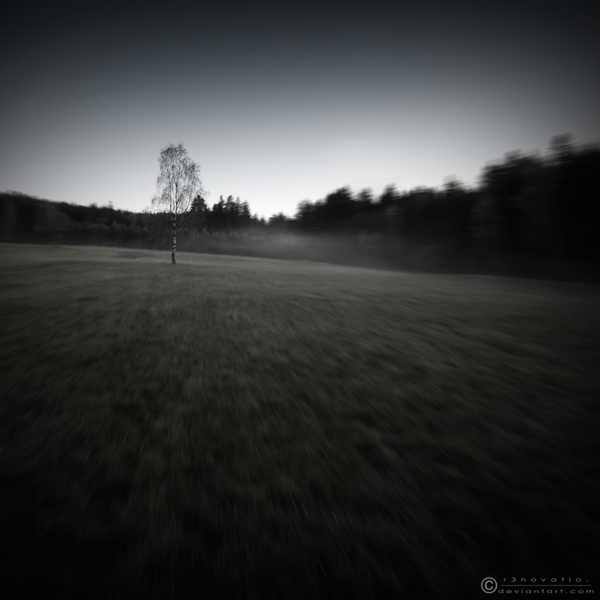
Below shows various examples of a vignette effect at varying intensities. How is your mood effects by each intensity?
As mentioned, the effect has been prominent in the world of Photography for some time. However, it is becoming an increasingly common trend in the world of Photoshop. Many designers are post processing their photos with a Vignette in Photoshop, integrating the effect into their graphic design compositions, and even into their website designs.
The effect draws the viewers eye to the center of the piece, so in this sense can be used to give your images more intensity, or give more impact to specifically central areas of your composition (or remove attention from details nearer the edge).
It’s important never to overdo a vignette effect, as this can look really fake and ruin the overall image. Try turning the visibility of your vignette on and off so that you can compare the final and original image. You don’t want to depart too much from the original but just give it a nice subtle design touch!
The image below shows how the details of the centrally positioned TV are accentuated by the vignette. The details of the background become faded, drawing the viewers attention to the centerpiece.

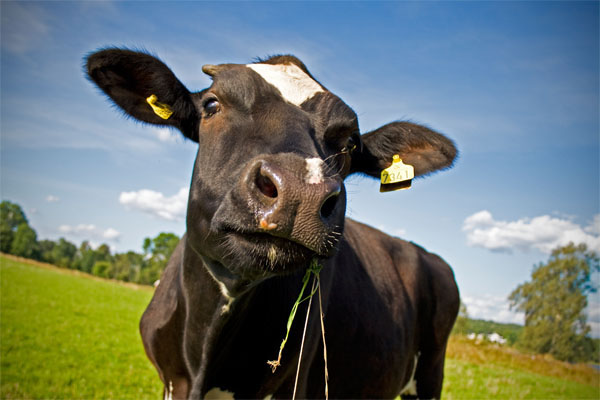
STEP 1:
Download this great image of a cow:
Paste it into your document.
STEP 2:
Create a new layer called ‘vignette’. Now select your elliptical marquee tool and in the options menu select a feather of around 50-100px. Create an oval shaped selection covering most of your canvas.
Then go to select>inverse to make your selection become all area OUTSIDE of your oval shape.
Fill this new selection with black. The feathered selection edge will mean that your edges of your oval shaped border will be blurred.

STEP 3:
And you’re done! Simply play around with the opacity of your ‘vignette’ layer until you have an intensity that you’re happy with.
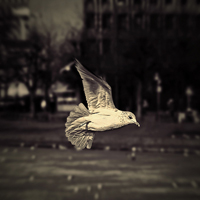
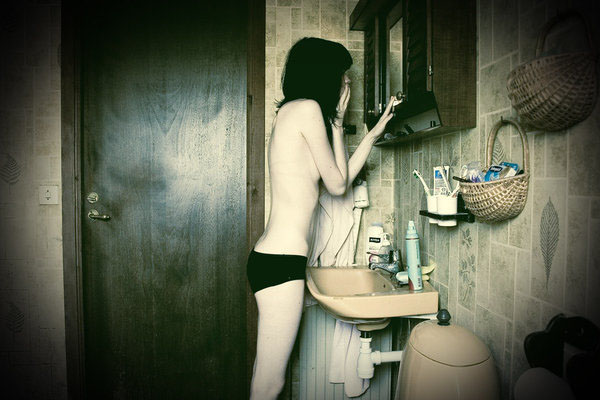
To help inspire you to use more vignettes in your work, we’ve compiled over 20 incredible examples of the vignette effect. Notice how many of these images utilize additional filters and effects in order to make the vignette even more effective. Vignettes seem to combine particularly well with sepia filters and grungy effects!


Tom is the founder of PSDFAN. He loves writing tutorials, learning more about design and interacting with the community. On a more interesting note he can also play guitar hero drunk with his teeth.


Do you know the basic tools in Photoshop but feel that your work is still looking average? Join our creative community at FanExtra and get the direction you need to take your work to the next level.


Very useful tutorial about vignette effect..examples are very beautiful…thanks for sharing…
Very useful tutorial with awesome photos. Thanks!
Really great tips – thanks!
Wayne
A really useful tutorial and some really great examples of the effect. Honestly I never knew what this effect was called but now I know and I’m sure I will find it very useful. Thanks for sharing.
Oliver: I wasn’t actually sure how many people would know about the effect, but it’s great to know that you’ve found this guide useful!
Great effect and great tutorial, i myself didn’t know what this effect was called too, I’ll keep this in mind and use this in future projects. Thanks Tom
Great post Tom, I have always loved this effect but I never knew what it was called! Nice examples! Thanks.
Very nice article about vignette effect and examples are very great.. A really useful tutorial and some really great examples of the effect..Thanks to advice…
very good way u providing info to people about the vignette effect….with photos it become more good……very nice blog….
Its really very nice and informative for new users. .
.
It helps me a lot.
I must say thanks