
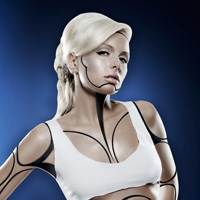
 Free FanExtra Tutorial: Create A Human/Robot Hybrid In Photoshop
 Create the Fiery, Dark Photo Manipulation ‘The Last Ride’
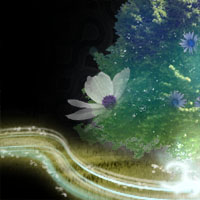 Create a Magical Image using Photo Manipulation
Have every post delivered to your inbox and get access to hundreds of useful design freebies.
Here is a preview of the image that we are going to be creating:

Create a new document (800X1000px). Ensure that your image resolution is set to 300 (pixels per inch) as this is better for printing.
Create a new layer called ‘background’ and fill your canvas with 2c2d53.

Paste in your nebula texture image into a new layer called ‘nebula’. Position this to cover the top of your canvas:

Change this layer’s blend mode to ‘overlay’ and reduce it’s opacity to 40%:

Then apply a hue/saturation adjustment layer to your nebula layer. Be sure to use a clipping mask on all of your adjustment layers unless otherwise specified, as this ensures that your adjustments only effect the underlying layer, not your entire canvas.
Hue/Saturation Adjustment Layer Settings:
Hue: 0
Saturation: -100
Lightness: 0

Create a new layer called ‘grid’.
Download the tron grid brush set from the resources section for this tutorial and apply several of the brushes across the top of your canvas using a white paintbrush:

Reduce this opacity of this layer to 6%:

Time to start adding some lighting!
Create a new layer called ‘highlights (white)’.
Use a large, soft white paintbrush to apply several spots of light over the areas of your background that you wish to highlight:

Change this layer’s blend mode to ‘overlay’:

Download the FanExtra Raylight Brush Set from the resources for this tutorial.
Create a new layer called ‘raylight neon’. Apply several of the brushes from the set using a cyan (04edf9) colored brush. Try to create a sort of light explosion:

Change this layer’s blend mode to ‘overlay’, and then duplicate it, to make the lighting effect more intense:

Create a new layer called ‘pink spots’.
Using a large, soft, pink (fb01a6) paintbrush, apply several spots of light over your canvas:

Change this layer’s blend mode to ‘color dodge’ and reduce it’s opacity to 15%:

Repeat step 6, this time adding some purple light spots on a new layer. The idea is to build up subtle layers of color:

Add some text to the top of your canvas.
Text Settings:
Font Face: Clutchee
Styling: Regular
Size: 30pt
Kerning: 0
Color: ffffff

You’ll notice that whilst this is a pretty cool font, the standard kerning between some letters can appear a little off. To fix this, go in and individually alter the kerning on letters that look wrong to you. You should aim to achieve something like the image below:

Now we want to warp our text.
Start by making the text a little smaller, and then rotate it slightly anti-clockwise.
Then go to edit>transform>warp.
From the warp drop down menu in your toolbar select ‘wave’ and leave the bend amount at the default: 50.0%.

Because you have not rasterized your text you can still edit it.
Select your text and change it’s color to 1f1b1b.

Apply an inner shadow blending option to this layer.
Inner Shadow Blending Option Settings:
Blend Mode: Overlay
Color: ffffff
Opacity: 75%
Angle: 120
Distance: 5px
Choke: 0%
Size: 5px


Now let’s create a 3D style drop shadow!
Duplicate your ‘CLUB ATTACK’ text layer, moving the duplicate beneath the original. Turn off all layer styles and blending options, and change the color of this duplicate text to 00fcff.
Now using your cursors, moving this text 1px down and 1px to the right:

Duplicate this new layer several more times, moving each duplicate 1px down and 1px right. After repeating this several times you should end up with something like the effect below:

In your layer’s palette select all of the duplicate layers that you’ve used to construct your 3D shadow effect.
Go to layer>merge layers.
This will merge all of the layers constructing your drop shadow into a single, editable layer.
Apply a color overlay and stroke blending option to this layer:
Color Overlay Blending Option Settings:
Blend Mode: Normal
Color: fd19a8
Opacity: 100%
Stroke Blending Option Settings:
Size: 4px
Position: Outside
Blend Mode: Normal
Opacity: 100%
Color: 000000


Open up the ‘casino lights’ image from the resources section for this tutorial.
Using your elliptical marquee selection tool, select the third bulb in from the left:

Copy and paste this light back into your original document, positioning it above your letters:

Resize the light to fit better with your letters, and then duplicate it many times, positioning the duplicate lights to fill the inner area of your letter ‘C’:

Repeat this technique, filling the rest of your letters for the word ‘CLUB’:

Select all of your light layers, and then merge them together into a single layer.
Apply an outer glow blending option to this merged layer to achieve a subtle glow effect:
Outer Glow Blending Option Settings:
Blend Mode: Normal
Opacity: 7%
Noise: 0%
Color: f0ecdb
Technique: Softer
Spread: 0%
Size: 16px


Create a new layer called ‘bottom area’.
Select the bottom 450px of your canvas, and fill it with 101010.

Create a 50px high pink (ff00a8) bar at the top of your dark bottom area:

Apply an inner shadow blending option to this layer:
Inner Shadow Blending Option Settings:
Blend Mode: Multiply
Color: 000000
Opacity: 25%
Angle: 120
Distance: 5px
Choke: 0%
Size: 5px


Apply some text over your pink bar:
Pink Bar Text Settings:
Font Face: Aller
Styling: Regular
Size: 6pt
Kerning: -50
Color: ffffff and 171717

In your layer’s palette select your dark bottom area by option+clicking on this layer.
With your selection active, create a new layer above this dark area, but a beneath your pink bar. Call this layer ‘highlight text area’.
Drag out a white to transparent radial gradient from the top center of this area:

Reduce this layer’s opacity to 15%:

Create a new layer called ‘grid’.
Using a white paintbrush apply another one of your Tron grid brushes, this time over your dark bottom area:

Reduce this layer’s opacity to 3% to make the effect really subtle:

Apply some further text to your dark bottom area, using aller as your main font.
I also added in the FanExtra logo where you would put your sponsor’s logos:

Download the FanExtra Simple Dividers set from the resources for this tutorial.
Select the 11th divider in the set, and paste this into your original document, using it to define your text areas:

Now reduce the opacity of your divider layers to 11% to make them more subtle:
You can view the final outcome below. I hope that you enjoyed this tutorial and would love to hear your feedback on the techniques and outcome.

Tom is the founder of PSDFAN. He loves writing tutorials, learning more about design and interacting with the community. On a more interesting note he can also play guitar hero drunk with his teeth.


Do you know the basic tools in Photoshop but feel that your work is still looking average? Join our creative community at FanExtra and get the direction you need to take your work to the next level.


It looks really nice, maybe you should have add some light effects over the text to look even better
Thanks John. That’s a great suggestion actually, I certainly think further lighting effects could help this piece. Maybe something I’ll consider for an upcoming text effort tutorial inspired by this piece .
.
Good for web designers, nicely explaines tutorial..thanks for sharing
Thanks Tom for sharing this wonderful tut I just changed my training from juridical to graphic designer, so this helps out alot if I go on internship!
Thanks for the tutorial, it help me a lot. i am a dj with no photoshop skills but i was able to do this.
Thanks a lot for the tutorial…It’s very easy to follow.
I think this is one of the first tutorials I’ve ever used without a problem. Thumbs up!