 Premium Texture Set: Sunless
 Artist Breakdown #2. Am I Collective: Verstikland (Source File Available)
 Members Area Tutorial: Create a Beautiful Snow Queen Photo Manipulation
Have every post delivered to your inbox and get access to hundreds of useful design freebies.
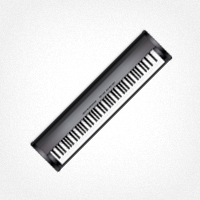
Hi there. In the following tutorial you will learn how to create a detailed electronic keyboard in Adobe Photoshop using advanced drawing tools.
As always, this is the final image that we’ll be creating:

Open Photoshop and hit Control + N to create a new document. Enter all the data shown in the following image and click OK. Enable the Grid (View > Show > Grid) and the Snap to Grid (View > Snap To > Grid). For the moment you need a grid every 10px. Go to Edit > Preferences > Guides, Grid & Slices and focus on the Grid section. Enter 10 in the "Gridline Every" box and 1 in the "Subdivisions" box. Also, set the color of the grid at #696969. Once you set all these properties click OK. Don’t get discouraged by all that grid. It will ease your work later. You should also open the Info panel (Window > Info) for a live preview with the size and position of your shapes.

Set the foreground color at black, pick the Rectangle Tool and create a 210 by 830px vector shape. Change the foreground color to green, create a 40 by 830px vector shape and place it as shown in the first image. Again, change the foreground color to yellow, create a 60 by 830px vector shape and place it as shown in the second image. One last time, change the foreground color to blue, create a 10 by 830px vector shape and place it as shown in the second image.

Move to the Layers panel and double click on the green vector shape to open the Layer Style window. Activate the Gradient Overlay and enter the properties shown in the following image. Keep focusing on the Layers panel, make sure that the green vector shape is still selected and duplicate it (Control + J). First, right click on this copy and click on Clear Layer Style. Next, lower its Fill to 0% and open the Layer Style window. Activate the Pattern Overlay section and enter the properties shown in the following image.

Gradient Overlay Blending Options Settings
Blend Mode: Normal
Opacity: 100%
Style: Linear
Angle: 0 degrees
Scale: 100%

Pattern Overlay Blending Options Settings
Blend Mode: Normal
Opacity: 100%
Scale: 100%

Focus on the Layers panel, right click on the vector shape with the Pattern Overlay and click on Convert to Smart Object. Select this new smart object, lower its Fill to 30% and open the Layer Style window. Activate the Drop Shadow and enter the properties shown in the following image.

Drop Shadow Blending Options Settings
Blend Mode: Overlay
Opacity: 50%
Angle: 180 degrees
Distance: 1px
Spread: 0px
Size: 0px

Move to the yellow vector shape. Open the Layers Style window for this shape and enter the properties shown in the first two images. Duplicate your yellow vector shape (Control + J). Select this copy, Clear Layer Style and lower its opacity to 0%. Open the Layer Style window for this copy and enter the properties shown in the final image. The yellow zero from the Gradient Editor panel stands for opacity.


I spend most of my time working in Adobe Illustrator and I have my own website that focuses on this program. So far, I published over 150 tutorials on my websites and on other vector-related websites. You can see them all on VForVectors


Do you know the basic tools in Photoshop but feel that your work is still looking average? Join our creative community at FanExtra and get the direction you need to take your work to the next level.


Impressive..
Thanks! There are a ton of drawing techniques I hadn’t known about before in this tutorial, so I hope you enjoy it .
.