
 Create a Poster Celebrating the Passing of Spring
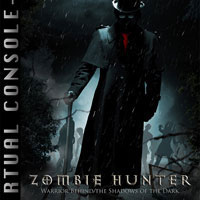 Members Area Tutorial: Creating a Zombie Video Game Cover
 Give a Car Photo Super Slick Lighting Effects
Have every post delivered to your inbox and get access to hundreds of useful design freebies.
In today’s tutorial you’ll learn how to create a dark, ominous scene featuring a fantasy devil woman. This is a fairly advanced tutorial with lots of details, but I’ve broken down the entire process for you so that you can follow along.
You’ll learn advanced masking, digital painting tricks, non-destructive workflow, coloring, blending tips and much more.
Let’s get started shall we?
Here’s a look at the outcome you’ll be able to produce by the end of this lesson:

And here’s a close up of some of the cool detailing:

Create a new document with size of 1300x900px and fill it with white. Open the ‘background’ stock.
Use the Move Tool (V) to drag it into your white canvas, and use Cmd/Ctrl+T to resize and rotate it:

We’ll darken the background and turn it into a night scene with an adjustment layer with a Clipping Mask. On your background layer, go to New Layer > New Adjustment Layer > Curves:

On the Curves layer mask use soft black brush with very low opacity and flow (about 10-15%) to reduce dark intensity on some parts of the
background.
You can see how I used it on the mask and the result on your picture.

I add another Curves layer to increase the darkness. On this Curves layer mask I remove and reduce darkness with soft brush, with varying opacities:


I want to remove the window behind the background so I make a new layer, and use the Retangular Marquee Tool (M) to make a selection in this area. Right click it, choose ‘Transform Selection’ and rotate it as shown below:


Go to Edit-Fill (Shift+F5) and fill it with black:

I name this layer “black fill 1″.
Add a layer mask to this layer. Use a soft black brush to blend some hard edges with the background:

Do the same method with the hole on the top of the background:

Create a new layer on the top. Use a soft brush with red color (I choose #ff0000) to paint on the window area that was filled with black
then lower the opacity to 60%:

I name this layer “red light 1″.
Make a new layer under ‘red light 1′ one. Use the same red brush color with opacity from 50-100% to paint over the parts illuminated from the red light. I change the mode of this layer to ‘Color’, at 100% opacity:

Create a new layer above ‘red light 1′. Use the same brush to paint on the columns and the ground to make the light effect stronger. Change
the blend mode to ‘Soft Light’, at 100% opacity.

Extract the model using your preferred method. Place her at the center of the ground:

Add a layer mask to your mode. Use a hard black brush to remove the lower parts of model’s dress and some small parts and details on her right shoulder and arms.

I want to add some red to the model. Double click your model layer, choose Blending Options:


Make some adjustment layers with Clipping Mask to change the lightness and contrast on the model.
Curves 1 and 2:

On Curves 2 layer mask I use soft black brush to erase the model’s face, hair and a small part of the hand as I don’t want them too dark:

I use Photo Filter and Color Balance adjustment layers to add more red light to the model:

On the Photo Filter and Color Balance layer masks I use a soft black brush to reduce red on the model’s skin:

To add more light for the model’s contour, therefore isolating her more from the background, I make a new layer with Clipping Mask. Hold Cmd/Ctrl while clicking the model layer thumbnail layer to load her selection:

Go to Edit-Stroke and pick color #ff0000:

We have this result:

Go to Filter-Blur-Gassian Blur and set radius as 20 px:

Use a layer mask to remove and reduce red intensity on the model’s shoulders, arms and hair:

Now it’s time for the most interesting stages of the tutorial. Open the stock included dress. Isolate the dress part from the model.

Use the Polygonal Lasso Tool to choose a dress part and move it onto the left of model body and use the Warp Tool (Edit-Transform-Warp) to bend it like so:


Choose a larger dress part to place at the right of the model:


Use a layer mask to remove the unwanted parts shown below:

Keep this dress part selected, and press Cmd/Ctrl+J to duplicate it into a new layer. Use Cmd/Ctrl+T to rotate it :

Go to Filter-Liquify and choose Forward Warp Tool with the settings shown below:

Use this tool to tweak the dress part to get the form you like. Here is my result:

Move this dress part into our main image and place it near the foreground and warp it:

Use a layer mask to blend this part with the rest:

I use a Curves layer with Clipping Mask to darken this part a little:

I liquify another dress part and place it at the left of the dress:


Apply a layer mask to this one to remove unwanted part:

I use Curves to brighten this part a little then on the Curves layer mask use a soft black brush to erase the lower part:

I add more tails to the dress using the same method. I use Curves to darken or brighten if needed. This is a great non destructive way to adjustment light in specific parts of your image.


Continue adding more dress tails:

Now we’ll be creating the upper part of the dress. Choose another part from your stock and place it onto the right arm:


Apply a layer mask to this part:

Duplicate it and move the duplicated area to another arm, use layer mask to blend it with the dress. I use Curves to darken it a little:

Take another part from your dress stock an place it above the model, use the Warp Tool to make it fit her body:


Use a layer mask to remove unecessary parts:

I duplicate this layer, move it to the left and flip it horizontally (Edit-Transform-Flip Horizontal). I also use Curves to darken it a bit:

Add another part to complete the dress:


To edit all dress layers together, make all of them selected and hit Cmd/Ctrl+G to create a group. Change the mode of this group from Pass Through (default group mode) to Normal 100%. Create two adjustment layers within this group to darken the dress and add red to it:


Because the group mode has been changed to Normal 100% these adjustment layers will only affect the layers inside this group (your dress layers).

Add a mask to this group (as done with a normal layer). Use a hard black brush to paint on the right hand to reveal more details of it:

Right click on the dress group and choose Duplicate group. After duplicating, right click again and choose Merge Group. Right click the layer mask, choose Apply Layer Mask. Now we have selection of the dress that will be useful for next steps.

In this step we’ll make shadow for the dress on the ground. Make a new layer under the dress layers group. Use a soft black brush with 40% opacity to paint under the dress tails.

As you may see, the dress wrinkles still look clumpy and random. To fix it, I make a new layer on the top and active Smudge Tool with Strength about 70-80%. Open Brush menu, choose Reset Brushes. Choose Rough Round Bristle brush and load your dress selection using the method from Step 13 (dress copy layer shown in step 28) and start smudging along the dress to soften the details:


In this step I want to add more small details to the dress. Make a new layer on the top. Use the Pen Tool to draw some shapes on the edges of the dress tails. Press Cmd/Ctrl+Enter to turn them into selections, then fill them with color #450000:

I use Curves (Clipping Mask) to darken these details:

On Curves layer mask I use brush to reduce the dark effect on some parts below:

I name this layer “small details”.
I think some parts of the dress should be darker so I load the dress selection again, then hold Shift key to load more small details selection. On the top of the layers, go to Layer-New Adjustment Layer > Curves:

Use a soft black brush to reveal some details of the dress. Now on the layer mask of the Curves and on the picture the result should be:

Load the dress + small details selections again, press Cmd/Ctrl+Shift+N to make a new layer, change the mode to Overlay 100% and fill with 50% gray:

Use the Dodge and Burn Tool with Midtones Range, Exposure about 20-25% to create more details for wrinkles and model body. You can see how I applied this tool with Normal mode and result with Overlay mode. You may notice that I drew a belt for our model:

In this step we’re going to add light for the dress tails. Load the dress + small details selections and use a brush with color #8e0005 to paint along the dress’ contour. You can use a layer mask to refine the light details:

With same method I add more light for the sides of the dress with color #ff0000:

Make two new layers and change brush size to 1px. Choose Pen Pressure in Shape Dynamics options. Draw tiny strings for the dress tails to give a creepy effect. On the first layer I use color #610002 and the second with a brighter color (#8e0005):


Create a new layer and choose a soft 2px brush (color #ff0000) to draw spots on the dress tails to create “special eyes” for each of them:

Apply an Outer Glow for these eyes to make them more prominent:


Extract the horns stock image and place them above the model’s head, using a layer mask to blend them:

Make a layer group for the horns as done with dress. I use Hue/Saturation, Color Balance and Curves to darken and add red tone to the horns:


Make a new layer within this group. Load the horn selection and use soft brush with color #ff0000, opacity and flow about 40-45% to add light to the horns:

Load the horn selections again and make a new layer with same settings like in Step 34. Use the Burn Tool to darken some parts of the horns:

I make 6 new layers on the top and change my brush to the crack ones from the resources section for this tutorial, using color #ff0000. Draw some cracks on the horns, use Cmd/Ctrl+T to transform if needed and hide unnecessary details with a layer mask:

Make a new layer on the top and use a brush with color #ff0000 to paint inside the model’s eyes and change the mode to Overlay 100%. Use a layer mask to reduce the lightness on the left eye:

Make a new layer with same settings in step 34. Use the Dodge and Burn Tool to add more sharpness to the eyes:

To add some glowing light on the model’s face, I make a new layer and use a soft brush with color #ff0000. Paint around the model’s eyes and change the mode to Soft Light 100%:

Make a Hue/Saturation layer on the top to increase overall saturation a little:


Final step: Hit Cmd/Ctrl+Alt/Option+Shift+E to merge all visible layers. Go to Filter-Sharpen-Unsharp Mask:

Add layer mask and erase the horns as I don’t want them too sharp:

Awesome job making it this far! You should be proud of what you’ve created. Show it off to your friends and colleagues and get some feedback.
You can also comment here with your version, or any questions you had about the techniques used. We love to see what you guys create and we’re always here to give helpful feedback and tips to help you to improve.
The source files for this tutorial are available to our FanExtra members community. If you want to access the source files for this tutorial (and all of our tutorials + thousands of other resources) then sign up here.
If you’re already a FanExtra member then you can login here to access the source files.

Thank you for reading this tutorial, I hope that you enjoyed it. If you want to view my other arts and tutorials you can look at my Deviantart page or follow me on Facebook.


Do you know the basic tools in Photoshop but feel that your work is still looking average? Join our creative community at FanExtra and get the direction you need to take your work to the next level.


You’re amazing. Thank you so much!