 Showcase Your Work With Unique Style
 Members Area Tutorial: Construct a Realistic Old Time Scene With Advanced Image Blending
 Create a Simple, Stylish Custom Youtube Background
Have every post delivered to your inbox and get access to hundreds of useful design freebies.
In this tutorial we will create a dark surreal landscape featuring a stony face.
Learn and get inspired on how to make uses of simple stock images to be creatively manipulated into atmospheric surreal scene using Photoshop.
Follow through the steps in this tutorial to learn how to set mood to the scene, add lightning and sharpen your image correctly.
Let’s get started!
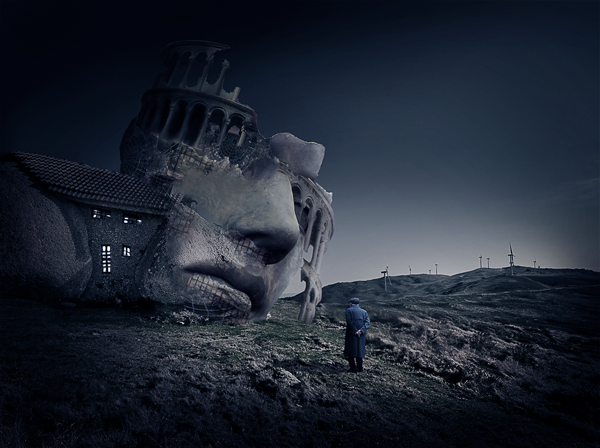
As always, this is the final image that we’ll be creating:
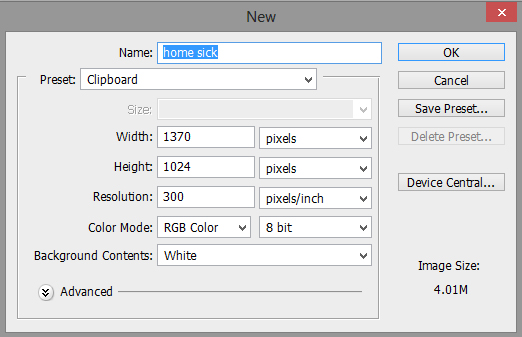
Firstly, create a new document (Ctrl+N) with size of 1370 pixel wide and 1024 pixel high .
Open the stone house image in the document. Take free transform tool (Ctrl+T) and scale the size of the image accordingly. Place it where needed. Please take a look at the screenshot for our inspiration

There is a space on the top of the canvas, we need to cover it. To do this purpose, firstly take rectangular marquee tool and make selection on the upper part of the stone house image. Hit ctrl + T to duplicate the selection into a new layer. Move the new layer to top of the canvas to cover the blank.

Click one of the dragging point, hold and drag down a bit. Finally, mask the lower part of the layer to make it well blended with the stone house image.

Now open the web image in a different document. We need this image as a reference or source to which the colors of the other images will be matched.
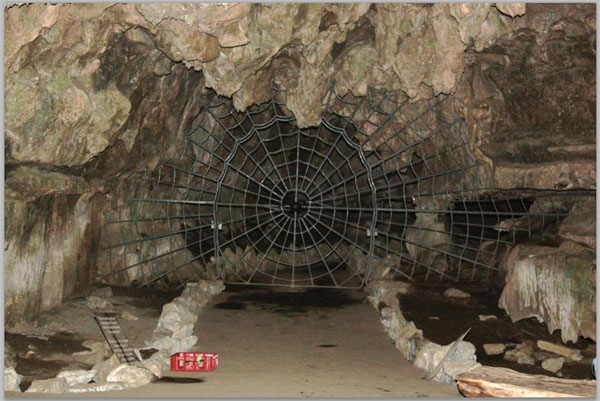
Now go back to the main document ( I named this file home sick). Firstly, we will adjust the color of the stone house image based on the web image. Select the stone house image and then go to image > Adjustment > color match. Choose the web image as the source to match. The screenshot below will show us the complete setting of the adjustment. Here is the explaination: The target of the layer to be matched is named stone house which is within the psd file named home sick and source is the image (named web.jpg) with which the layer stone house will be matched:

We need to eliminate the rock seen in the stone house image. To do this purpose, take clone tool in the tool panel and clone the rock.
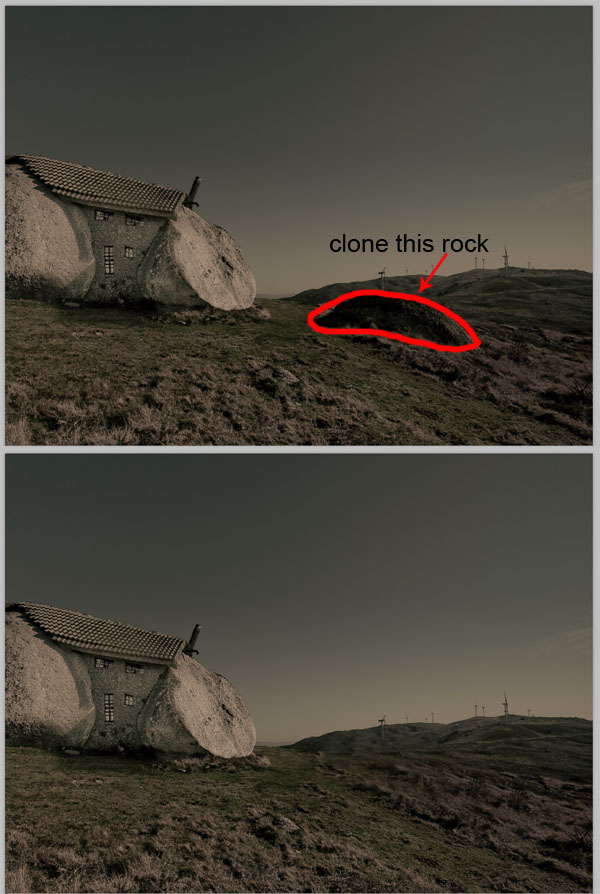
This is how the clone tool works: activate the clone stamp tool (S). Click and hold the alt key on the keyboard, and place the mouse pointer on the area to determine a source point. Click the source point and then click the areas of the rock to be cloned:

Do the same way to keep cloning the rock until it is covered. Use the nearest areas as the samples or sources to be cloned on the rock. Here is the result I created:

Create a new layer (Shift+Ctrl+N) above the stone house image and activate the brush tool. Choose costume chalk brush at 3-5 pxl size set at 20-30% opacity and set the foreground color to #5b5144. Now paint a line to define a border between the mountainous areas:

In this step we will add a stone face to the scene. Open the face image and, with pen tool, extract the face from its background .
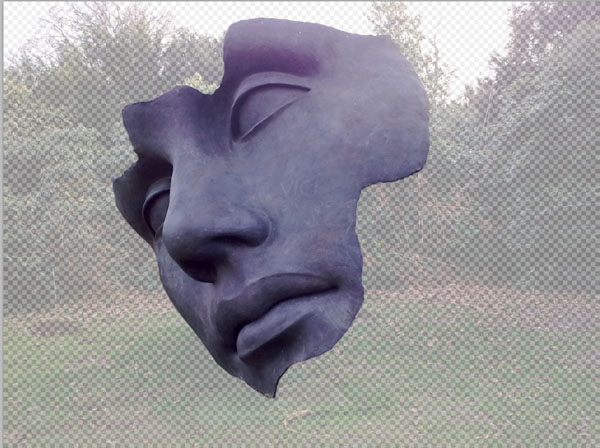
Now add the face to the scene. Make sure to scale its size and position it where needed.

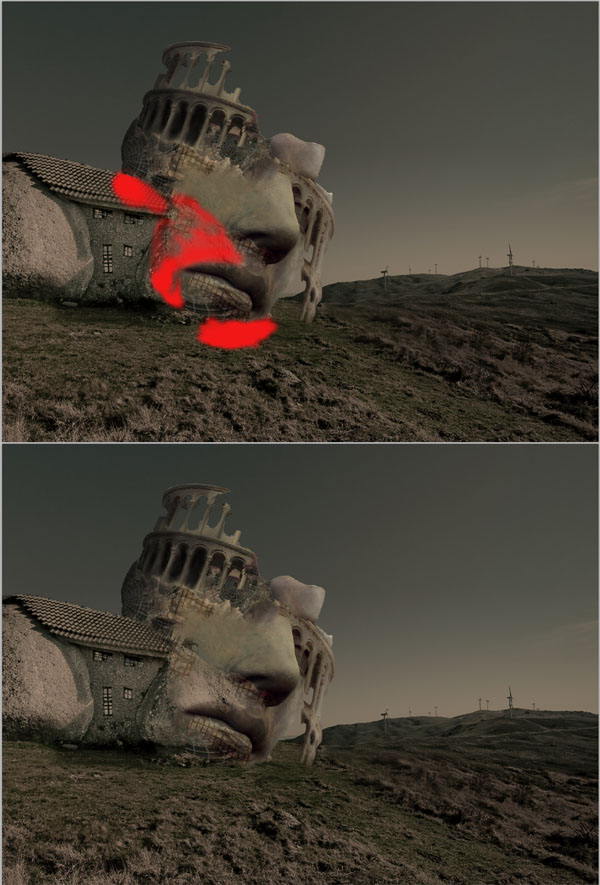
As in previous step 3, match the color of the face according to the web image. Finally, after matching the color, take dodge tool and set the tool as shown in the screenshot. Give highlight to some areas on the face as pointed in red arrows:

Next, add the web image to the scene. Place it above the face layer. With free transform tool, scale its size and locate it on the one of the eye. Mask unneeded part of the image to get the result as in the screenshot below.

Add more web at the back of the head:

Add the decals png to the scene and set it to soft light blending at 100% opacity.

Duplicate (Ctrl+J) the decals png and place the duplicate to the other part of the face. Scale its size and locate it where desired:

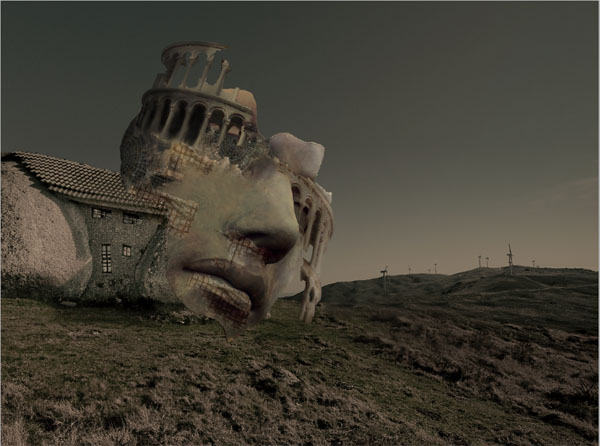
Now we will add more building to the face. We will use the tower image to fulfill this purpose. Cut out part of the tower, and then, adjust the color of it as that of the web color. Arrange it to the position as the one I created.

Add more building on the area around the left eye.
Finally, all images (layers) used to make up the face and group them. Give this face group a layer mask and mask on the areas around the nose ( marked in red)
Create a new layer (shift+Ctrl+N) below the face group layer. Take a very soft round brush with opacity of 15% and paint white color on the ground of the stone house image. Then, set this layer to overlay at 100% opacity.
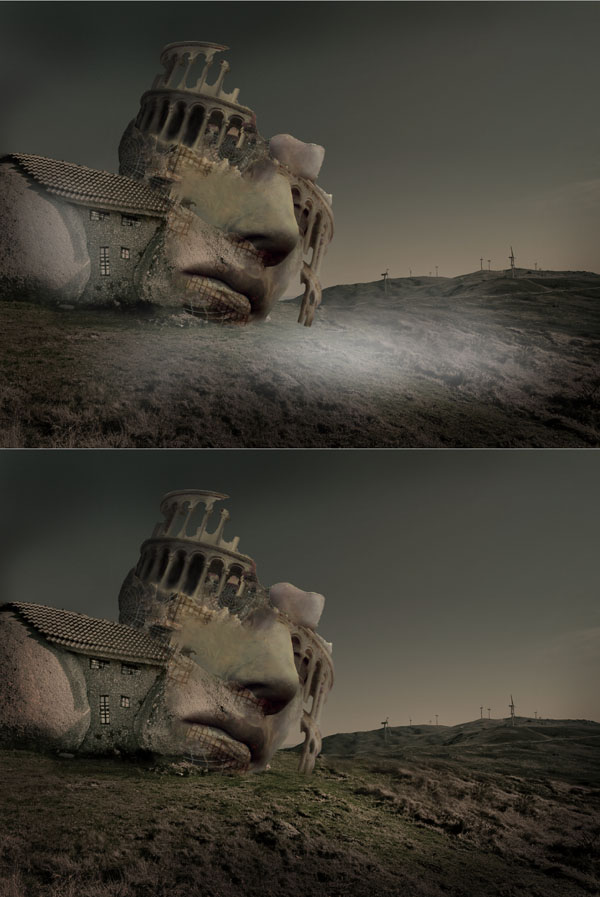
Create another new layer above the group face layer. Take a very soft round brush at 10% opacity and paint some black color on the stone and the left areas of the face, set this layer to overlay at 40% opacity.

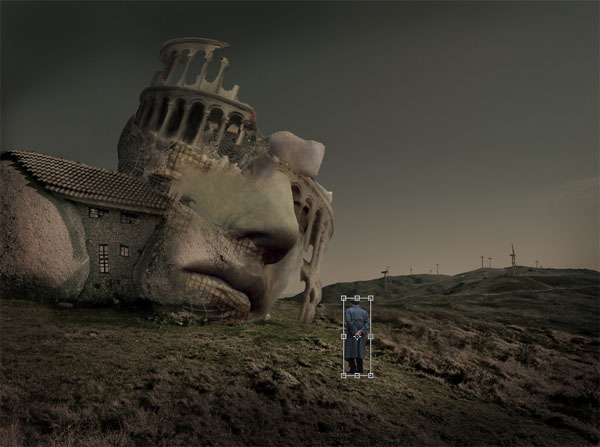
Now we will add a figure to the scene. Cut out the figure image.

Add the figure to the scene. Flip it horizontally and scale the size down. Position it in front of the face:
Create a new layer above the figure layer and give this new layer a clipping mask. Take again a very soft round brush and paint some black color on the figure.

Duplicate (Ctrl+J) the figure layer and fill this duplicate with black. Rotate the duplicate to the left and try to make it look like it is laid on the ground, finally set it blending to normal at 40% opacity. Now we have shadow for the figure.

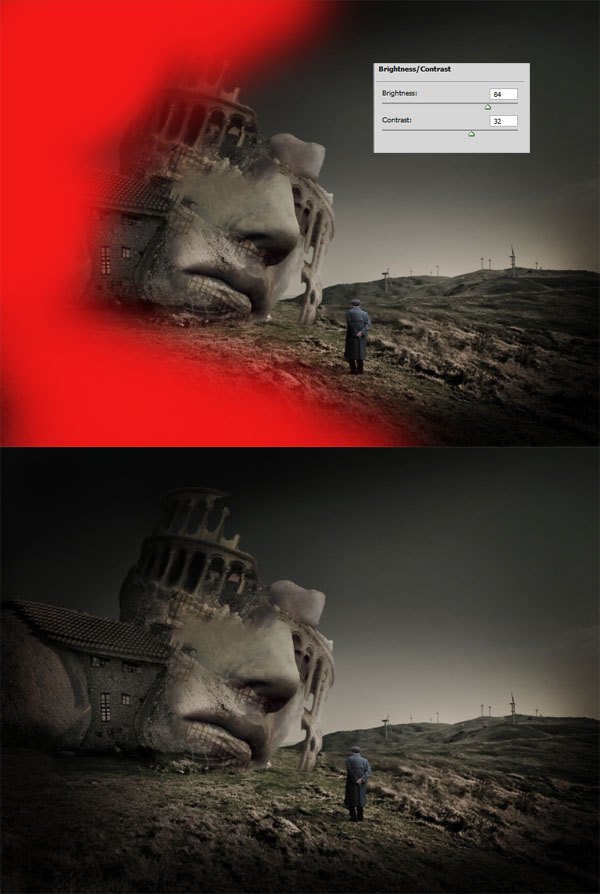
From this step on, we will add some color adjustments to the scene. Firstly, go to layer > new adjustment layers > brightness/contrast. Mask some part of this adjustment layer as shown in red highlight:

Next, give another adjustment layer: vibrance. Set this layer to normal at 55% opacity

Again, give another adjustment layer : curve. Mask some areas of this curve layer and set it to soft light at 80% opacity:

Another adjustment layer : brightness/contrast. Mask some areas of this curve layer and set it to normal at 50% opacity:
Finally, give the scene one more adjustment layer: color balance. Set this layer to normal at 50% opacity.

In this step, we will add some light on the windows of the stone house. Create a new layer above all the other layers. Fill (Shift+F5) this layer with black. Then set this layer’s blend mode to ‘screen’. Take a very soft round brush set to 4-8% opacity and paint some white color on the windows to give them some light:

Finally, stamp all layers by hitting Shift+Ctrl+Alt+E , then select the stamped layer and give it high pass filter by going to filter > others > high pass:
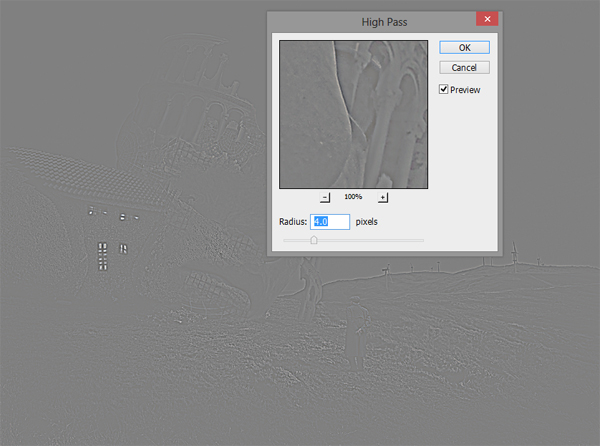
Set this stamped layer to overlay blending at 100% opacity. Here is the result:

You can view the final outcome below. I hope that you enjoyed this tutorial and would love to hear your feedback on the techniques and outcome.
The source files for this tutorial are available to our FanExtra members community. If you want to access the source files for this tutorial (and all of our tutorials + thousands of other resources) then sign up here.
If you’re already a FanExtra member then you can login here to access the source files.

I am a self-taught photoshop hobbyist from Bali, Indonesia. Photo manipulation is something I am keen on most and a music lover as well. Meet me here http://wprabu.blogspot.com/


Do you know the basic tools in Photoshop but feel that your work is still looking average? Join our creative community at FanExtra and get the direction you need to take your work to the next level.


Very cool tutorial Dek! I really like the compositing and the color matching technique is something I have never used before in Photoshop. Always something new to be learned! Thank you for sharing
Thanks Eric…..
it’s just a simple and handy basic technique.
I wasn’t actually aware of it either though. Really quick but useful technique.
thanks
fantastic tutorial but i didn’t understand what in step 9 .. please help me out
Thanks so much for this tutorial, I really liked it
This is my version
http://silvialorica.tumblr.com/post/67844608034/the-man-who-looking-the-surreal-ruins-photo
enjoy it
It’s awesome.
I really like it.
Thanks you very much to shear it with us.