
 Design an Old-Style Safari Map
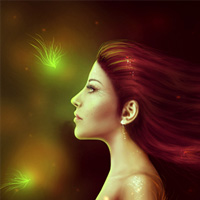 How to Paint a Fantasy Woman Portrait with Photoshop
 Quick Tip: Learn How To Create a Vintage Photo Effect in Photoshop
Have every post delivered to your inbox and get access to hundreds of useful design freebies.
As always, this is the final image that we’ll be creating:

Open up a new document (600X600px) and then start by pasting in one of the incredible textures from our recent texture set:
Premium Texture Set Broken & Beat

Now go to edit>transform>distort and distort your text to look like the shape below:

Then in your layers palette option+click on your texture layer to select your distorted texture’s shape. With your selection in place create a new layer called ‘radial gradient 1′ and fill your selection with a black-white radial gradient. Then change this layer’s blend mode to ‘soft light’.


Now repeat this step, adding in two more textures (each with it’s own radial gradient), until you have covered your entire canvas.

Open your adjustments panel and add a black/white adjustment layer. This should apply to all layers beneath it (your texture and gradient layers) – turning them grayscale.

Create a new layer above your adjustment layer called ‘shadows and highlights’. Use a large brush (around 200px), 0% hardness and 80% opacity to paint in areas of white around the edges of your texture shapes, and then paint black in the center.
Then reduce the opacity of this layer to 20% and change its blend mode to ‘hard light’.


Now open up your adjustments panel again and apply a gradient overlay layer. You should choose on of the preset gradients (see gradient used below).
Then change this layer’s blend mode to ‘overlay’ and it’s opacity to 20%.


Create a new top layer called ‘lines’. Use your line shape tool (1px, white) to draw 3 lines following the edges of your textured shapes. Each line your create will need to be rasterized, and then merge your three line layers together.

Reduce your ‘lines’ layer’s opacity to 30%.
Then go to layer>apply layer mask>reveal all. Drag a black-white radial gradient out from the center of your canvas. This will use your mask to hide the central areas of your lines.

Create a new layer called ‘clouds’. Go to filter>render>clouds. Then create a layer mask, and use your radial gradient tool to reveal the center of the document through the clouds.
Then reduce the opacity of your clouds layer to 15% and change it’s blend mode to ‘hard light’.


Cut and paste this photo of an arm into your document:

Go to edit>transform>warp and warp your arm so that it fits better with your composition.
Also I find it helps to go to filter>sharpen>sharpen just to clean up your image after warping it:

Now we need to match the colors and tones of our arm better with our textured background.
I apply 3 adjustment layers (hue/saturation, color balance, and levels). You can see the settings for all of these below. Then, very importantly I option+click on my arm layer in the layers palette. With my arm selected I go to select>inverse, and then select each of my adjustment layers mask options and fill my selection with black. This is an easy way to make sure that adjustment layers only apply to one part of your image:


Now download this great photo of some ripped paper:
Resize and distort your paper until it fits nicely like it’s part of your textured surface:

Now use your erase brush to erase away the edges of your ripped paper, blending them smoothly into your textured background:

Now your want to open up your adjustments panel and apply various adjustment layers to make your ripped paper layer blend better with your overall composition.
I won’t go through the exact adjustments to use, as they can vary based on your general composition. However, I played around with hue/saturation, color balance and levels to get the desired effect.
Very importantly – remember to use the masking technique used on your arm layer. Option+click on your ripped paper level, inverse your selection and then fill your new selected area with black for each one of your adjustment layers masks (refer to the previous steps if you need this clarifying).
The outcome can be seen below:

Now you want to make it look like your arm is emerging from the rip in the wall. To do this, simply start erasing the part of your arm overlapping the rip.
Because of your adjustment layers being masked around the shape of the arm, even after you’ve erased your arm the erased area should appear darker:

Now use your dodge and burn brushes on both your arm layer, and ripped paper layers. The aim is to not only accentuate the shadows and highlights of your layers, but to make the arm realistically blend into the ripped hole in the wall. To do this, burn the inside area of your ripped hole, a LOT. You want it near black, so that your arm appears to be emerging from the shadows:

Now duplicate your ripped paper layer and move it to the floor of your textured room:

Now cut out and paste in this image of an arm:

Now use your warp tool to warp your arm into a better position:

Now repeat the previous steps used to blend your other arm. I won’t go over these again, but remember to work with adjustment layers (making sure to mask them properly) and just adjustment your levels, saturation and color balance settings until it looks good!
Then repeat the dodge/burn steps and blend your arm into the ripped area of floor:

Now you want to create some shadows cast by your arm. Create a new layer called ‘shadow’ and use a soft, black paintbrush to paint in shadows from your arms:
I used my brush to paint shadows cast on the first arm by the second, and then going across the floor and walls:

Create a new top layer called ‘clouds final’. Render some clouds, and then change the layer blend mode to ‘hard light’ and the opacity to 20%.
Go to layer>layer mask>reveal all. Then with your mask selected, drag a black-white radial gradient out from the center of your canvas:


To finish, add any further adjustment layers you want. I added a final color adjustment layer, adding a bit of a red and blue tint to the overall composition:

Tom is the founder of PSDFAN. He loves writing tutorials, learning more about design and interacting with the community. On a more interesting note he can also play guitar hero drunk with his teeth.


Do you know the basic tools in Photoshop but feel that your work is still looking average? Join our creative community at FanExtra and get the direction you need to take your work to the next level.


Another great tutorial your a experienced photoshop user, and make it simple for your us visitors to follow your simple steps. Cheers
that is wonderful
Great tutorial Tom and very easy to follow. I really like the overall effect of this manipulation and I’m going to give it a go myself. Thanks for this.
Thanks so much guys! I appreciate your support
Incredibly detailed and helpful tutorial.
Great technique – quick easy and super effective, thanks…
Awesome tutorial, really great finished piece and easy to follow!
Thanks.
thanks you very much
its a Brilliant works & good effect
Massive, abstract effect I like it a lot.
I haven’t had the chance to use Photoshop CS5 yet, but I’d imagine the new puppet warp feature would help with the arm work. I’m looking forward to playing around with it.
thank for share
Just been through this step by step, wow, thanks for the share!