 Photo Manipulate an Angel Rising From Hell Scene
 Members Area Tutorial: Design a Rocking Grungy Band Website
 Photo Manipulate a Mysterious Ghost Ship in Photoshop
Have every post delivered to your inbox and get access to hundreds of useful design freebies.
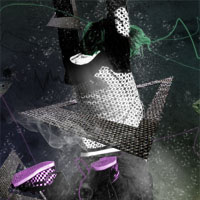
This is the final image that we’ll be creating:

The following images were used in making this tutorial:
http://www.sxc.hu/photo/1095865
http://www.sxc.hu/photo/1166314
http://www.sxc.hu/photo/1139999
http://www.sxc.hu/photo/1140000
http://www.sxc.hu/photo/1139998
http://www.sxc.hu/photo/1104885
http://www.sxc.hu/photo/1104884
http://www.sxc.hu/photo/957019
http://www.sxc.hu/photo/957020
http://www.sxc.hu/photo/957016
http://www.sxc.hu/photo/1161709
http://www.sxc.hu/photo/1080080
http://www.sxc.hu/photo/1073897
http://www.sxc.hu/photo/1156891
http://www.sxc.hu/photo/1145070
http://www.sxc.hu/photo/1119039
Create a new document (600X800px) and go to filter>render>clouds.

Now go to image>adjustments>brightness/contrast and reduce your brightness to -100 and your contrast to -80.

Now paste in a photo of some old paper or parchment. Make sure that your texture fills your entire canvas, and then go to image>adjustments>desaturate. Reduce this layer’s opacity to around 30% to let the patterns of your clouds layer show through. Finally, set your parchment layer’s blend mode to ‘hard light’ in order to bring out the details of the texture.

Now create a new layer called ‘color spots’, and use a large paintbrush (0% hardness) and paint in huge spots of color all over your canvas. I went with greens, blues, and purples to compliment each other.
Then reduce this layer’s opacity to 50%, and set the layer’s blend mode to ‘overlay’.


Now paste in a photo of your jumping woman. I cut out the woman from her original background using the lasso tool, but you can use whatever selection method you like. Don’t worry too much about cutting out her hair perfectly for now.
Call this layer ‘jumping woman’.

Now duplicate your jumping woman layer and hide the original. This is so that if anything goes wrong we can retain the original image. Select your duplicate layer and go to image>adjustments>desaturate to grayscale it.

Now we want to make our woman layer more intense. To do this go to image>adjustments>levels and input the settings shown below.

Now create a new layer called ‘hair color’. Grab a small, soft, bright green paintbrush and paint over your woman’s hair. It doesn’t matter if you overlap into your main background, but try not to overlap the woman’s arms.
Next, option click on your ‘jumping woman’ layer in your layers palette. This will select the shape of your woman. Then, return to your ‘hair color’ layer and go to layer>add layer mask>reveal selection. This will hide any parts of your green paintbrush marks that overlap into your main background, making the color fit nicely to your woman’s hair.
Next change your ‘hair color’ layer’s blend mode to ‘overlay’ and reduce it’s opacity to 50%.


Repeat this same technique, this time turning your shoe’s pink.

Now, paste in an image of some splashing water on a black background. Change this layer’s blend mode to ‘screen’ and the black background will vanish, giving the impression of the water splashing over your woman.
Use a soft eraser brush just to tidy up the effect a little.


Now repeat this exact same technique with several more water splashes. It may be a good idea to desaturate your water images so that they don’t distract too much from your main image.

Create a new layer called ‘triangle’. Use your lasso tool to draw out a perfect triangle. To do this, hold shift, to draw your selection lines at either 45 or 90 degrees. One you’ve drawn out your triangle selection, fill it with light gray. Then go to select>modify>contract and contract your selection by 40px. Then hit delete.

Open a metal texture photo in a new document, and resize it to be 600px wide. Then go to edit>define pattern and define your pattern as ‘metal texture’.

Now return to your original document. Go to the blending options for your triangle layer and apply a pattern overlay, using your newly created ‘metal texture’ pattern.


Now create a new layer beneath your triangle layer called ‘metal triangle’. Merge your triangle layer down with this layer. This will allow you to modify your triangle shape, as your pattern overlay effect will now be part of your object, rather than a consistent overlay effect.
Now go to edit>transform>distort and distort your triangle until it looks like the image below:

Use your lasso tool to cut away part of the triangle so that it appears to be going behind the woman.

Now go to image>adjustments>levels and apply the settings shown below:

Now go to the blending options for your triangle layer and apply a dark gray drop shadow (settings below):


Now duplicate your triangle layer and fit it over one of the woman’s shoes, and over one of her arms. You’ll need to rotate/resize these duplicate triangles to ensure that the gap (the bit going behind your woman) lines up correctly. If needed you can tidy up this part using the lasso tool.

Now download this awesome bubbles brush set. Go to the brush settings and apply the shape dynamics and scattering settings shown below.
Then paint in bubbles over your piece. The bubbles were looking a little faint, even at 100% opacity, so I duplicated my bubbles layer and merged the two layers together. Then I reduced the opacity of this layer to 80%.


Now create a new top layer called ‘pen lines’. Select a very small paintbrush, and then use your eye dropper tool to select the colors of various parts of your image. Then simply draw out very rough lines from these areas of your woman. You can afford to be very messy, as we’re going for a sketchy look. However, try to maintain a sense of balance in your overall composition, and don’t overdo it. I reduced this layer’s opacity to 70% to make the effect slightly more subtle.

Now start pasting in photos of smoke, beneath your pen lines layer. Use the same technique that you used to blend your water (set your layer’s blend mode to screen). Use your eraser tool and play with layer opacity until your smoke looks right.

Now to finish off our piece I we need to add in some fish to our underwater scene. Paste in your first photo of a fish, and then go to image>adjustments>desaturate. We grayscale the fish photo so that we can then go in and add our own color. To add color go to image>adjustments>color balance and apply the settings shown below:
Then reduce your layer opacity to 60%, and go to image>adjustments>brightness/contrast and reduce your brightness to -35.


Now add in a couple more fish, and then use your bubbles brush to apply some smaller bubbles coming out of the fish’s mouths.

Now download this great School of Fish brush set from PSDTUTS. Create a new layer beneath your ‘jumping woman’ layer called ‘School of Fish’. Then paint in your schools of fish using a black paintbrush. Finally, reduce this layer’s opacity to around 30% in order to make the fish seem far away in the water.

Finally, paste a larger photo of a fish into the bottom right of your canvas. Then go to filter>blur>gaussian blur and apply a 2.5 strength gaussian blur. This should give the impression of a fish being closer to you than the rest.

Then give your big fish some bubbles coming from his mouth, and be sure to apply a gaussian blur to the bubbles also.
I really hope that you enjoyed this tutorial and as always would really appreciate your comments.

Tom is the founder of PSDFAN. He loves writing tutorials, learning more about design and interacting with the community. On a more interesting note he can also play guitar hero drunk with his teeth.


Do you know the basic tools in Photoshop but feel that your work is still looking average? Join our creative community at FanExtra and get the direction you need to take your work to the next level.


Whoah – Pretty weird, but also pretty good! Yet another well explained tutoral, great job. Truely unique!
Yeah by abstract I really meant no rhyme or reason behind it! I do miss doing these more abstract bits of art though, so who knows, there may be more tuts like this to come… I’m glad you enjoyed it anyhow
Too black for me. How Marco said unique style.
Very nice! Little wierd, but that’s the nice thing about it
Nicely done!
amazing!!
Thx a lot
I don’t know where you came up with the idea for this but I love the final result.
I don;t think it looks as ‘underwater’ as you’d like – the only thing that makes it look underwater is the fish and the bubbles. In it’s own right it’s a great piece of abstract digital art, so thanks!
Thanks for the kind words guys!
LOVE this one.
…If only you provided us with the psd files for free
Gotta keep up with the costs I’m afraid. Remember, you can get access to all .psds for $4.95 though, which seems reasonable to me .
.
Very Nice! Thanks for this tutorial, I linked your blog
Thanks a lot xea, I’m glad you enjoyed it!
Wow very good tutorial…
[...] Create an Abstract Underwater Scene – Create an awesome abstract underwater scene using photo manipulation techniques. Learn how to create a complex abstract composition. [...]
UNique post … reeally amazing. Can you post something freezing in snow or something …
Thanks for the awesome tutorial! I used to live in FL and did a lot of actual underwater photography and modeling and well – up in the north east – I only have about a two and a half month window for that work. Your tutorial took the depression out of that situation for me – thanks so much! I’m a fan, I’ll be back!
Great job
i wanna try the tut, but some are the pics arent there .