Have every post delivered to your inbox and get access to hundreds of useful design freebies.
In this tutorial I will show you how to make a dark and conceptual photo manipulation. You will learn not only different techniques of manipulating, retouching, using brushes and filters but why they are used. I hope they will be useful for you and you can make beautiful pieces with your own creativity.
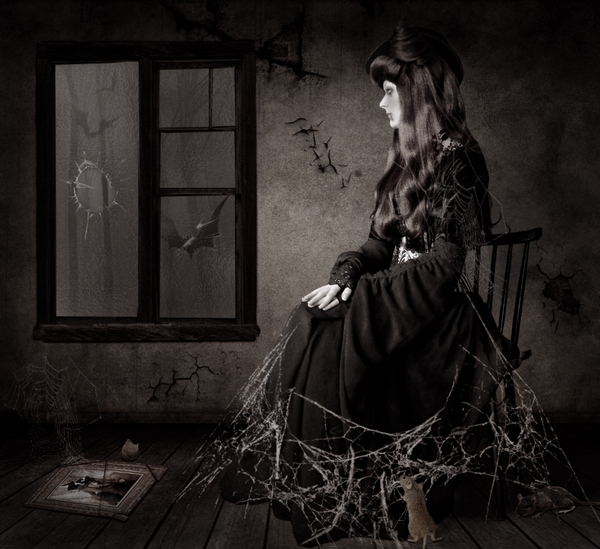
As always, this is the final image that we’ll be creating:

Open room stock. I want to narrow down the space to make focus on model, so i crop two sides of room and leave the middle:

Open window stock. I only cut the outside frame of it and move into our document, scale it to fit the room and place it into the left side:

To make color of it fit background, i use a new Hue/Saturation above window layer with Clipping Mask:

Down the lightness and saturation:


Create a new layer under window layer. Use black brush with hardness about 30% to paint around outside frame of window to make shadow for it:

You can see difference between before and after this step:

Name this layer as “window frame”.

Open window stock again, cut the top part of it , move into background and situate at the bottom of window frame:


Add a new Hue/Saturation layer( with Clipping Mask) to change its color:


Make a new layer under this layer, make shadow for it like in previous step:

Open forest stock. I only cut a part of it , place it under window layer, resize it to fit the size of window, name it “forest”:


Use Hue/Saturation layer with Clipping Mask to reduce the light and change color of forest part:


Now we will make broken glass window. First add a new layer on the top, set foreground to white, use shattered glass brushes, number 300 and 352 to paint on window as shown below:

Name it as “shattered glass brushes”.
Make a new layer between forest and shatterred glass brushes. Call it “glass window”:

Hold Cmd/Ctrl key also click the forest thumbnail layer to active its selection:

Set foreground and background to #939596 and #454449 then choose Filter-Render-Clouds:

Choose Filter-Distort-Glass with settings below:

We have result:

Hit Cmd/Ctrl+D to deselect it then click the icon at bottom of layer pallete to add layer mask. Then active forest selection again, use soft black brush with opacity and flow 100% to clear the part within the broken hole on left middle of window.
Then lower opacity and flow of brush to 40% then continue clearing all the rest of glass window:

Then add a Hue/Saturation layer with Clipping Mask for this layer:

You should get result like mine:

The truth is very simple. With the look from inside the room, the background shown in broken hole of glass window ( not hidden from glass layer) should be visible 100% and all the rest should be less visible .
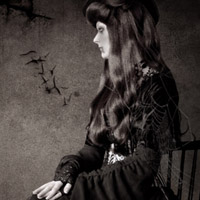
After downloading model pack, i choose this one to isolate and move into room background, place her at the right side:

Model looks so saturated against the background so i use adjustment layers( of course with Clipping Mask) to change color of her.
Selective Color 1:

Hue/Saturation:

Selective Color 2:


Add a new layer under model layer, use black brush to make shadow under her dress, chair:


As we see the light on model from in front, so she must have a shadow behind. So make a new layer, use soft black brush to paint an approriate shape behind her and chair ( that is long and narrow) , then lower opacity to 70%:

Now i use hair brushes to hide the poor hair cutting on her back.

Create a new layer, pick color on the hair of this part ( we get #030005) and use hair brush, number 975 to click three times( while still holding left mouse) as the pic below shows:

Transform and add layer mask to eraser the hair on shoulder and arm to make only the part outside of shoulder visible :

Duplicate this hair layer and transform to make the hair strands look natural:

Make a new layer on the top, use soft black brush to paint on her eye then lower opacity to 50%:

New layer again, use hard white brush, 5 px to paint in the eye center, then put opacity as 50%:

With a new layer, use soft black brush to paint around eye and down opacity to 50% again:

New layer again, use soft brown brush to paint down from her mouth :

On a new layer, use this brush to darken her cheek :

Create two new layers again, set foreground color to #a3a0a0, use cobweb brushes, number 968, 696 to paint beside the chair, and use transform tools to stretch them to fit the pose of model and chair.

Make a new layer, use cobweb brushes, number 432, paint on her dress, transform, duplicate and transform again to make all cobwebs look like in a connected network:

On a new layer, use brush number 1064, paint on model body part which meet the chair, eraser extended part out of shoulder, then duplicate this layer and down opacity to 50%:


Open rat 1 stock. Cut this rat and place him behind the chair and situate this layer under cobweb layers:

With a new layer under rat layer, we make shadow for him:

Add a new Hue/Saturation layer ( with Clipping Mask) to down the lightness:

Use black brush to eraser his head:

Take a new layer with Clipping Mask, use soft black brush to paint on rat 1 body and tail then set this layer to Soft light 70%:

This step is to balance color for this rat (the body needs to be darker to fit the head).
Now we will add more rat. Cut rat 2 and situate him like touching cobweb at model dress bottom, place this layer above cobweb ones. Use transform and warp tool to change his head and right leg ( stretch them up) to get an approriate pose.


Make two new layers, add two shadow for this rat: shadow under him and on the right side like we did with model ( in step 7).
With shadow under rat, i use black brush with small diameter and opacity 100% ( normal mode) and soft black brush with larger diameter and opacity 40% for right shadow :


Add some adjustment layers with Clipping Mask to change color of rat 2.
Hue/Saturation 1:

Selective Color:

Hue/Saturation 2:

This is result:

I use a new layer with Clipping Mask for rat 2. Take soft white brush and paint on the left side of rat 2 body to make it brighter as it needs more light than the right one. Set this layer to Overlay 30%:

Now we will add cracked effect for room wall. Make a new layer above background layer ( room), name it “cracked effect”, use cracked brushes, number 1076, 1116, 1092 with black color to paint on room wall at following areas:


As we see, in original picture, the cracked part on the wall top shows the brick inside.

So we must make new cracked part which we’ve just created have the similar look.

So choose background layer, use any tool to make selection for brick part on top wall. Right click this selection, choose Layer via Copy and we have this brick part on a new layer. Set it above “cracked effect” layer. Choose Edit-Transform-Flip Vertical and move it on cracked part at the right bottom of the room. Still on this layer, press Cmd/Ctrl while clicking the thumbnail of “cracked effect” layer to load its selection. Invert it ( hit Cmd/Ctrl+Shift+I) then press Delete to clear all extended part outside .

Open frame stock. Move the selected portrait ( which has same style with model) and place it on frame stock, resize to fit as shown below:

Turn off portrait temporarily. Choose Magic Wand Tool and click inside black part of frame:

Invert this selection then turn on portrait layer and on this layer, hit Delete we have:


Now the portrait is inside the frame completely. We will change color of frame and portrait to match them together.
Make a new Selective color layer for frame with Clipping Mask:

Also one for portrait:


Hit Cmd/Ctrl+Shift+Alt+E to merge all layers.
Drag this frame after being merged into our document, place it above cracked effect and brick layers. Scale and transform it to make it look like lying on floor:

Press Cmd/Ctrl+U to adjust Hue/Saturation for frame:


Add shadow for frame by Layer Style:


In this step we will break frame. Duplicate frame layer and hide one of them ( so you can go back and edit later if making any mistake). On visible frame layer, choose Polygonal Lasso Tool to make a selection at the corner of frame. Right click this selection, choose Layer via Cut then move this cut part into right side:

To make this cut get out of flat look, apply Layer Style for it with Drop Shadow and Bevel and Emboss effect:


We get:

With same technique, make some separate parts of frame and remember to transform and arrange them in different motions to get realistic broken look:

Rename all these parts as “broken part 1”, “broken part 2”…
Open candle stock. I chose an almost burned candle because it makes better effect than a full one. Extract it out from backdrop to get the result:

I add a new layer and use Clone tool to remove flame and light part of this candle ( we we don’t need it ):


No need to be so perfect as it will be scaled and colored. Hit Cmd/Ctrl+Shift+Alt+E to merge all layers ( except background). Move this candle into our canvas, resize and place it beside broken frame parts:

With a new layer under candle layer, we use black brush painting under its bottom, lower opacity to 50%:

Add a Hue/Saturation layer for candle with Clipping Mask:


And this is result so far:

Make a new layer, use cobweb brush, number 679, color #a3a0a0 ( same color for cobweb brushes in step 11), paint above frame :

The window looks kinda boring so i decide to add some drama to it. Add a new layer between forest and glass window layers, name it “bats”:

Set foreground to black and choose random bat brushes ( press F5 to uncheck Shape Dynamics and Shattered settings and use any bat you like) to paint on window like the pic below shows ( remember that the further the smaller and blurrer). Lower opacity for further bats ( i use opacity 50-70%):

We finished adding all elements. Now it’s time for coloring and blending. I use some adjustment layers which are set on the top of layers.
Selective Color 1:

Selective Color 2:

On layer mask of Selective Color 2, use soft black brush to remove high contrast on selected parts ( which are appeared from adjusting Black channels):

Gradient Map layer, i take color from Black to White ( Normal mode) and fill opacity as 50%. Use black brush on layer mask to clear contrast of model dress:


Color Balance:

Hue/Saturation:

This is what we have after this step:

Add a new layer, use soft black brush ( with opacity 100 and 50%) to paint on background and foreground around model. On the screenshot you can see the darker part painted with brush 100% opacity, the brighter from brush with 50% opacity:

Set this layer to Multipy 50%.

In the final step we will add some noise for picture to make the old look more visible ( especially for broken frame, wall…). Make a new layer, i name it “Noise”, set to Overlay and fill with 50% gray:

Click Filter-Noise-Add Noise:


Apply Gasian Blur with 0.3 px, then add layer mask to eraser noise on window, model face, hand, candle. I use brush with 50% opacity for window, but 100% for the broken hole in the middle of the left glass window:

You can view the final outcome below. I hope that you enjoyed this tutorial and would love to hear your feedback on the techniques and outcome.

Thank you for reading this tutorial, I hope that you enjoyed it. If you want to view my other arts and tutorials you can look at my Deviantart page or follow me on Facebook.
Do you know the basic tools in Photoshop but feel that your work is still looking average? Join our creative community at FanExtra and get the direction you need to take your work to the next level.
Another great photo manipulation tutorial! This reminds me of the creepy girl from the The Ring.
Amazing tutorial! Very nice, thanks!
very creepy result and great tut Jenny
Thanks so much Nisha
Thanks, I’ve learned a few things.