
 Create A Futuristic Photo Illustration With Photoshop
 Create a Surreal Photo Manip
Have every post delivered to your inbox and get access to hundreds of useful design freebies.
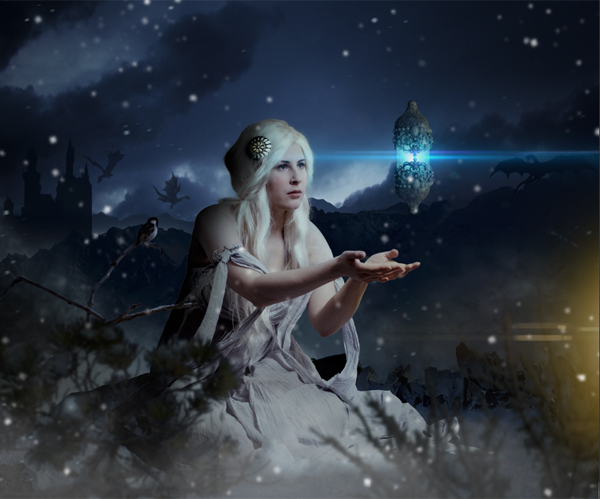
In this tutorial we will be creating a fantasy scene with a princess and magic lamp. In the background there will be dragons flying by the castle and the snow covered hills.
This tutorial covers topics like
-Painting snow surface texture.
-Digital Hair Painting.
-Advanced Matte Painting Techniques.
-Makeup and skin enhancement.
-Lighting principles for digital painting.
and many more photo-manipulation short cuts and techniques.
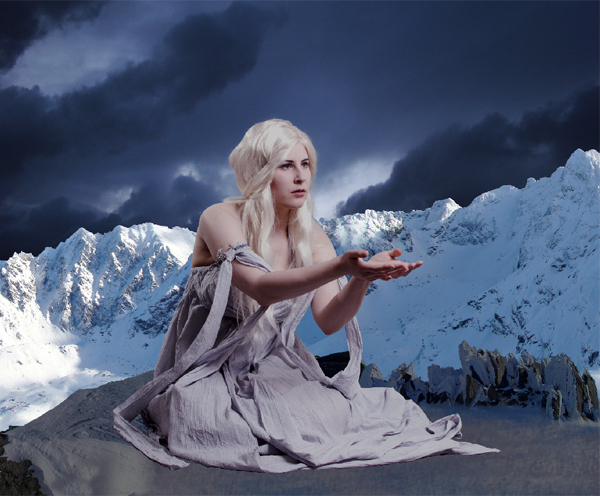
As always, this is the final image that we’ll be creating:
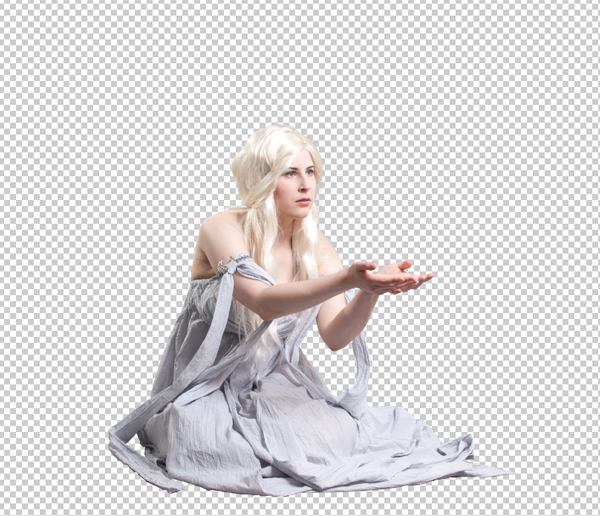
Create a new canvas in Photoshop with Width=3415px and Height=2816. Then import the image of the princess on to the canvas and place it in the center.
In this step we are going to place the sky in the background and color correct the princess to match with the BG sky using Adjustment Layers.
1) Import the image of the Night Cloudy sky on to the canvas and place the layer under the princess layer.
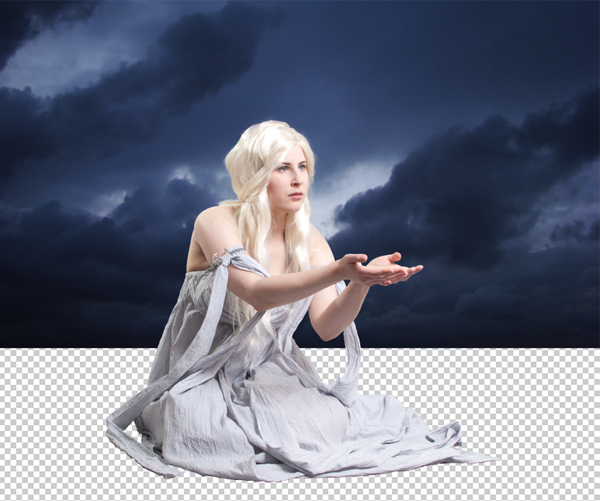
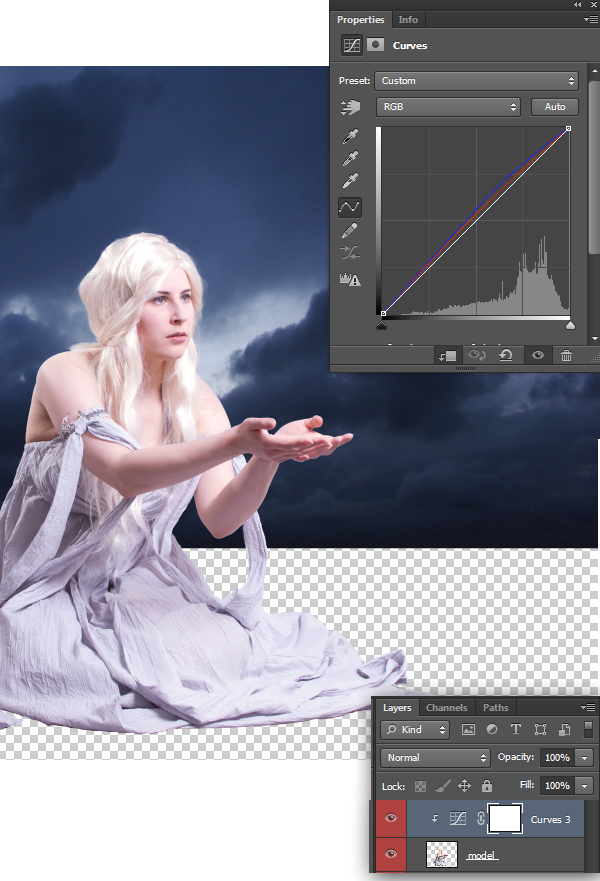
2) Now create an Adjustment layer of Curves to the princess layer and set the RGB curves as shown.
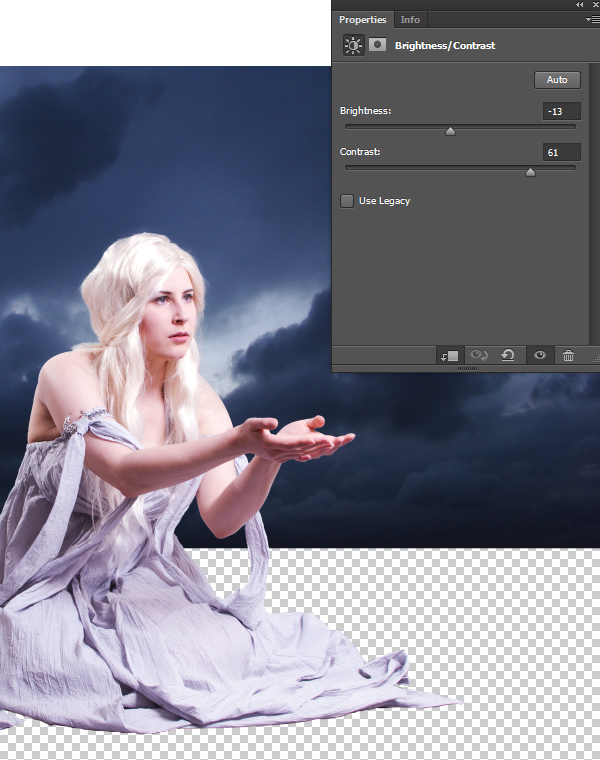
3) Using the Brightness/Contrast adjustment layer set the brightness to -13 and Contrast to 61.
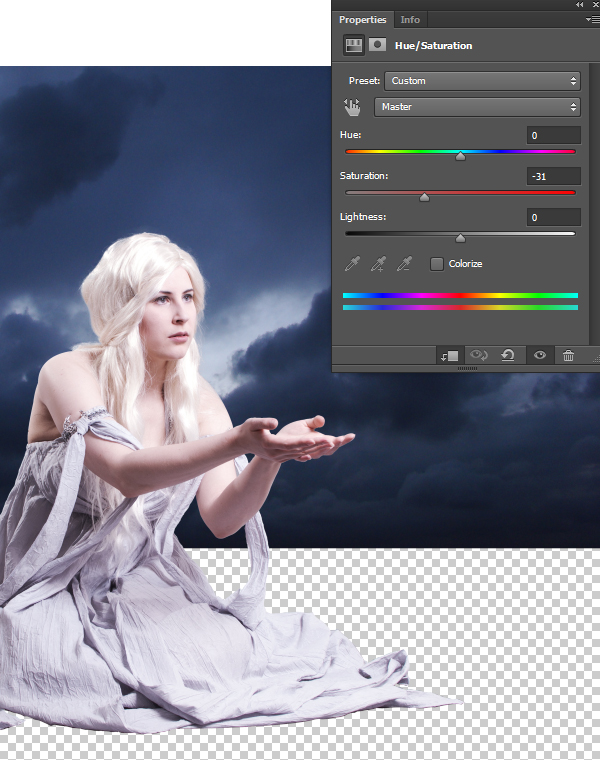
4) De-Saturate the princess layer to -31 using the Hue/Saturation Adjustment layer.
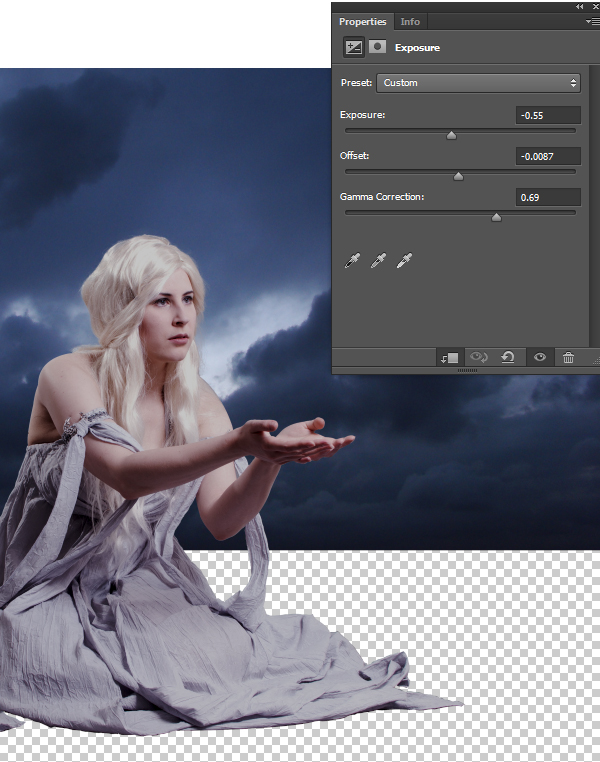
5) Now by using the Exposure Adjustment layer set the Exposure to -0.55, Offset to -0.0087 and Gamma Correction to 0.69.
In this step we are going to create snow covered rocky borders to support the snow surface that we will be creating in the next step.
1) Cut the snow covered cliff and place it beneath the princess as shown.
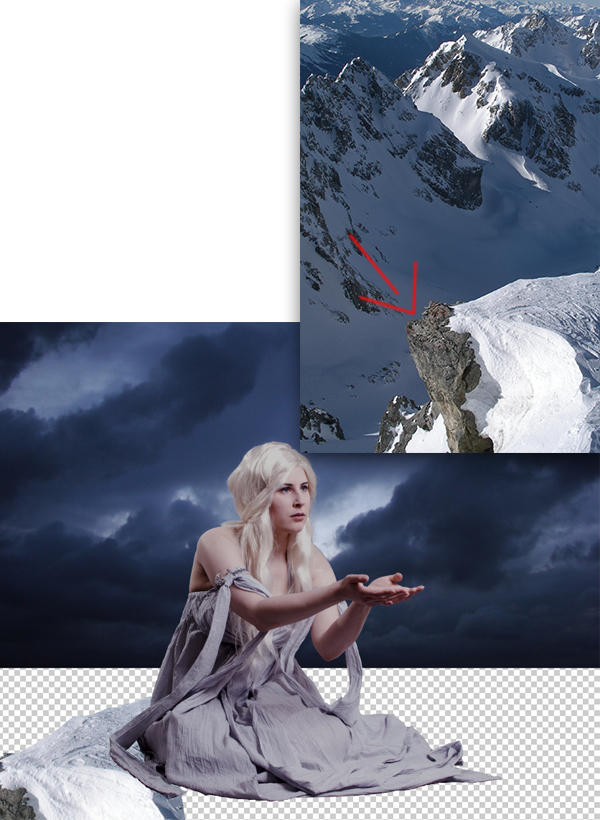
2) Now place a rock behind the princess as shown.
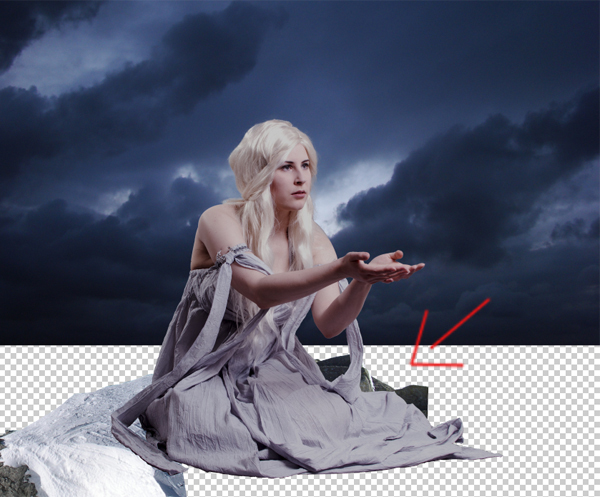
3) To complete the border of the surface place snow covered rocks.

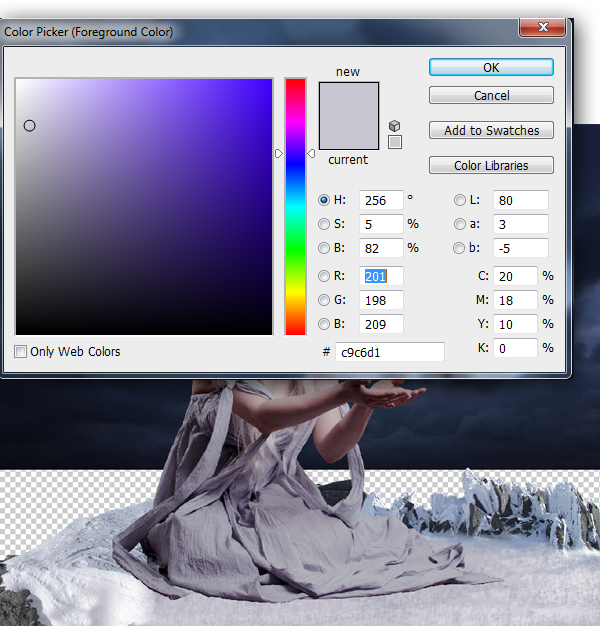
In this step we will be digitally painting the snow surface using the Dry Brush.
1) Using basic round brush paint white within the area of the surface, then by using the Dry Brush paint the snow texture with the color #c9c6d1.
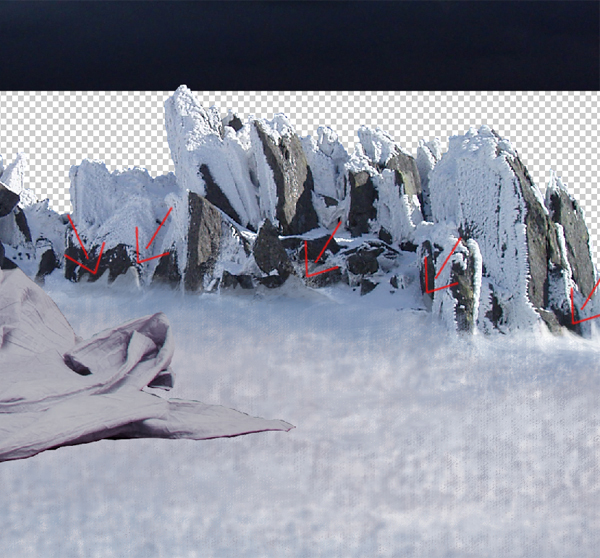
2) Using the same Dry Brush paint another coating of snow texture in a new layer with the color #a0abc2.

3) While performing the previous steps make sure you paint the snow overlapping on the small corners of the rocky borders.
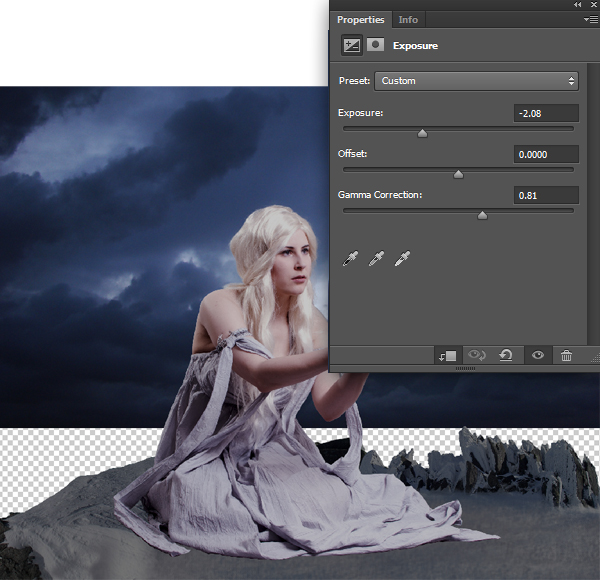
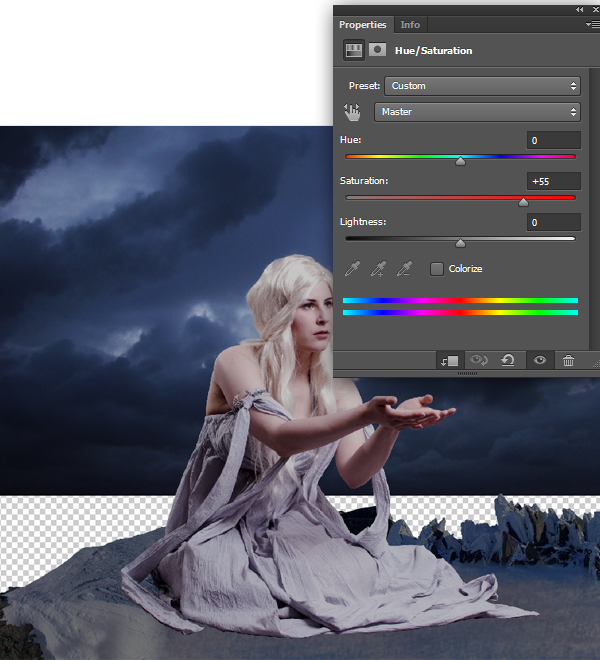
In this step we are going to color correct the surface to match with environment of the scene.
1) Merge all the surface layers and create an Adjustment layer of Exposure and set the Exposure to -2.08 and Gamma Correction to 0.81.
2) Now increase the saturation level of the surface layer to +55 using Hue/Saturation Adjustment layer.
In this step we are going to place hills in the background.
1) Cut the image of the snow covered hill from the stock photo and place in the background as shown.
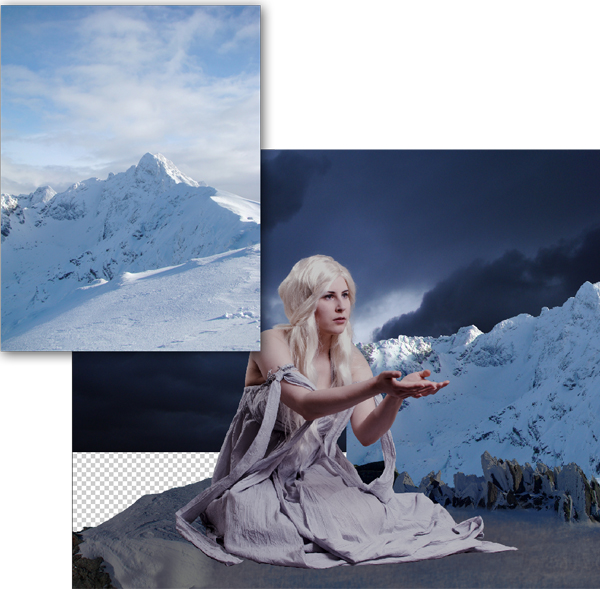
2) Similarly place another hill beside the previously placed hill.

I'm a freelance graphics designer and the Founder of Zillionarts and ZillionArts Workshop. Here we ought to provide the best training on Digital Painting and Visual Effects host by the experienced pros from the Hollywood and Gaming Industry. I work constantly to explore more possibilities and techniques to bring my imaginary worlds to live. You can follow me on Deviantart.


Do you know the basic tools in Photoshop but feel that your work is still looking average? Join our creative community at FanExtra and get the direction you need to take your work to the next level.


Looks like a good tut! The final outcome is pretty sweet!
Thanks Eric! I hope as a new FanExtra member you enjoy the full tutorial and source file.
Definitely going to have a look – I added some ideas to the Fan Extra section but not sure if my comments went through or not?
Merci pour ce tuto très créatif et bien expliqué!
Ma réalisation (avec une texture neige):
http://www.chez-mireilled.com/article-montage-reine-des-neiges-avec-photoshop-114059769.html
Tres bien!