
 Create a Magical Image using Photo Manipulation
 Members Area Tutorial: Photo Manipulate a Complex Surrogate Scene
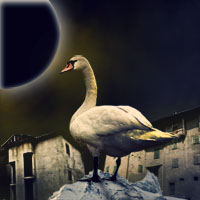 Photo Manipulate a Surreal Space-Age Landscape
Have every post delivered to your inbox and get access to hundreds of useful design freebies.
Today’s design lesson is an in depth guide to creating a beautiful, fantasy piece called “Summoning the Power”.
You’ll master a range of expert techniques including:
Let’s get started!
As always, this is the final image that we’ll be creating:

Create a new document with size 1000×1300 px and fill it with any colors you want (I choose white). Hit Cmd/Ctrl+Shift+N to make a new layer. Active Radial Gradient Tool (G) with colors #010619 and #01375c:

Open sky stock. Use Move Tool (V) to drag it into our white canvas, then use Cmd/Ctrl+T to rotate it to make this part of sky visible:


Change the mode to Soft Light 100%:

Open ground stock. I use Retangular Marquee Tool (M) to grab a selection of ground and place it at the bottom of our main picture, use Cmd/Ctrl+T to get a right perspective:


Click the second button at the bottom of Layer Pallete to add mask to ground layer. Use soft black brush to blur the hard edge of the ground:

I want to darken and change color of the ground to be fit the sky. To do it, I use some adjustment layers with Clipping Mask. On ground layer, go to Layer-New Adjustment Layer-Hue/Saturation:

Color Balance and Curves:

After darkening with Curves, on its layer mask, I use soft black brush with opacity about 30-40% to erase the middle section of the ground (as it’s illuminated by sky part -we’ll see in next steps).


To darken the ground edges more, I make a new layer (Clipping Mask) and use brush with color #2f3855 to paint there. Change the mode to Multiply 100%:

Extract model and place her at the center of our picture:


Thank you for reading this tutorial, I hope that you enjoyed it. If you want to view my other arts and tutorials you can look at my Deviantart page or follow me on Facebook.


Do you know the basic tools in Photoshop but feel that your work is still looking average? Join our creative community at FanExtra and get the direction you need to take your work to the next level.


Do i get the PSD file of this tutorial in the members Area?
That’s right Ricardo. You can download it at http://fanextra.com