
 Members Area Tutorial: Get Better at Photo Blending Starting Today
 Photo Manipulate a Beautiful Snow Queen Scene
 Create a Detailed Colourful Heart Illustration
Have every post delivered to your inbox and get access to hundreds of useful design freebies.
Today we have a great new photo manipulation tutorial for you guys.
You’ll learn how to create a beautiful nature scene, featuring some crazy weather, a complex background structure and some lovely touches of detail.
With this tutorial we will be covering key topics like:
Let’s get started shall we?
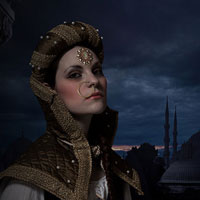
Here’s a look at the outcome you’ll be able to produce by the end of this lesson:

Create a new canvas in Photoshop and draw a rough sketch of the concept in a new layer.

In this step we will be creating the BG landscape using multiple images.
1) Import the image of the river on to the canvas and place it on the left side of the scene as shown.

2) Now import another image of the same river and place it on the right side. Then by using the Eraser tool(E) erase the sharp side of the image as shown to blend the two images perfectly together. (Note: While aligning the river images, make sure the wave in the same line. This could help in proper aligning.)

In this step we will be removing the boats from the scene using the Stamp tool (S).
1) Create a new layer above the river layer and select the stamp tool, then set the Aligned Sample option to Current & Below. Now press and hold the “alt” button (Same on both Mac and PC) and select the adjacent area of the boat and clone out the boat as shown.

2) Similarly clone out the other boat from the scene.

In this step we will be separating the sky into a new layer for further advancement in the landscape development.
1) Before we proceed further merge all the landscape layers, then by using the Lasso Tool (L) select the entire landscape image leaving the sky as shown. (Note: Selection of the hill need not be accurate.).

2) Now open the Refine Edge option and paint the edges of the hills and trees using the Refine Radius tool to get the perfect edge selection. To get the perfect edge selection set the Contrast level to 2% , Shift Edge to -7% and Edge Detection Radius to 0.3px. Then set the Output to New layer and press OK.


3) Similarly cut the sky from the image into a new layer.

In this step we are going to create a distant hills beyond the flora covered hills by the river.
1) Import the image of the distant hills on to the working canvas and place the image layer in between the river and sky layer, then position it as shown in the scene.

2) Now create a Curves adjustment layer to the distant hills layer and raise the Red curve slightly as shown.

3) Now by using the Hue/Saturation adjustment layer reduce the Saturation level to -61.

In this step we are going to place a rock in the scene on which our character will be seated.
1) Import the image of the rock on to the scene and place it at the bottom center of the scene as shown.

2) To blend the shade of the rock with the climate increase the Gamma Correction level of the rock to 0.87 using the Exposure adjustment layer.

In this step we will be creating a rough water flow in the river.
1) Import the image of the rough water flow on to the canvas and place it on the left side of the rock as shown. Then by using the eraser tool erase the sharp edges of the image to blend it perfectly with the landscape.

2) As you can observe that the water of the river is in greenish color so create a Curves adjustment layer to the water flow layer and slightly increase the Green curve as shown.

3) Now by using the Exposure adjustment layer set the Gamma Correction level to 0.70.

Now we’re going to add a building to our scene. Cut out and paste in your building photo like below.
Then use a layer mask to mask off the edge of the building, fading it into your main scene smoothly.


2) Using the Hue/Saturation adjustment layer set the Saturation level to -60

3) As you can observe that the water of the river is in greenish color so create a Curves adjustment layer to the water flow layer and slightly increase the Green curve as shown.

4) Now by using the Exposure adjustment layer set the Gamma Correction level to 0.70.

Create a new layer on the top of the layer palette and create a vignette for the dramatic mood in the scene.

In this step we are going to cut the image of the central character from source image using advanced cutting options.
1) Select a mask around the model as shown using the lasso tool or a magic wand tool.

2) Now open the Refine Edge option and set the smooth level to 1, Contrast to 4% and Shift Edge to -3%. Then paint the edges of the model with the refine radius tool to select every fine detail of the model.
- Now set the Output to New layer and press OK to get the fine cut image of the model on to a new layer.


In this step we are going to introduce the central character in the scene and blend it with the environment.
1) Import the image of the model on to the working canvas and place it on the rock as shown.

2) Now erase the unwanted rock beneath the model as shown.

3) Using the Hue/Saturation adjustment layer set the Saturation level to -47.

4) Now increase the Gamma Correction level to 0.67.

Create a new layer over the model and paint dark shadows on the model as shown. (Note: Use of digital pen tablet could give better results in painting shadows.).

In this step we are going to paint the hair extension behind the model.
1) Select a hairbrush from the brushes palette and paint the hair extension behind the model as shown using the color #bdbab1.

2) Now by using the color #706d66 paint the shaded hair as shown. Make sure to maintain the hair flow during the brush strokes to make it look natural.

In this step we are going to paint the hair flaunting over the neck and flowing towards the front of the model.
1) Select a hairbrush with more hair strands and select the color #c7c1b1 paint the hair as shown on the model in a new layer.

2) Now select a hairbrush with less but thick hairs strands and paint the hair as shown using the same color.

3) Now by using the color #6b645c paint the shaded part of the of hair as shown over the neckline.

In this step we are going to paint shadows to the digitally painted hair to make it look natural and believable.
1) Create a new layer over the hair layer and select the mask in shape of the hair by clicking on the hair layer thumbnail by holding Command key (Mac) and Control key on PC. Then paint the shadow over the hair as shown.

2) Now paint the shadow over the hair behind the model as shown.

3) Since the hair is covering the front portion of the model create a new layer under the hair layer and paint the shadow over the model as shown, which is cast by the hair.

In this step we are going to create water splash effect around the rock caused by the waves hitting it.
1) Create a new layer under the rock layer and paint the water splash as shown using the white color.

2) Now create another new layer over the rock layer and paint the water splash as shown.

In this step we are going to create fog in the scene.
1) Create a new layer under the vignette layer and paint the fog as shown in the image.

2) Now select the eraser tool and choose the same fog brush from the brushes palette and erase the previously painted fog slightly.

3) Now reduce the Opacity of the fog layer to 76%.

4) Create another new layer and paint the fog near the shore as shown on the right side of the image.

In this step we are going to add a sparrow in the scene facing the model.
1) Import the image of the sparrow on to the working canvas and place the image as shown in front of the model.

2) Now create a new layer over the sparrow and paint the shadow as shown to blend it with the environment.

In this step we will be adding dead branches closer to the scene.
1) Import the image of the dead branches on to the working canvas and place the branches on the left side as shown.

2) Create a Hue/Saturation adjustment layer to the branches and set the Saturation level to -35.

3) Now by using the Exposure adjustment layer set the Gamma Correction level to 0.81.

4) Since the branches are imagined to be closer to the scene they must be blurred in order to create the DOF to the scene. Hence with the dead branches layer selected add Gaussian Blur of Radius 5.0px.

In this step we will be color correcting the whole scene.
1) Create an Exposure adjustment layer on the top of the layers palette and set the Gamma Correction level to 0.85.

2) Now by using the Brightness/Contrast adjustment layer set the Brightness level to 8.

3) Using the Curves adjustment layer set the RGB curves as shown to get the following effect.

Using the birds brushes paint flocks of birds flying around in the scene as shown.

In this step we will be creating rain to add more drama to the scene.
1) Create a new layer on the top of the layers palette and paint the rain using rain brush with white color selected.

2) Now add a Motion Blur with Angle 50 and Distance 1px to the rain layer.

In this step we are going to create few water droplets on the screen. Before proceeding with this step merge all the layer of the scene into a single layer.
1) Create a new layer and paint the water drop on the screen as shown on the right side of the scene.

2) Using the Lasso tool cut the scene in the shape of droplet into a new layer.

3) Now merge both water droplet and the cut image of the scene together and add a Gaussian Blur of Radius 7.0px to get the desired effect.

4) Similarly create few more droplets as shown.
Awesome job making it this far! You should be proud of what you’ve created. Show it off to your friends and colleagues and get some feedback.
You can also comment here with your version, or any questions you had about the techniques used. We love to see what you guys create and we’re always here to give helpful feedback and tips to help you to improve.
The source files for this tutorial are available to our FanExtra members community. If you want to access the source files for this tutorial (and all of our tutorials + thousands of other resources) then sign up here.
If you’re already a FanExtra member then you can login here to access the source files.

I'm a freelance graphics designer and the Founder of Zillionarts and ZillionArts Workshop. Here we ought to provide the best training on Digital Painting and Visual Effects host by the experienced pros from the Hollywood and Gaming Industry. I work constantly to explore more possibilities and techniques to bring my imaginary worlds to live. You can follow me on Deviantart.


Do you know the basic tools in Photoshop but feel that your work is still looking average? Join our creative community at FanExtra and get the direction you need to take your work to the next level.


Leave a comment
0 Comments:
No comments have been posted yet. Be the first!