
 Create an Aquatic Photo Manipulation of a Giant Tortoise
 How to Turn Yourself Invisible
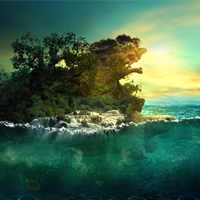
 Create a Surreal, Scenic Photo Manipulation
Have every post delivered to your inbox and get access to hundreds of useful design freebies.
The popularity of apps such as Instagram has shown a tremendous demand for cool photo effects. It’s no longer enough for people to Facebook regular photos of their experiences, they want realistic filters such as bleached, degraded or vintage.
It’s certainly true that these filters can add a lot to your photos and give you some really cool outcomes. However, what if you don’t have an Iphone, or access to these popular apps? Well, luckily for you it’s possible to achieve an awesome vintage photo effect using nothing but Photoshop!
Don’t worry if you’re a beginner, because this effect can achieve in 10 simple steps. Read on for a full walkthrough of achieving a vintage photo effect in Photoshop.
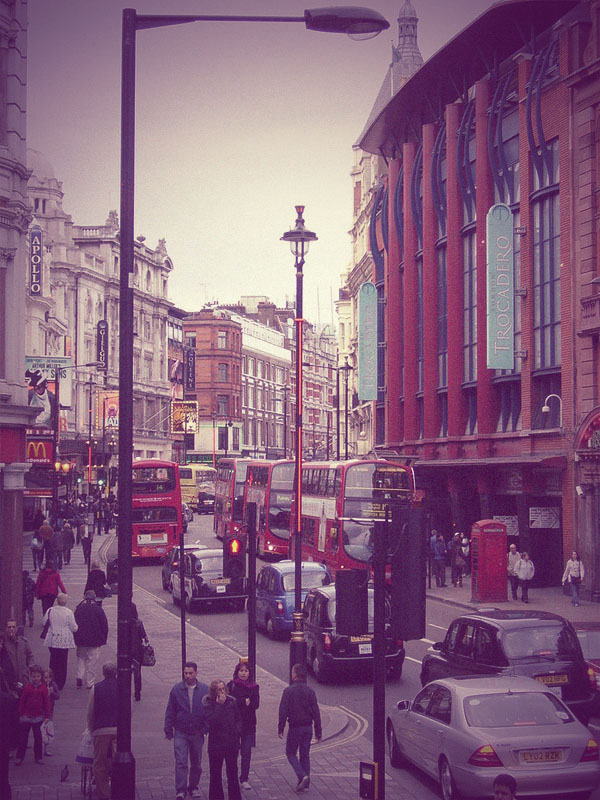
As always, this is the final image that we’ll be creating:

Open the street view photo from the resources section for this tutorial. Duplicate this background image by directly pressing Ctrl + j command or right click on a layer and select duplicate layer.

Right-click on the same layer and select “Convert to Smart Object” like as shown in the image below. It’s an option which gives you flexibility to edit the values of any filter any time.
When working with a non-destructive workflow it’s recommended to integrate smart objects into your workflow.

Now to get a nice contrast on the edges of your image, select Filter > High Pass Filter.
In the High Pass filter settings, input the value as 0.3 pixels as shown in the image below:

This is the result:

Apply “Overlay” blending mode to your duplicate layer to see the effect. You can compare it with the original image, from this method minor but beautiful contrast you will find on the edges.

Let’s proceed further. On your Layer palette, from the Adjustment Layer option select the tool Brightness/ Contrast. This time you have to dull the overall color tone of an image.

Apply following value to the Contrast option.

See the output of this method:

Now we are moving towards the most important step of this effect, which is applying color shades of vintage effect by properly managing the curves of Red-Green-Blue channels.
So from Adjustment Layer option, select Curves tool and adjust the curves as described below.
First select Red channel and manipulate the curve as shown in the image below.

Now to brighten the image and to add some greenish color tone then adjust the green channel as shown in the image below:

And finally, to give overall touch of vintage effect then bluish color tone is most important. So adjust it as shown below:

See the output below. The image is looking much more vintage!

Now we’re going to work further on color tinting our image. Make a new layer and fill it with the color #E9077C.

Apply Blending Mode as Screen and reduce the opacity to 30%. This is the output you will get:

To reduce the overall pinkish color tone over the image then select Hue/Saturation tool from the Adjustment Layer panel and change the image Saturation value to -20 as shown in the image below:


So we are moving towards the final step. Select your bottom background image, duplicate it and convert it to a smart object.
Then select Add Noise tool from Filter-> Noise. Apply a noise filter at 4% strength, uniform. We only want to add a subtle noise effect.


Now by using Lens Correction tool we are giving final but important touch to the image.
With your background layer still selected, go to Filter -> Distort, select the Lens Correction tool and in it the Vignette option. Under the vignette settings reduce the Amount to -100 (darken mode) and set the Midpoint value as +25. No need to change any value of other options in this tool.

You can view the final outcome below. I hope that you enjoyed this tutorial and would love to hear your feedback on the techniques and outcome.
KMahesh, is an animator by profession. By having sufficient knowledge in Photoshop software, he has created a niche website howtouse-photoshop.com for the people who want to learn to use Photoshop.


Do you know the basic tools in Photoshop but feel that your work is still looking average? Join our creative community at FanExtra and get the direction you need to take your work to the next level.


Very well written tutorial . great share
finally a case to use the vignette function in the lens correction
cool beans!
Thanks for posting this awesome tutorial, this will come in handy for me!