
 Members Area Tutorial: Create a Cat in a Magical Pond Scene Photo Manipulation
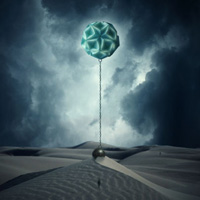 Photo Manipulate a Surreal, Gravity-Defying Desert Scene
 Members Area Tutorial: Photo Manipulate the Surreal Composition ‘Daydream’
Have every post delivered to your inbox and get access to hundreds of useful design freebies.
Matte painting is an essential skill to learn from any serious digital artist or Photoshop user. Not only does it allow you to produce beautiful out of this world outcomes, but it teaches you core skills such as correct image blending and photo manipulation.
In this tutorial I’ll show you how to create a snowy night landscape photo manipulation featuring a northern lights sky. You’ll learn how to combine many stocks together and blend them seamlessly, work with layer groups and Smart Objects, create stunning lighting effects and more.
As always, this is the final image that we’ll be creating:

Create a new document and fill it with white. I choose the size of 1300×800 px but you can start with bigger size. Press Cdm/Ctrl+Shift+N to make a new layer and hit G to active Gradient Tool. I use Linear Gradient with white color and #2f6d7f. Drag a line from top to bottom to get result below:


Open ‘starry sky’ stock. Use the Move Tool to drag it into our main canvas, place it at the right side of our canvas then right click this layer and choose to ‘convert to Smart Object’. Hit Cmd/Ctrl+T to resize it as shown below:

Change the mode to Screen 100%:

Use the Rectangular Marquee Tool (M) to make another selection on ‘starry stock’:

Drag it onto the left side of your canvas, convert to Smart Object and change the mode to Screen 100%:

I name these layers as “stars 1″. “stars 2″.
Apply a layer mask to each of your star layers and use a 50% opacity black brush to blur some parts of the star fields. You can see how I did it on the mask of these layers:


Result on picture:

Open ‘background’ stock. Isolate the mountain and foreground and place it in our main document. Convert to Smart Object and resize with Cmd/Ctrl+T:


Use a layer mask and soft black brush to blend the top of the mountain at the middle part with sky:


We only use the background of this stock because its foreground is not suitable with a snowy track (we’ll see in a future step).
To change color and brightness of this background, I use some adjustment layers with Clipping Mask. Go to New Layer-New Adjustment Layer-Color Balance:


Curves:

We have result:

Open ‘foreground’ stock. Take foreground part and position it at foreground of our main picture after converting it to Smart Object and resizing:


Thank you for reading this tutorial, I hope that you enjoyed it. If you want to view my other arts and tutorials you can look at my Deviantart page or follow me on Facebook.


Do you know the basic tools in Photoshop but feel that your work is still looking average? Join our creative community at FanExtra and get the direction you need to take your work to the next level.


Thank you very much for this beautiful Matte Painting.
Here is my realization:
http://www.chez-mireilled.com/article-matte-painting-enneige-avec-psdfanextra-114522472.html
Does it have to be improved?
Wow, your version looks amazing! Nice work Mireille, thanks for sharing .
.