
 Members Area Tutorial: Create a Fiery, Dynamic Basketball Photo Manipulation
 Create a Stylized Photo Montage from Scratch
 Members Area Tutorial: Design a Multi-Page Portfolio Website
Have every post delivered to your inbox and get access to hundreds of useful design freebies.
To celebrate the launch of our new wallpaper section I decided to do a tutorial on how to create a grungy wallpaper. You can download the wallpaper at the bottom of this tutorial.
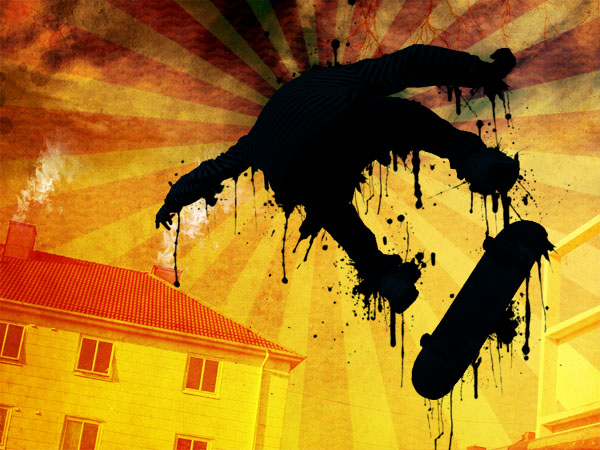
This is the final image that we’ll be creating:

Open up a new document (1024X768px) and paste in a photo of a skateboarder.
You can find the original photo here: http://www.sxc.hu/photo/143913

Now use your lasso tool to cut around the skateboarder, and then copy/paste him onto a new layer. Then do the same for his board, and copy/paste this onto a new layer also. Then merge the layer’s together. The image below shows the data on the merged layer, with the original photo hidden:

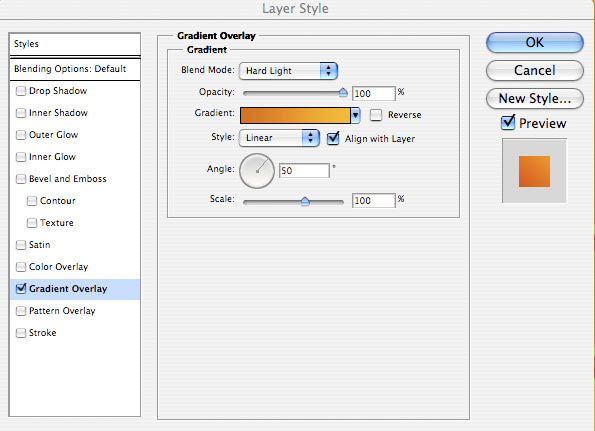
Now return to your original photo layer, and apply a linear gradient overlay ranging from FDBE37 to D47300. Set the blend mode of the gradient to ‘hard light’, and the angle to 50 degrees. The image below shows the original photo layer, with the isolated skateboard layer hidden.

Now find an old paper texture image. I used this one: http://www.sxc.hu/photo/1088062. Apply the paper texture over your photo, and then change the texture layer’s blend mode to ‘overlay’ and it’s opacity to 70%.

Now make your isolated skateboarder layer visible again and apply a gradient overlay (gradient ranging from: 012544 to 010D16). Make sure that your blend mode for the overlay is ‘multiply’.


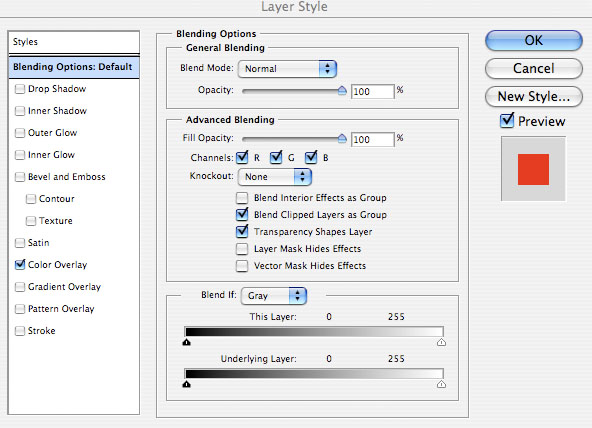
Now duplicate your skateboarder layer and change your gradient overlay to a black color overlay (settings shown below). Then erase away parts of this layer using a large, soft eraser brush. Don’t erase all of the black overlay layer, but just enough to allow some of the dark blue layer show through.


Now paste in one of the images from our Free Sunburst Set. Make sure that you paste the image onto a new layer above your original photo layer, but below your old-paper texture layer as you want the texture to be applied to this shape. Once you’ve done this, apply a red color overlay, and reduce the layer’s opacity to 20%.

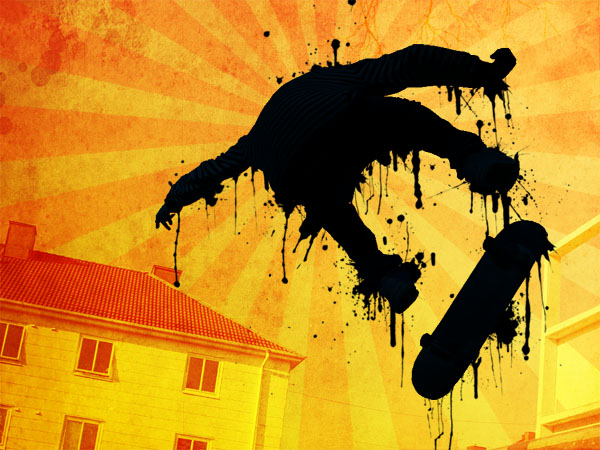
If you noticed in the last step, the sunrays overlapped the building and edge of the skate ramp in our photo. I want to create the effect that these objects are in front of the sun rays. To do this I select my sunburst layer and go to layer>apply layer mask>reveal all. Then I select around my building/skate-ramp and fill my selection with black. This will mean that any data within these areas becomes hidden. You can see the result of this in the image below:

Now create a new layer below your isolated skateboarder layers and above your texture/photo layers called ‘splatter’. Grab a free splatter brush. and set it’s color to black. Then apply it to the edge of your skateboarder. Keep applying different brushes, trying to achieve a melting kind of look.
Now find a retro looking pattern online, I picked mine up from SquidFingers.com, a great resource for patterns and other freebies. Open the pattern image in a new Photoshop document and then go to edit>define pattern and choose a name for your pattern. Then return to your original document and duplicate your sunburst layer. Go to blending options for your duplicate and remove the red color overlay and apply a pattern overlay instead, using your newly created pattern. Be sure to make your pattern overlay’s blend mode ‘hard light’. Then reduce this duplicate layer’s opacity to 10%.


Now find a photo of some clouds. I used this image: http://www.sxc.hu/photo/1099805. Paste it over your image, making sure to place the clouds over your sunburst layers, but below your texture layer. Then change the layer’s blend mode to ‘linear burn’. Finally to fade the photo gradually into the main background, apply a layer mask (reveal all) and then drag a black (100% opacity) to white (0% opacity) linear gradient upwards to mask off the bottom of your cloud image.


Now find an image of some smoke and paste it into your document. I used this image: http://www.sxc.hu/photo/1073897. Rotate the image to fit over the chimneys on the roof of the house in your photo, (to rotate to go edit>transform>rotate and then manually rotate it). Then duplicate this smoke layer and fit the duplicate over the other chimney on your house.
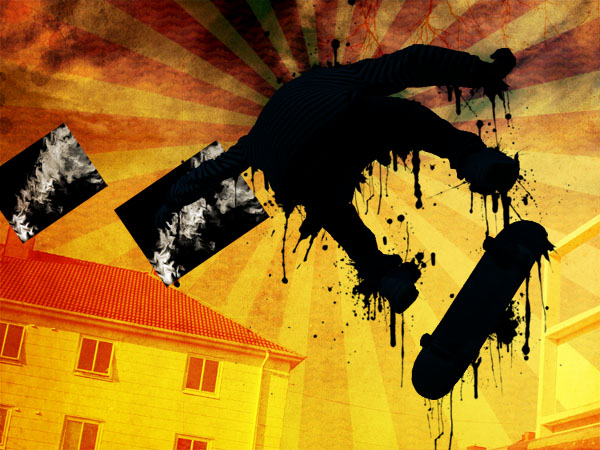
Now change both layer’s blend mode to ‘screen’ and you’re left with just some white smoke, minus the original black background. Then use a large, soft eraser brush at around 25% opacity to erase the parts of smoke that cover up the chimney tops, and also erase the edges of the smoke so that it appears more natural.
Now paste in an image of some tape onto a new top layer (I got an image from the Grunge Essentials Freebie Pack right here at PSDFAN). Then to make it darker apply the hue/saturation/lightness settings shown below:

Now type some text over the tape, and rotate it using edit>transform>rotate.

Now select each of your letters using the magic wand tool. Then with your selection still in place delete your text layer. Select your tape layer, and then apply a layer mask (reveal all). Then fill your selection with black to hide the areas of tape that follow the shape of your text.
I hope that you enjoyed this tutorial, and would love to hear your thoughts on it. If you appreciated the techniques that I’d love a Digg or Stumble ![]() . Just click on the image below to view the full sized wallpaper.
. Just click on the image below to view the full sized wallpaper.


Tom is the founder of PSDFAN. He loves writing tutorials, learning more about design and interacting with the community. On a more interesting note he can also play guitar hero drunk with his teeth.


Do you know the basic tools in Photoshop but feel that your work is still looking average? Join our creative community at FanExtra and get the direction you need to take your work to the next level.


great grungy tutorial.. love this kinda effects!!!
Cheers Yuva, I’m glad you enjoyed it.
Amazing Tutorial! Very nice final image, and very well explained too!
Thanks Rash!
Great tutorial, one I am definitely going to try out, because lately I have started to love grunge websites, so many more of them would be great
Yeah I really like seeing great grunge design too, I might actually do a grunge roundup post soon if you’re interested. Thanks for commenting!
Nice Tom, to my home page
Awesome! Cheers
Nice tutorial, with lots of interesting ideas.
Is it possible to list the layers you used (show a screen shot of the Layers palette)? I somehow got the order crossed.
Loved it!
Thanks guys.
Steve: A members area is actually in the works that will offer all .psd files from each tutorial.
this is a great tutorial..too bad i can’t seem to do it.. i find it a bit difficult..haha. im only 13.. soo sad.. i really like grunges..
  ( but GREAT.GREAT work! ^^
great tut. I liked alot. I had some difficultys, but I managed to fix those. Big Up!
hey great tutorial this is what i made:- http://i34.tinypic.com/2h699ao.jpg
Nice result JeRmY, it looks really good.
This has to be my fave tut
heres what i got
http://file040b.bebo.com/1/original/2008/11/28/21/3638129536a9519665520o.jpg
possibly the best wallpaper tutorial on the net! thanks a lot mate!
Great tutorial:D The best I’ve seen so far, But where can i find Free Sunburst Set?
great tutorial…
Excellent tutorial. My picture came out great.
Just wondering, what font did you use to write in the text?
Quality tutorial
for a beginner like myself the explanation and end result was perfect
loving the effect
cheers
good work, thanks
i dunno how.. please make it easier, if you wont mind.. ^^ for beginners
Wow this must be one of the best explained tuts I’ve found till now. Great job, I love it
Thanks so much, I appreciate the kind words
This is really awesome, good job on the tutorials.
Thanks Nummy!
This was a great tutorial! Thanks, it inspired me and I created my first wallpaper in Photoshop.
Here is the result:
http://twitpic.com/b0gqo
Original picture taken by my husband. =)
What program are you using to edit the images, Photoshop or Gimp?
B
I use Photoshop for all my tutorials.
thank you fort this amazing tutorial. good job!
greatness man thanks!!!!!
thank you very much to given us a great avanue to make a buitiful and magnificiant imaje what a great excelent tutorial
good job thank u
that was pretty cool, i wish i could create images like. I find that photoshop is too expensive for me. Can you do the same thing with Gimp?
so great..i think this is the best way to do more a grungy wallpaper..
great guys.
TOO GOOD!!


keep it up
and plz upload some more
thank u soooooo much