
 Create a Surreal Smoking Photo Manipulation
 Members Area Tutorial: Digital Painting Lesson: Scarecrow’s Joyride
 Members Area Tutorial: Design a Sleek, Engraved Style Web Design
Have every post delivered to your inbox and get access to hundreds of useful design freebies.
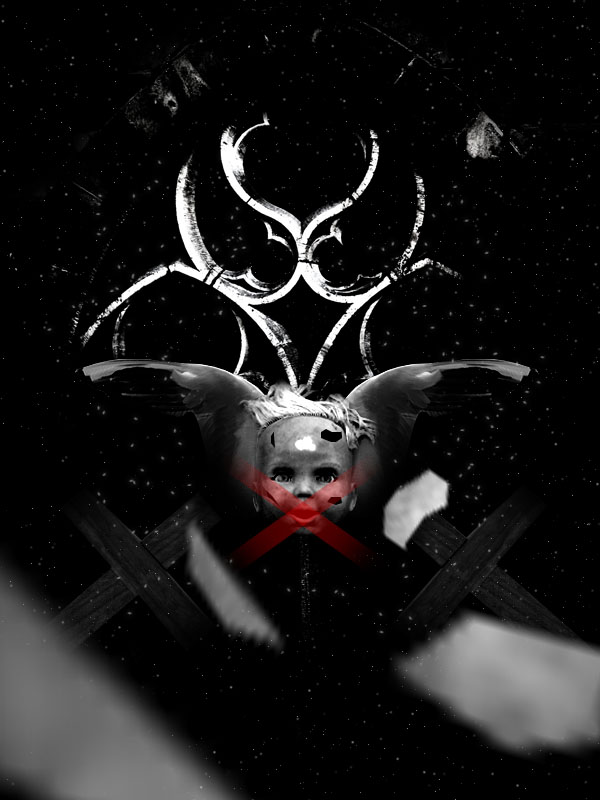
As always, this is the final image that we’ll be creating:

Create a new document (600X800px).
Create a new layer called ‘black background’ and fill your entire canvas with black.

Paste in this photo of a stone archway. Call this layer ‘arch’.
Photo: Stone Archyway

Go to select>color range and use this selection method to select the highlights of your photo. Then with your selection in place copy and paste it onto a new layer called ‘arch highlights’.
Delete your original photo layer.
Finally, go to image>adjustments>desaturate to grayscale your arch image.

Now download this image: Doll Photo
Paste it into your photo.

Now cut out just the doll’s head and go to image>adjustments>desaturate to grayscale it:

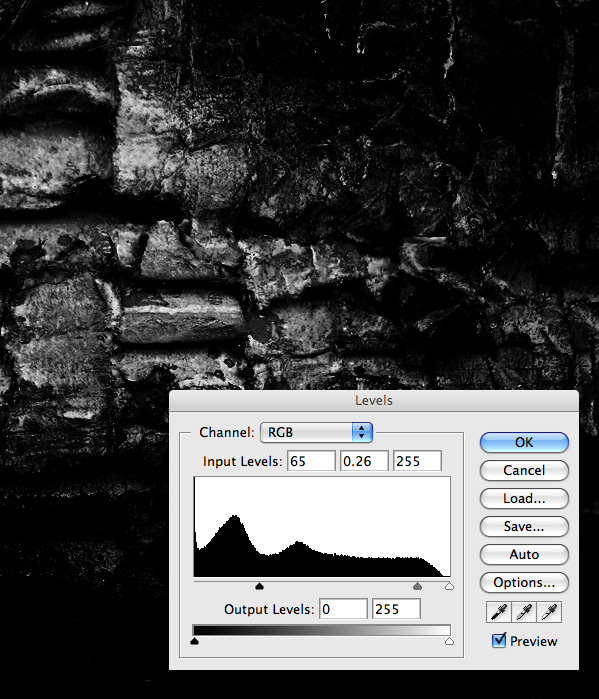
Now go to image>adjustments>levels and adjust the levels of your dolls head layer in order to bring out it’s shadows and make it blend better with your dark background. (See levels settings below):

Use your marquee tool to create a red rectangle going across your doll’s face. Reduce this layer’s opacity to 40%.

Now go to edit>transform>rotate and rotate your rectangle to around 30 degrees. Then duplicate this layer and go to edit>transform>flip horizontal. Move your flipped duplicate to form a red cross that goes across your doll’s mouth. Then merge these two red shape layers together.

Use a large, soft eraser brush to erase the edges of your cross shape, letting it blend into your background.

Copy in this image of a cross:
and cut it out using the lasso tool. Go to edit>adjustments>desaturate.

Then resize your cross and rotate it to fit in the corner of your canvas. Erase the edges of your cross using a soft eraser brush, and then duplicate this layer. Go to edit>transform>flip horizontal and move the flipped cross to the opposite side of your canvas. Reduce the opacity of both layers to 35%.

Paste in this photo of some wings:
Cut out the wing using the lasso tool, and then resize it to fit next to your doll’s head. Move your wing layer below your doll’s head layer.

Use a large soft eraser brush to erase the bottom part of your wing, blending it smoothly into your background.

Go to image>adjustments>levels and change your level settings to those shown below. This should let the wing blend into the darker background.

Go to filter>sharpen>sharpen to bring out the detail of the wing. Then duplicate this layer, and call the duplicate ‘right wing’. Go to edit>transform>flip horizontal and move the flipped wing to the right of the doll’s head.
Then select your doll’s head layer and use a small, soft eraser brush to blend the edges of your doll’s head into your wing better.

I want to darken my doll’s head a little more, and so apply the following level settings to this layer:

Create a new document, and create a new layer. Using your lasso tool create a feather shaped selection and fill it with black. Hide your white background layer, leaving your shape over a transparent canvas. Then go to edit>define brush preset. Save your brush as ‘feather brush’:

Return to your original document and create a new layer called ‘scattered brush’. Apply the following brush settings:

Apply the feather brush around the center of your canvas.

Now apply an outer glow blending option to your feather brush layer.

Now select your doll’s head layer. Using your lasso tool select a fragment of the head, and hit ‘copy’. Then delete this selection from the doll’s head. Paste the fragment onto a new top layer, and resize it to be much larger than it originally was. Then go to edit>transform>rotate. The fact that you’ve resized your head fragment should blur it, making it look much closer to the viewer than the rest of your piece.

Now repeat this technique, cutting out more fragments from the doll’s head. Enlarge these fragments to be even closer and large on your canvas. Rotate each fragment to give a more shattered effect.

Merge all enlarged fragment layers together and apply a drop shadow blending option to them, to give them extra depth:

Then apply the following drop shadow effect to your doll’s head layer, to make it looks more like it’s in front of your wing layers:

Create a new top layer called ‘stars small’. Fill your canvas with black, and then go to filter>noise. Apply the noise settings shown below:

To get the effect of a star field, go to image>adjustments>brightness/contrast and reduce the brightness to -55 and increase the contrast to +95:

Reduce the opacity of your ‘stars small’ layer to 50% and change it’s layer blend mode to: screen.

Duplicate your ‘stars small’ layer and call the duplicate ‘stars large’. Resize this layer to around 200% the size of the original. This should give you larger stars.

Use a large, soft eraser brush to erase away the stars on both star layers that overlap your large fragments and your doll’s head and wings.
Create a new layer called ‘burn layer’. Select a medium sized soft black paintbrush and reduce it’s opacity to 10%. Then change it’s blend mode to ‘color burn’. Brush over the areas that you want to shadow more. Below you can see the burn layer isolated, as well as the result of using your burn brush:


Now create a new top layer called ‘dodge layer’. Repeat a similar technique to your burn layer, instead using a 5% opacity, white paintbrush with a ‘color dodge’ settings. Brush over your highlight areas.

Create a new layer called ‘red circle’. Create a circular selection using your marquee tool and fill it with red. Then use your other selection tools to delete areas of this circle, creating a unique, retro shape.
Finally, reduce this layer’s opacity to 30%.

Download the PSDFAN texture set:
Paste in the first texture in the set.

Go to image>adjustments>desaturate. Then apply the level settings shown below to darken your texture a lot:
Finally reduce the opacity of this texture layer to 10%:

Download this great parchment texture:
Paste it into your document:

Then go to image>adjustments>desaturate. Reduce this layer’s opacity to 30% and change it’s blend mode to multiply:

Create a new adjustment layer with a gradient map, ranging from dark blue, to red, to dark blue.

Finally, reduce the opacity of this adjustment layer to 10%. This should give your entire piece a subtle tint of color:
I really hope that you enjoyed this tutorial and would love to hear your feedback!

Tom is the founder of PSDFAN. He loves writing tutorials, learning more about design and interacting with the community. On a more interesting note he can also play guitar hero drunk with his teeth.


Do you know the basic tools in Photoshop but feel that your work is still looking average? Join our creative community at FanExtra and get the direction you need to take your work to the next level.


Great idea Tom. it reminds me of Chucky.
Nice work. I think by moving the doll head up and removing the arch image above it would allow for some text to go towards the bottom of the page, maybe promoting a movie or something that the poster could be for.
I dig it though
very nice tutorial Tom.
i really liked it .. keep goin
Another very good tutorial. Easy to follow and uses some nice techniques to achieve the final result. I really like the affect achieved with this tutorial and I look forward to more of your tutorials in the future. Thanks
Wow good ideas in this tutorial, i got to say that with these tutorials from psdfan, I’m always learning new techniques, Cheers Tom.
p.s the link to view a larger final image goes to the wrong page
Grafpedia: Thanks mate, I see the resemblance!
Mike: Cool idea, I’ll definitely try and work up a movie poster design soon.
Vim: Thanks a lot, I’m glad you’re enjoying the tutorials. Thanks for the head sup with the larger final image link, I’ll go fix that now.
This tutorial was very good!
Hey Tom Hows it going ,good final outcome looks great – I noticed you always have elements close the viewer that are blurred, can explain to us why you do this , Thanks
Creepy, but great techniques shown. Thanks for sharing.
Great step by step tutorial. Not sure if the red cross works over the dolls head but a good composition all round. Would be good as a motion graphic with the pieces exploding past the camera field of view and zooming towards the dolls head and…. anyway, get a bit carried away at this time of night. Good stuff!
Nothing short of amazing.
freaking awesome tutorial! Im using it to promote my bands new album!
Great tutorial. I’m pretty new to photoshop and this had a good mix of different concepts that really helped me to get a grasp on some of the different features. Thanks.
learn a great deal of design….everyone.
very nice tutorial Tom.
i really liked it .. keep goin
The final effect is just awsome man!
very nice tutorial Tom, Well Done!!!
This was a great idea for a tutorial and the end product was really nice however, it could have been more detailed in exactly what you were doing. I had to wing the whole gradient at the end and the pictures used in the tutorial were linked but who wants to use a website that’s going to make you be a member before you download? Photobucket would’ve been a better choice. But in the end, this was still great. Good job!