
 How to Create a Lighter Illustration from Scratch in Photoshop
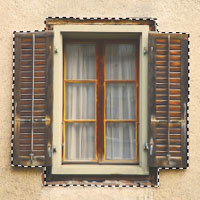 Master Photoshops Selection Tools in Under 30 Minutes
 Members Area Tutorial: Photoshop a Medieval Dream Scene
Have every post delivered to your inbox and get access to hundreds of useful design freebies.
I love tutorials that go beyond the basics and teach some really innovative techniques. This tutorial is a perfect example of that. I’ve been using Photoshop for over a decade, and our resident author Dek Wid taught me a couple of really handy tricks in this lesson.
The beauty of this tutorial is that the various source images we’re working with aren’t similar at all, but through some creativity and outside-the-box thinking you’ll learn how to turn a daytime scene into night, and rework a tractor/plastic toy into a believable sci-fi vehicle.
Not only will you learn some fantastic ways to blend your images effectively, but you’ll be creating an awesome sci-fi outcome. Time to get creatively geeky and create an outcome that you can wow your friends with.
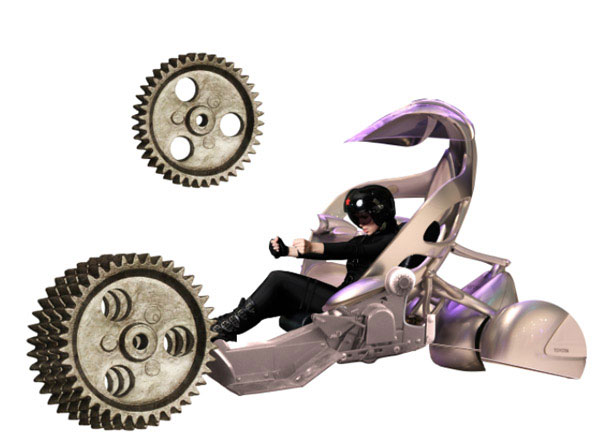
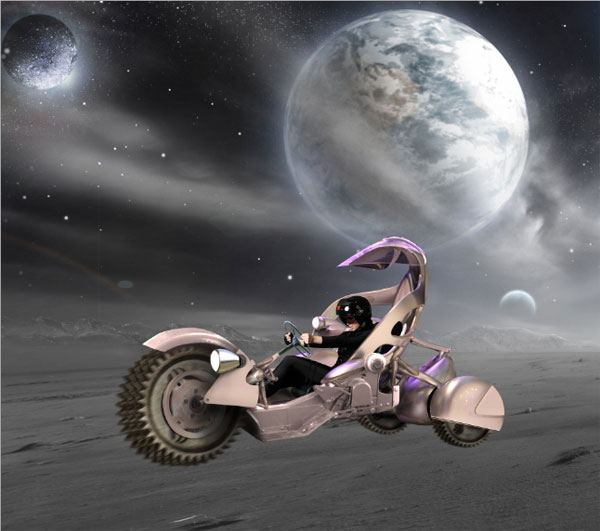
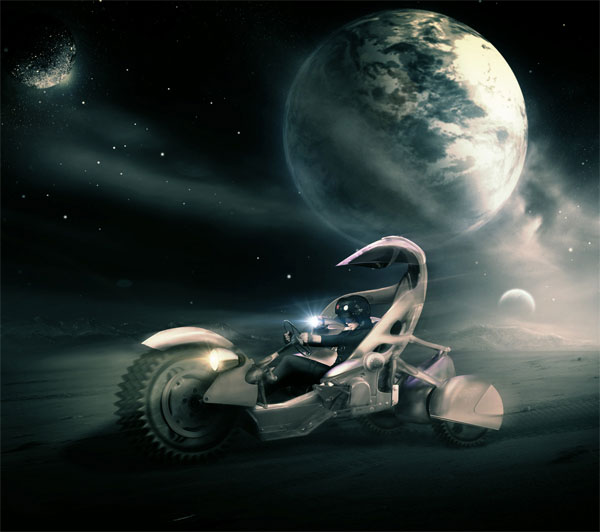
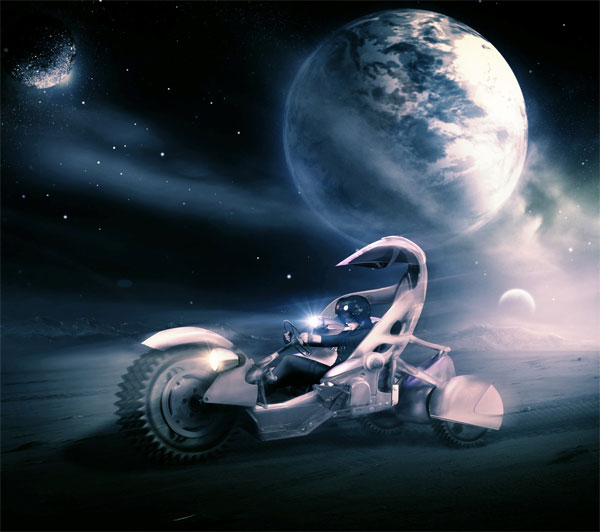
Here’s a look at the outcome you’ll be able to produce by the end of this lesson:

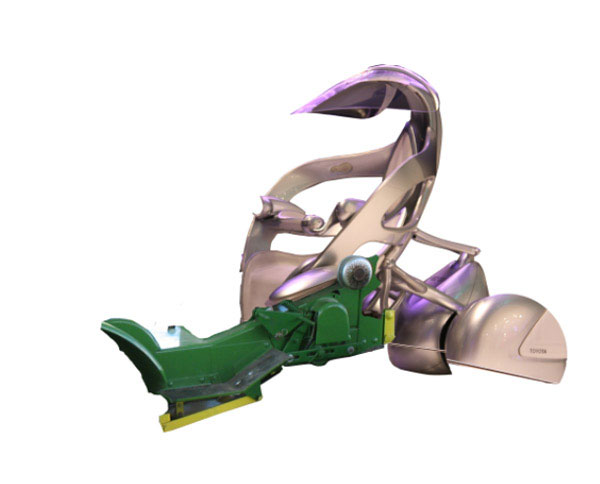
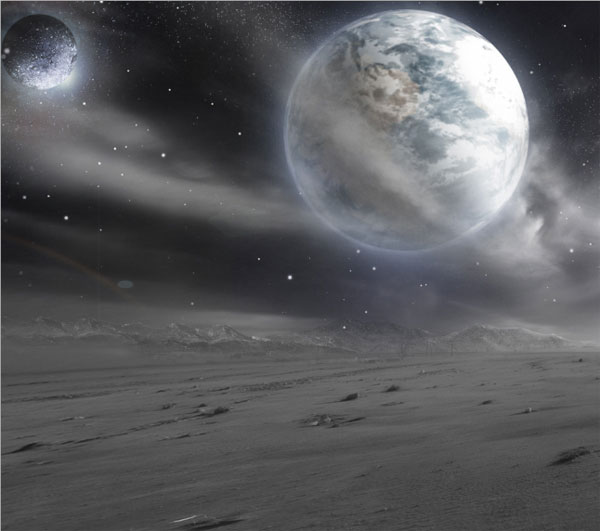
Here are the images we’ll be combining to create our masterpiece.

Create a new canvas on photoshop with size of about 3000 pxl wide and 2400 pxl high. Open the stock image on the canvas. Scale its size with free transform tool (Ctrl+T). This image will be a new layer in the layer panel. I named this layer ‘vehicle 1′.

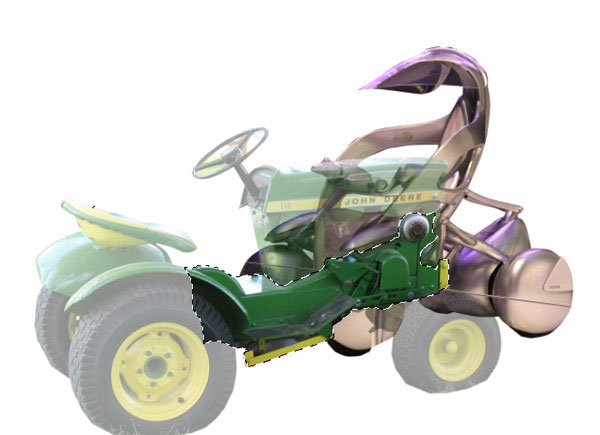
Open the ‘vehicle 2′ stock image. Place this image above the vehicle 1 layer in the layer panel. I named this layer vehicle 2. We will join this layer to the previous layer. The target here is we will take the main body of the vehicle 2 to be joined with the vehicle 1. Reduce the opacity of the vehicle 2 layer so that it will be transparent. This will help us deciding where the part of the main body going to fall to fit the body of the vehicle. Make sure to scale the size with free transform tool to find desired size. As we can see, the selected part of the vehicle 2 is the one will be joined to the base (vehicle 1).
Here is the result I created so far:
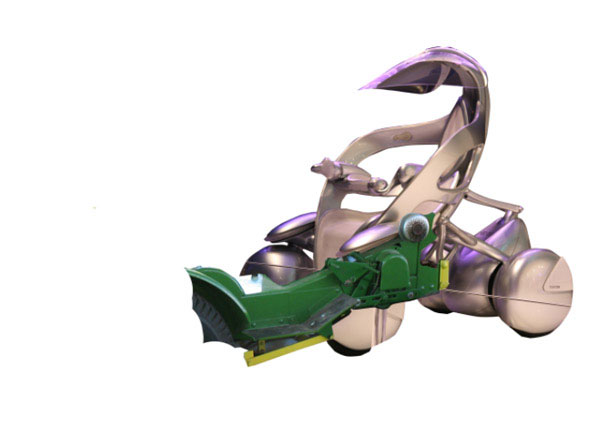
Proceed to clean some unneeded parts of the base (vehicle 1). We just simply add a layer mask to the vehicle 1 layer and then mask the parts to hide them. Here is the result so far:

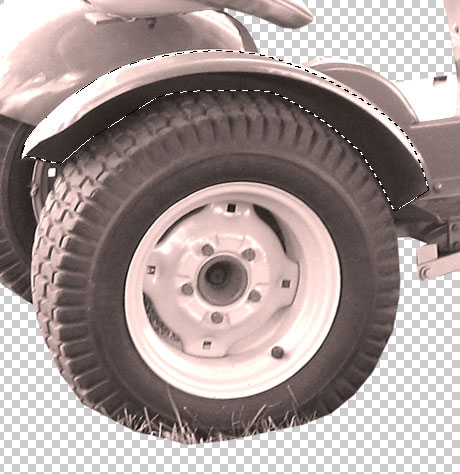
Next, we need to repair the rear wheel of the vehicle. We can do this purpose by cutting out the wheel of the original image and then put the cut out on the rear wheel. Here is the result I created:
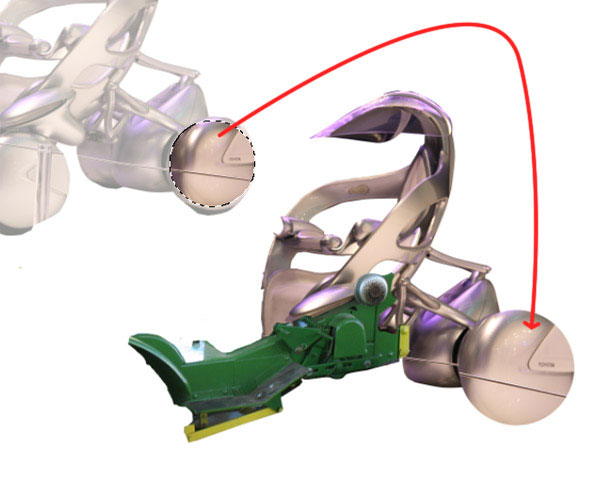
The purpose of adding the cut out of the wheel is not supposed to replace the wheel of the base (vehicle 1), however to create a mudguard for a wheel which is going to be added later in the next step. So that’s why, we should clean the lower part of the cut out. Here is the result I created to see what I meant :
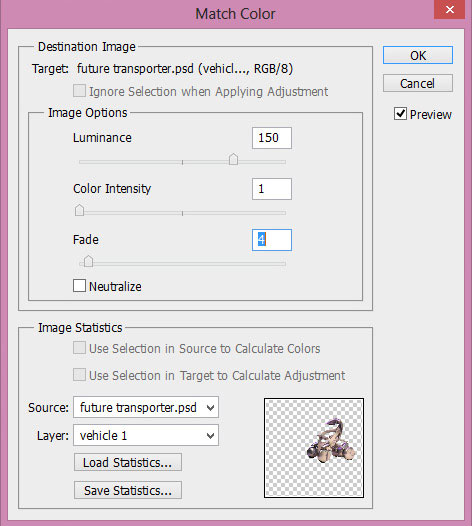
We will adjust the color of the vehicle 2 layer based on the vehicle 1. Select the vehicle 2 layer and then go to image > Adjustment > color match. Choose the vehicle 1 layer as the source to match. The screenshot below will show us the complete setting of the adjustment. Here is the explanation: The target of the layer to be matched is named vehicle 2 which is within the psd file named future transporter and the source is the image (named vehicle 1.jpg) with which the vehicle 2 layer will be matched:
Here is the result:

In this step we will add a driver. Open the model image and extract it. Add the model to the main canvas. Scale its size to fit the vehicle we are going to create.
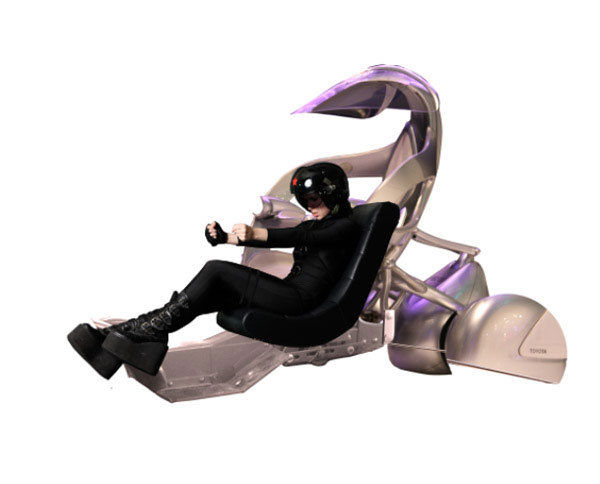
To make your composition more personal, why not get a friend to photograph you in the same position as this driver model. Think how impressed your Facebook friends would be if you used this outcome as your profile picture, with you behind the wheel!
Mask parts of the model so it will look as if it is sitting in the vehicle.
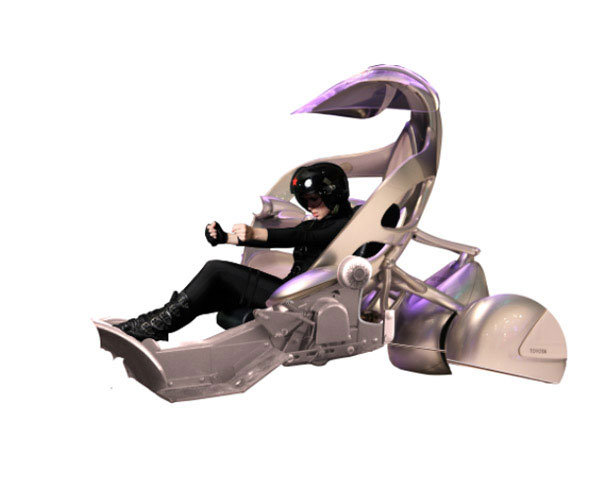
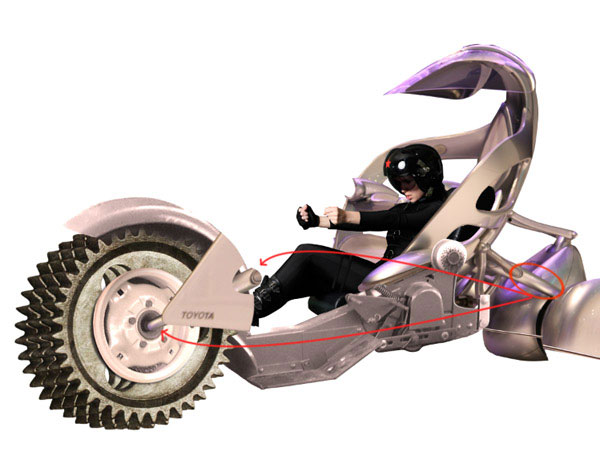
Proceed to finish the vehicle, now we will add the front wheel for it. We will use the gear image to create the wheel. Open the gear image. Scale its size and duplicate it two times. Join the duplicates and arrange them to create a wheel. Select all the gear layers and hit Ctrl+E to merger them. Place the gear in front of the vehicle.
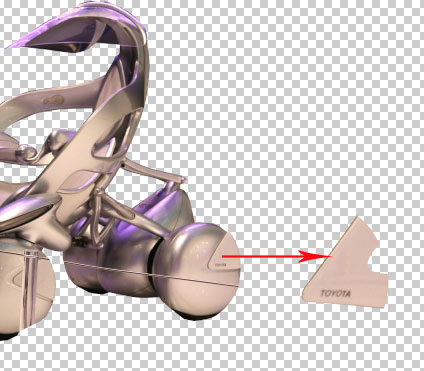
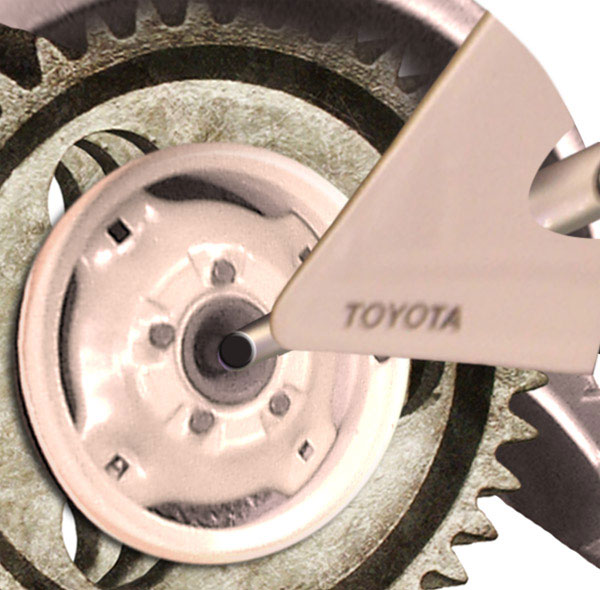
Next, cut out the disk from the wheel of the original vehicle 2 image.

Using the free transform tool, arrange and place the cut out disk on the wheel.

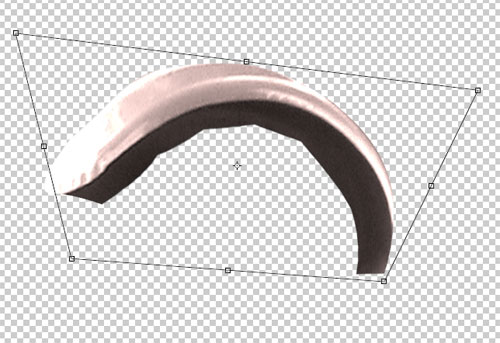
Cut out the mudguard of the vehicle 2, we will use this part to add a mudguard to the vehicle going to create.
We need to alter the shape of the cut out to fit the perspective of the vehicle, to do this purpose we use free transform tool. Take the free transform tool, and use the perspective and distort to alter its shape:
Add the cut out to the vehicle. Mask unneeded part of it. Here is the result so far:
Add more part of the front wheel. I cut out the mudguard of the vehicle 1 to be added to the vehicle
Here is the result I created:

Next, we will add front shock absorber to the vehicle. We will use the steel frame from the original vehicle 1 to do this purpose. Cut out the frame and scale the size of it. Place the cut out beside the wheel.
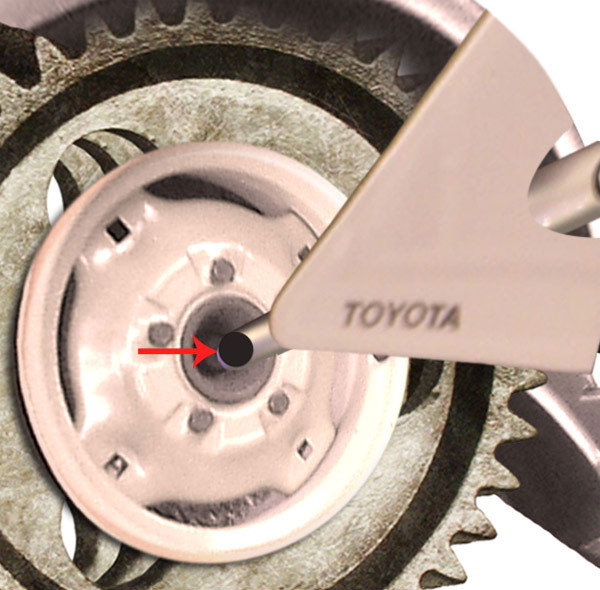
Create a new layer (Ctrl+Shift+N). On this new layer, create a black circle.
With the new layer still selected, go to layer > layer styles > bevel and emboss. Set the setting as seen below:
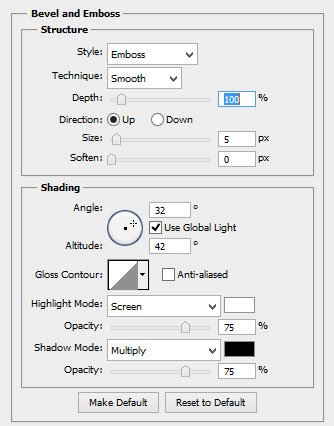
Here is the result:
Now activate custom shape tool and select one of the shape. With dark grey color create the shape on the circle previously made:

Here is the result I created so far, after adding some shadow to my wheel structure:

With parts taken from the two vehicle stock images, I added a stir and some steel frames around the stir as we can see the result here:

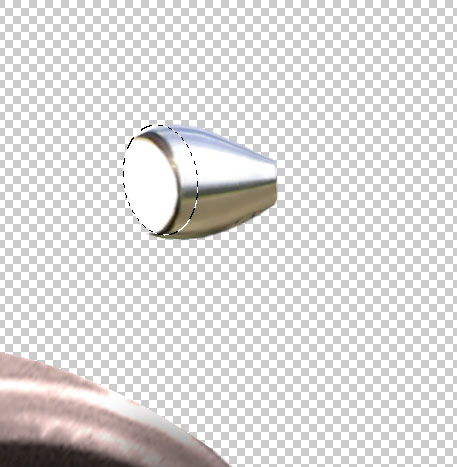
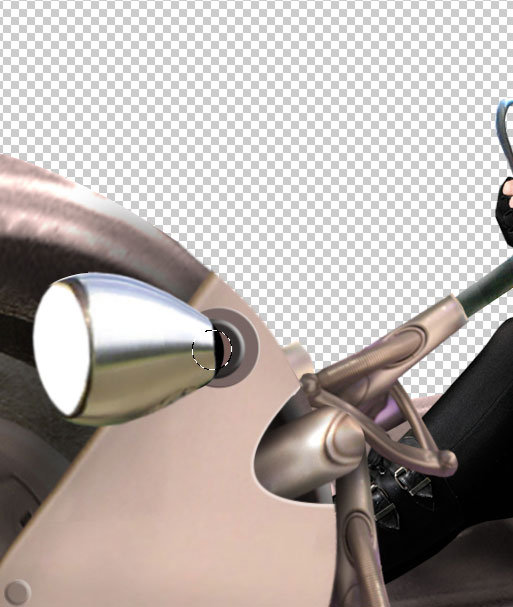
In this step on we will add a lamp for the vehicle. Open the stock image and cut out the metal tube on the image.

Add the cut out to the canvas. Take the free transform tool and activate warp tool. Alter the shape of the metal tube by warping it as seen in the screenshot below:

Now crate a new layer below the tube layer. On this new layer create a round selection and fill (shift+F5) the selection with white. I named this layer white:
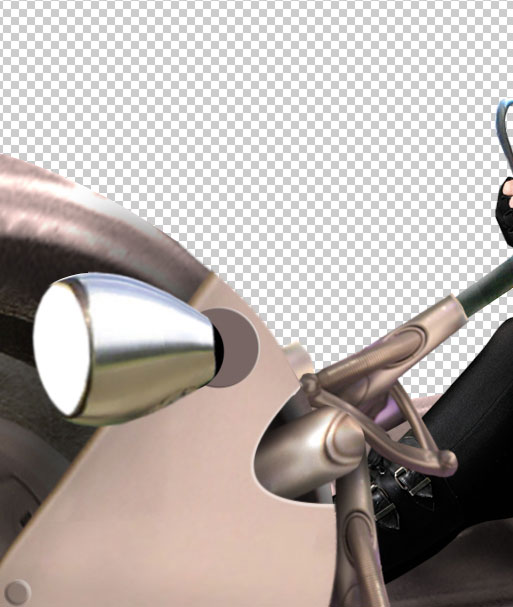
Then, select the tube and the white layer and hit Ctrl+E to merge them. I named this layer lamp. Add the lamp to the vehicle. Place it beside the front wheel.

Now we will paint the holder of the lamp. Create a new layer below the lamp layer. Create a round selection and fill the selection with color of #776663.

With the new layer selected, go to layer > layer style > bevel and emboss. Set the setting below:

Here is the result:
Create again a new layer above the previous new layer, create a smaller round selection on it. Fill the selection with color of #322e2e.
Give this layer bevel and emboss style:

Here is the result:

Create another new layer and a smaller round selection than those previously made. Fill this selection with #765c57
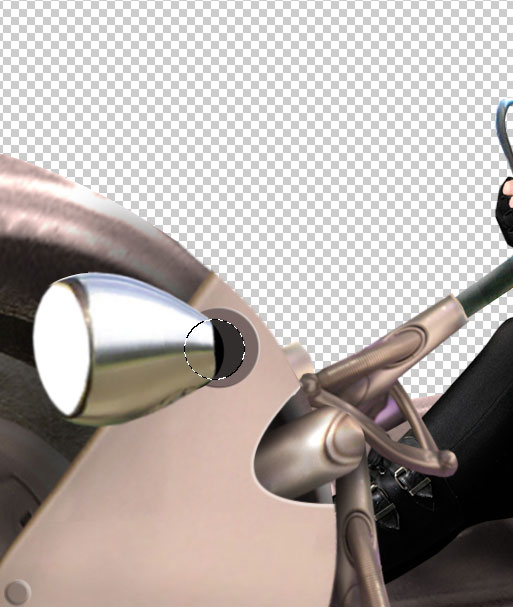
Then, create another new layer below the lamp and the three round layers. Take the brush tool and choose a very soft round brush. Set the opacity of the brush to 10-20%. With black color, paint the shadow of the lamp and the holder. We can use the combination of burn and dodge tool to define the shadow and highlight of the lamp and its holder. Here is the result I created:

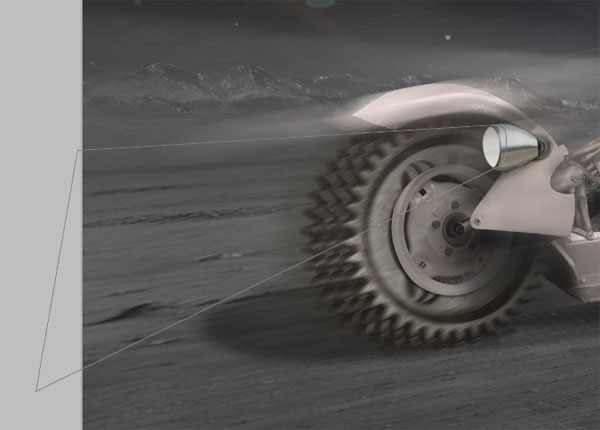
Finally, we will give the effect of motion to the wheels of the vehicle. Select the wheel layers and go to filter > blur > motion blur :
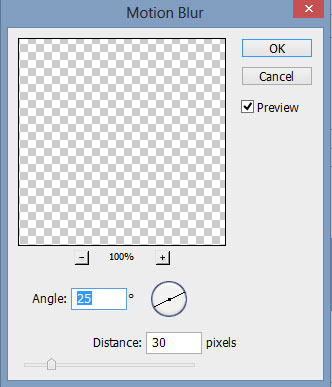
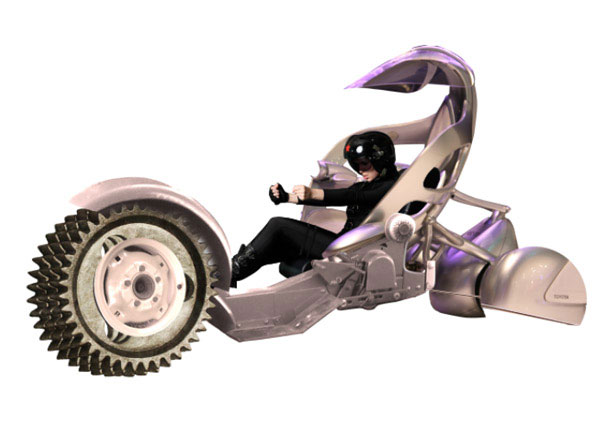
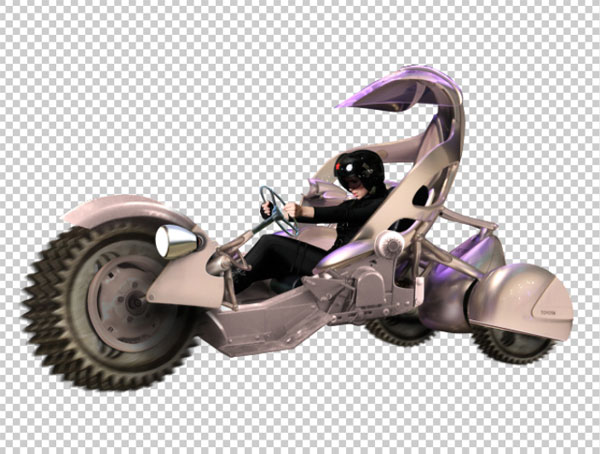
There we go, we have finished the vehicle:
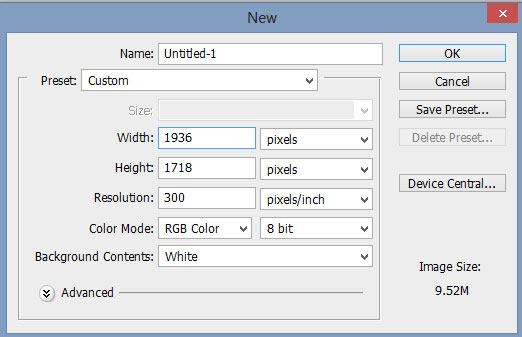
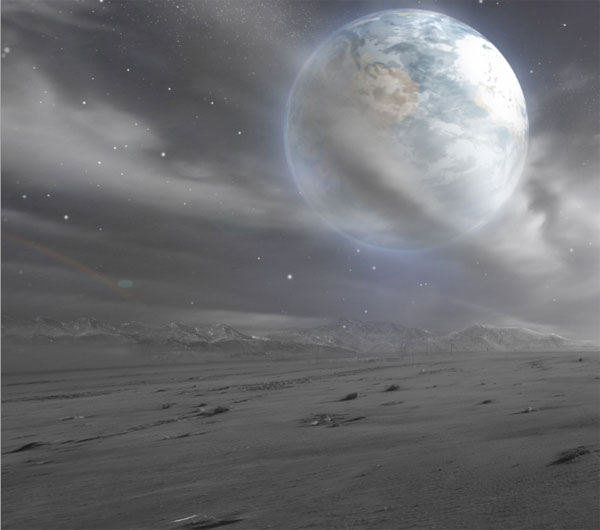
In this step we will a background on which the vehicle and the driver will be displayed. Start by creating a new canvas with size of 1936 pxl wide and 1718 pxl high.
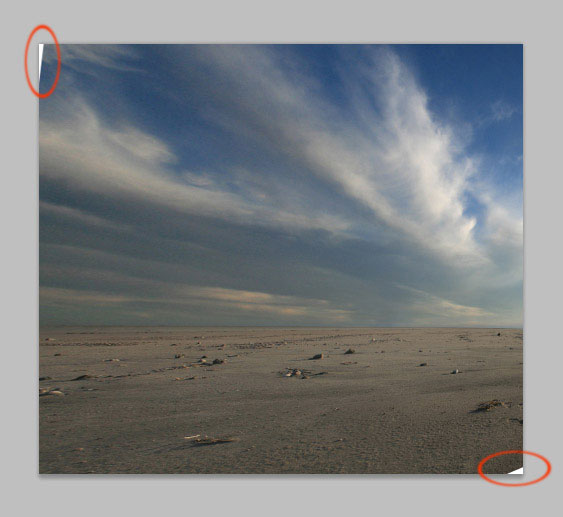
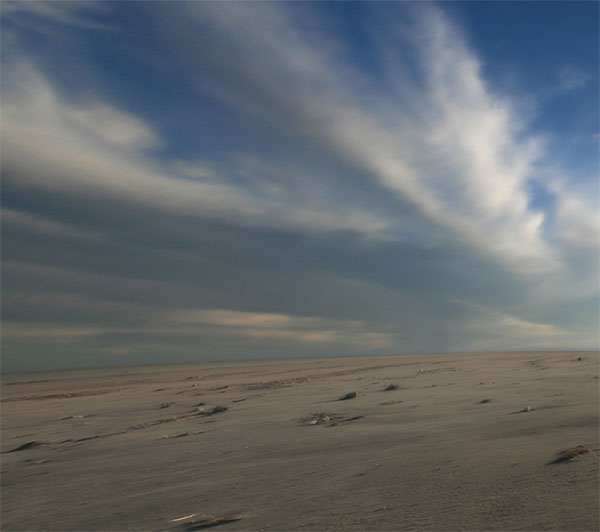
Open the desert stock image in the document. Convert this layer into a smart object by going to layer > smart objects > convert to smart object.

We need to alter the perspective of the background. To do this purpose, take the free transform tool and use the perspective and distort to get the result as below. Technically the shape of the background will be look like the one in the screenshot after being applied the tool:

Here is the result. We can see some blank spaces (marked in red) in the document after the transforming.
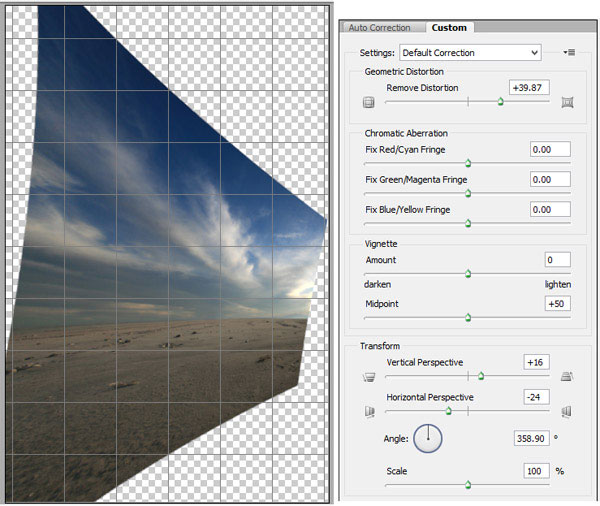
To fix the blanks, hit Shift+Ctrl+R to activate lens correction. Choose custom and set the setting as below:
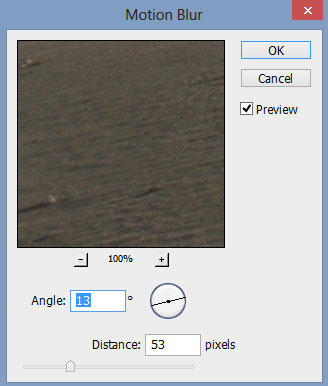
Then, go to filter > blur > motion blur:
Here is the result we should create after being given the two filters. Activate the mask filter thumbnail and mask some part of the cloud:
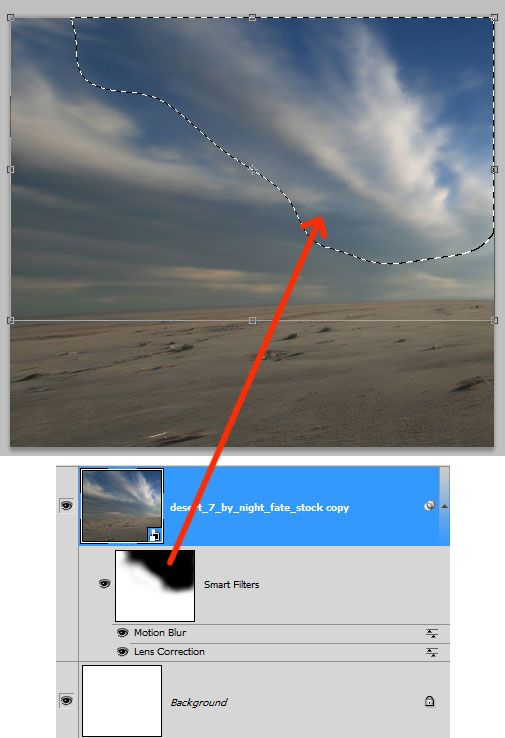
Here is the result should look like:
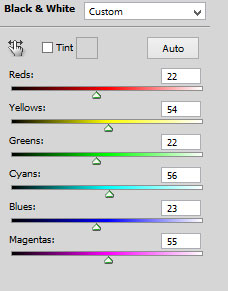
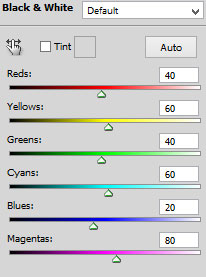
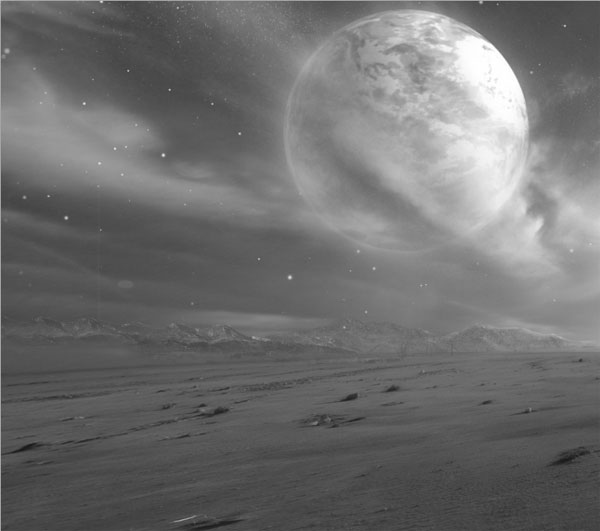
Now give the background color adjustment. Go to layer > new adjustment layer > black and white:
Here is the result:

Open the other stock image in the canvas.

Mask the sky and ground of the image. We just need the rock to be added to the scene. Set this layer to normal at 52% opacity:

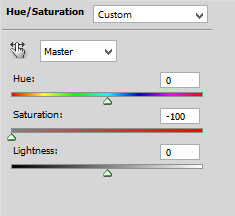
Give this layer a color adjustment layer: hue and saturation. Make sure to create a clipping mask to this hue and saturation layer:
Here is the result:

Create a new layer above the hue and saturation layer. Make sure to give this new layer a clipping mask. Take a very soft round brush at opacity of about 5-10%. With white color, paint the highlight on the top of the rock.

Duplicate the rock layer and move the duplicate to the left to fill the blank space and make a better composition. Set this duplicate to normal blending at 48% opacity.

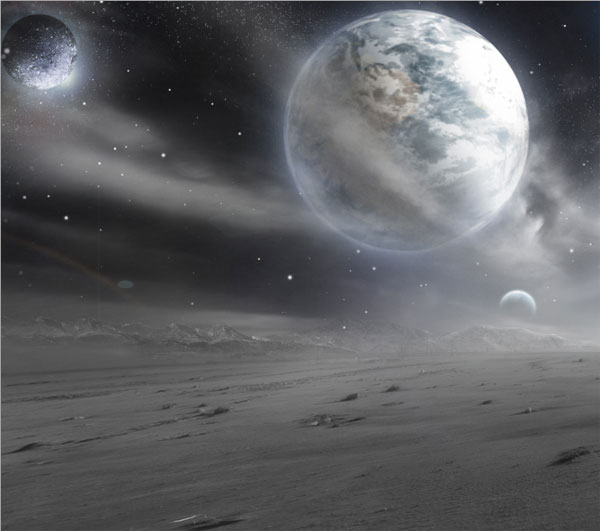
Now we will add some planets to the scene. Firstly, open the planet stock image. Scale its size and position it as the one in the screenshot.
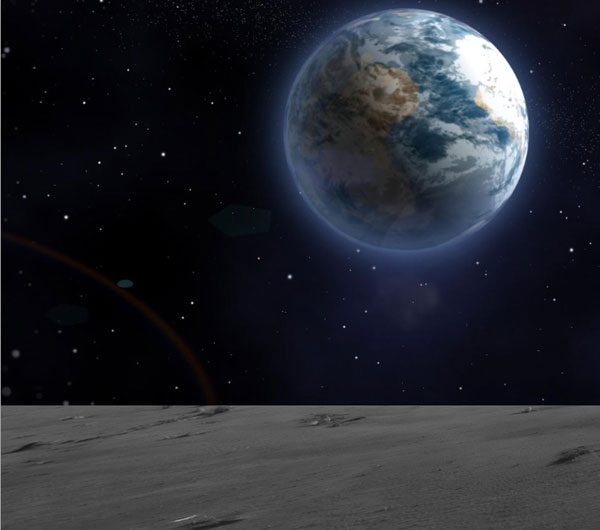
Set the layer to screen blending and mask some parts on the cloud to reveal it more vivid.
Then, give this planet layer black and white adjustment layer:
Here is the result:
Finally, duplicate the planet layer. Set the original to screen blending mode at 100% opacity and the duplicate to soft light blending at 100% opacity to get the result like this:

Open the other planet stock on the canvas. Scale its size and position it on the upper left corner:
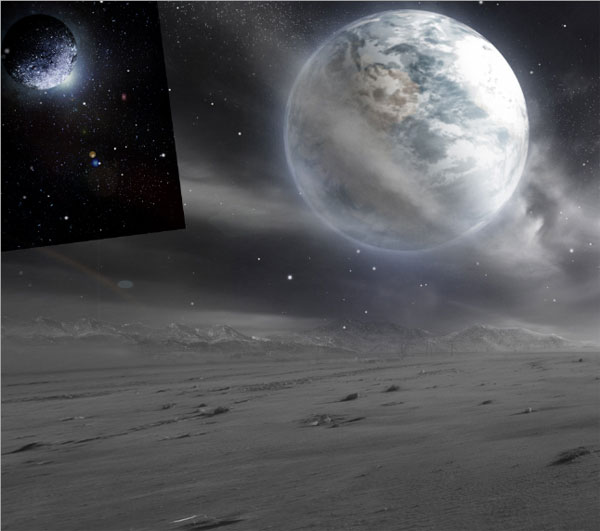
Set the blending to screen at 100% opacity. Mask unneeded parts of the image.
Choose one of the cosmos images and add the image to the scene to add another planet. Scale its size and set it to screen blending at 100% opacity. Mask the unneeded parts of the image so let the smaller planet is being revealed.

Create a new layer above all the other layers. Take a very soft round brush set at 5-10% opacity. On this new layer, paint soft white color around the left rock and ground:
Now add the driver to the main scene. Convert this driver layer into a smart object. Scale its size and position it in the center.
Give this driver layer a hue and saturation adjustment layer with a clipping mask.

Here is the result:

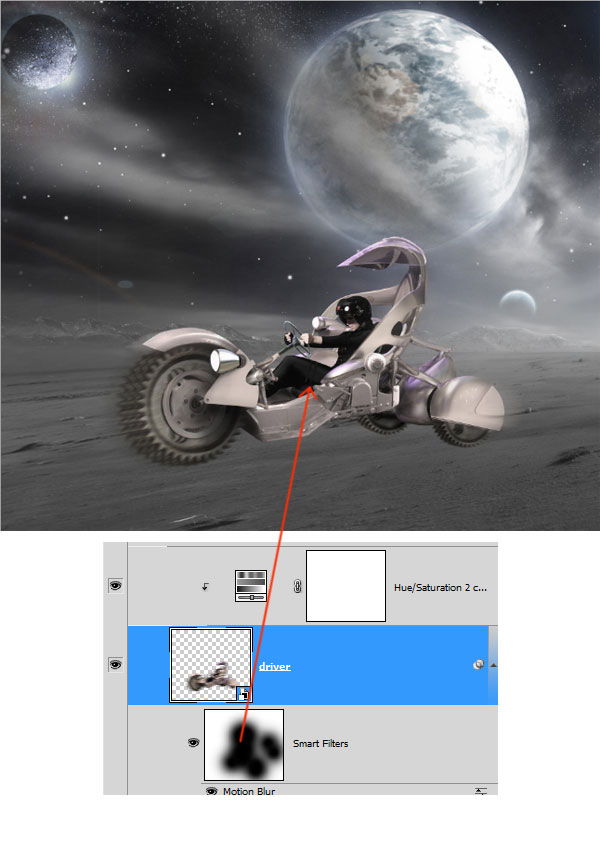
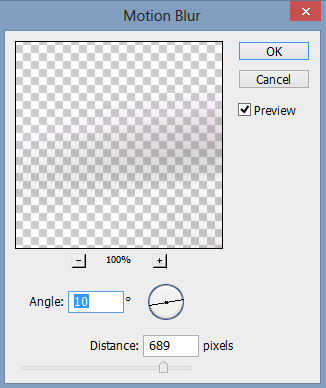
With the driver smart object layer still selected, go to filter > blur > motion blur.

Then, after being given the blur, activate the mask filter thumbnail. Mask some parts on the vehicle and the driver to hide the effect of the blur filter.
Duplicate the driver smart layer and the hue/saturation adjustment layer. Make sure to keep the clipping mask for the hue/adjustment layer. Activate the mask filter thumbnail and mask some parts of the driver. Set the blending of this layer to normal at 86% opacity.
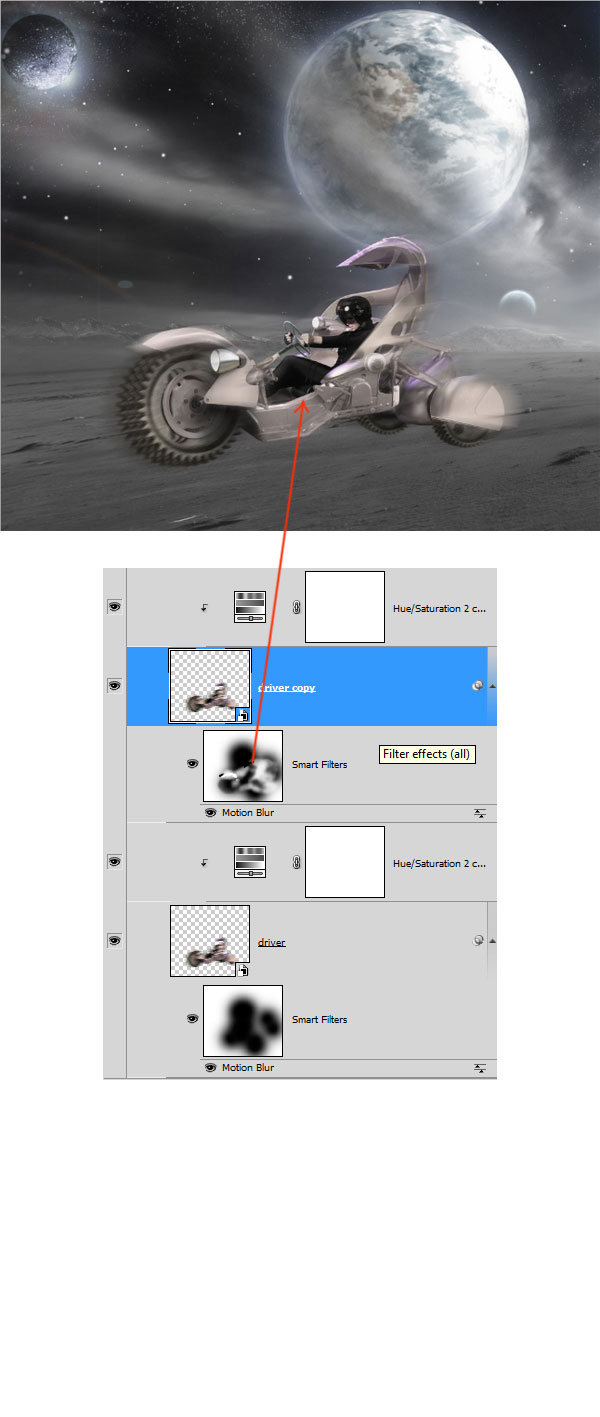
Now duplicate the second duplicate of the driver layer. Give this duplicate the hue/saturation layer with the same value as the previous ones. What we have to do next is alter the value of the blur filter for this duplicate as shown in the screenshot:
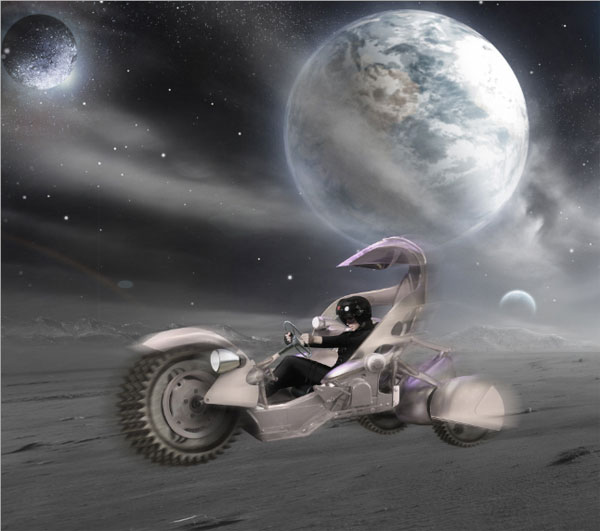
Finally, set this duplicate to normal blending at 66% opacity. Here is the result:
We will add some tracks where the vehicle is passing through. Create a new layer. Take the brush tool. Choose the chalk 44 brush set to size of 80 pixel in the brush picker. Activate the brush preset and set the brush to the setting as shown:

Create a new layer. On this new layer create straight path with the pen tool. Right click on the document to show up the path command options box. When the box shows up, choose stroke path. Make sure to set the color of the foreground color to #555d5a.

Here is the result:

Then, duplicate the track. Set the original track to screen blending mode at 100% opacity and the copy to overlay at 98% opacity.

Do the same to create tracks for the other wheel courses. Here is the result I created so far:

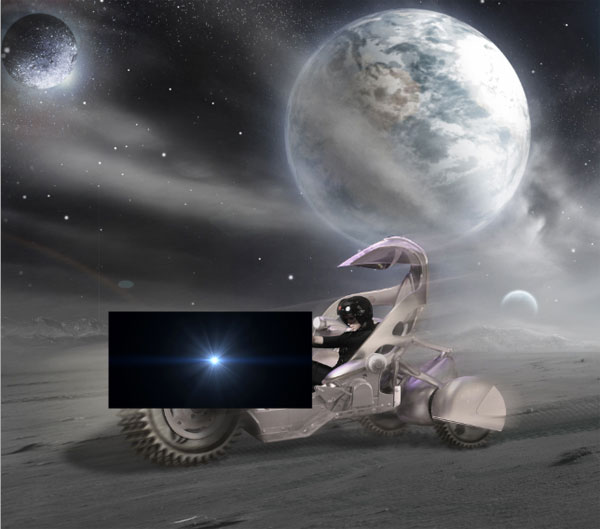
Now we will add some flash light for the front light. Create a new layer on which we will create the flash light. Take the pen tool and create path for the flash.
Next, make the path into a selection. Activate the gradient tool. Choose liniar gradient. Create a yellow to transparent gradient in the gradient editor. Finally, fill the selection with the gradient by clicking the gradient tool on the lamp, hold and drag to the direction where the flash light should falls:

With the gradient layer still selected, go to filter > blur > Gaussian blur:

Duplicate the gradient layer. Select the duplicate and fill it with white color:

Finally, set the original layer (I named it as yellow) to normal at 51% opacity and 26% fill. Then, set the duplicate layer (I named it as white) to normal at 53 % opacity.

Next we will add flare to the lamp. Open the flare image and cut out one of the flares.

Add the flare to the scene. Position and scale it right on the lamp.
Set the flare layer to screen blending at 100% opacity. Mask some unneeded part of it.

Alter the color to the flare to yellowish tone by giving it a new hue/saturation layer. Make sure to give this layer a clipping mask.

Finally, duplicate the flare layer and place the duplicate to light next to the driver. Set this duplicate layer to screen at 100% opacity.

Here is the result I created so far:

In this step on, we will adjust the overall color of the scene. Start by adding gradient map adjustment layer. Set the gradient as shown in the screenshot:

Here is the result should be:

Mask the gradient on the center of the scene:

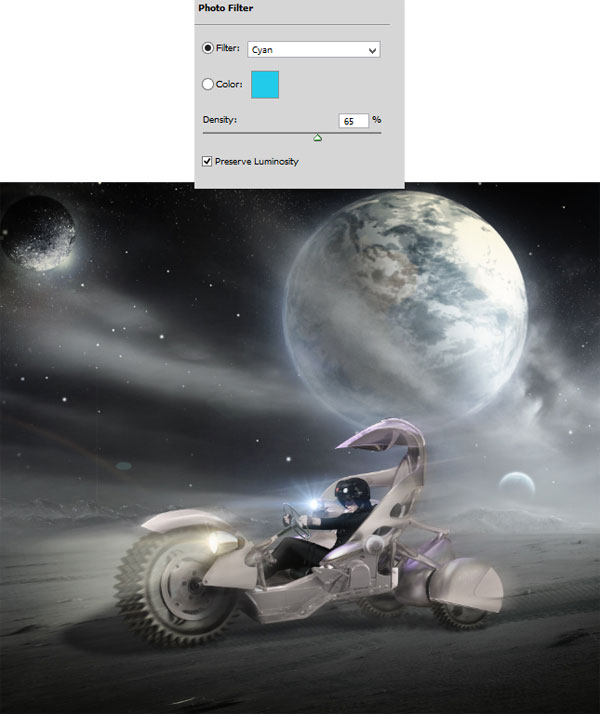
Next, give the other adjustment layer. This time we will give photo filter adjustment layer as shown. Set this layer to normal blending at 11% opacity.
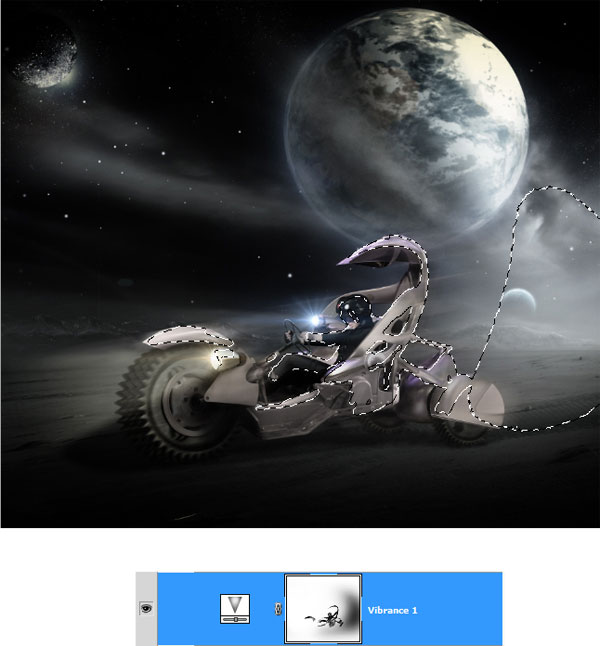
Proceed to give the scene vibrance adjustment layer:

Mask some parts of the vehicle and areas around the rock. Make sure to use a very soft round brush set to 10-15% opacity to mask the parts
After that, duplicate the vibrance layer. Set the duplicate to normal at 45% opacity to get the result as shown below:

Next give another layer adjustment to the scene. This time we will add color balance:

Here is the result after the color balance layer is set to normal blending at 45% opacity:
Finally, add the last adjustment layer: curves

Mask the curves layer on some areas around the foreground and near the biggest planet as shown in selection :

Finally here is the result:

While we are still selecting the top most visible layer in the document (curves layer), hit Shift+Ctrl+Alt+E to stamp all the visible layers. This will create a new single layer above all the other layer. I named this layer stamp. Select the stamp layer and go to image > apply image. Set the setting as shown below:
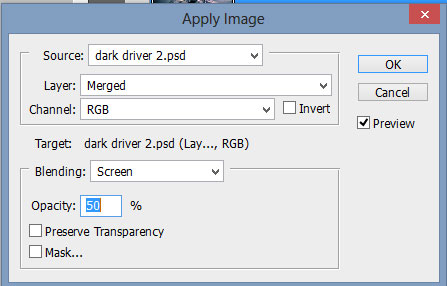
The result should look like the one in the screenshot. Then convert this stamp layer into a smart object.
I decided to sharpen the image, to do this purpose, go to filter > others > high pass:

Finally, edit the blending option of the high pass smart filter to overlay at 100% opacity:

Here is the result:
Awesome job making it this far! You should be proud of what you’ve created. Show it off to your friends and colleagues and get some feedback.
You can also comment here with your version, or any questions you had about the techniques used. We love to see what you guys create and we’re always here to give helpful feedback and tips to help you to improve.
The source files for this tutorial are available to our FanExtra members community. If you want to access the source files for this tutorial (and all of our tutorials + thousands of other resources) then sign up here.
If you’re already a FanExtra member then you can login here to access the source files.

I am a self-taught photoshop hobbyist from Bali, Indonesia. Photo manipulation is something I am keen on most and a music lover as well. Meet me here http://wprabu.blogspot.com/


Do you know the basic tools in Photoshop but feel that your work is still looking average? Join our creative community at FanExtra and get the direction you need to take your work to the next level.


Awesome tutorial. Kudos for sharing such a wonderful tutorial for free. Though I may not try to do some photo manipulation like this but I loved it a lot.
Thanks again!
Thanks a lot Sourabh! I’m really glad that you enjoyed this tutorial. We have hundreds more free tutorials available, so you should take a look around the site.
I had a look at your photography work and it’s really interesting. Even if you don’t produce anything as in depth or fantasy based as this lesson, photo manipulation could definitely help you to make your work more visually spectacular.
Very nice and complete turotial, well explained and step by step. This is a good way yo make people to try for themselves.
Thanks Daniel, I’m so glad you enjoyed this tutorial. If you manage to replicate the outcome I would love to see your version in order to give you some pointers.
This was definitely a very fun tutorial! The outcome looks fantastic and you really made a great use of all of your stock images which I could tell were the result of some careful planning. There are also some very good techniques here like the Match Color method that I haven’t seen before. Very nice!
Thanks for commenting Eric! I never think to use the match color technique either, but it’s a really effective blending method.
really annoying with these tutorials.
click on background file and its missing.
if you upload a tutorial then upload the files in a zip format so they don,t go missing.
Hey Brit. Thanks for pointing that out! I’ll ask Dek (the author) to locate the image and hopefully will be able to repost it soon. The original image definitely was working fine, but it looks like the creator has removed it for some reason.
Unfortunately we’re unable to host images ourselves, as this is technically redistribution, which isn’t allowed. We have to link to resources used in our tutorials via other websites.
hiya tom
ty for reply.
so many tuts have missing elements in them and i understand about redistribution of others work ect.
i managed to get it by saving the image from this page in your tutorial.(should of thought of this in first place sorry dull momment)
massive biggie for the tut excellant work and explanation.
very easy to follow,(which alot are not).
ty.
Hi everyone, really sorry for this annoyance because of the missing stock. I have my personal permission in using the stock from its owner, Julia Star aka night fate stock. So this is not my own personal image, however we can get the image here http://ge.tt/8u3ELat/v/0?c
Please credit to Julia Star aka night fate stock if you use this stock.http://night-fate-stock.deviantart.com/
Thanks for following this tutorial……
Hi Sir,
For your creativity hats off sir… Superb….. I thank for above tutorial I really enjoyed & I will try to make like dat…Awesome manipulating images to make a one lovely image…
Man you are the best I enjoyed alot in this and every tutorials thanks alot Sir Wish I could be like you !!!! You are Genius
Some effect and adjustement layers didn’t do whatit was supposed to do anyway I finaly get that & I’m proud of it.
Thank’s 4 the TUT.