
 Members Area Tutorial: Photo Manipulate a Destructive Giant Gorilla Scene
 Create a Google Docs Icon
 Creating a ‘Swan Bride’ – Fun With Paths!
Have every post delivered to your inbox and get access to hundreds of useful design freebies.
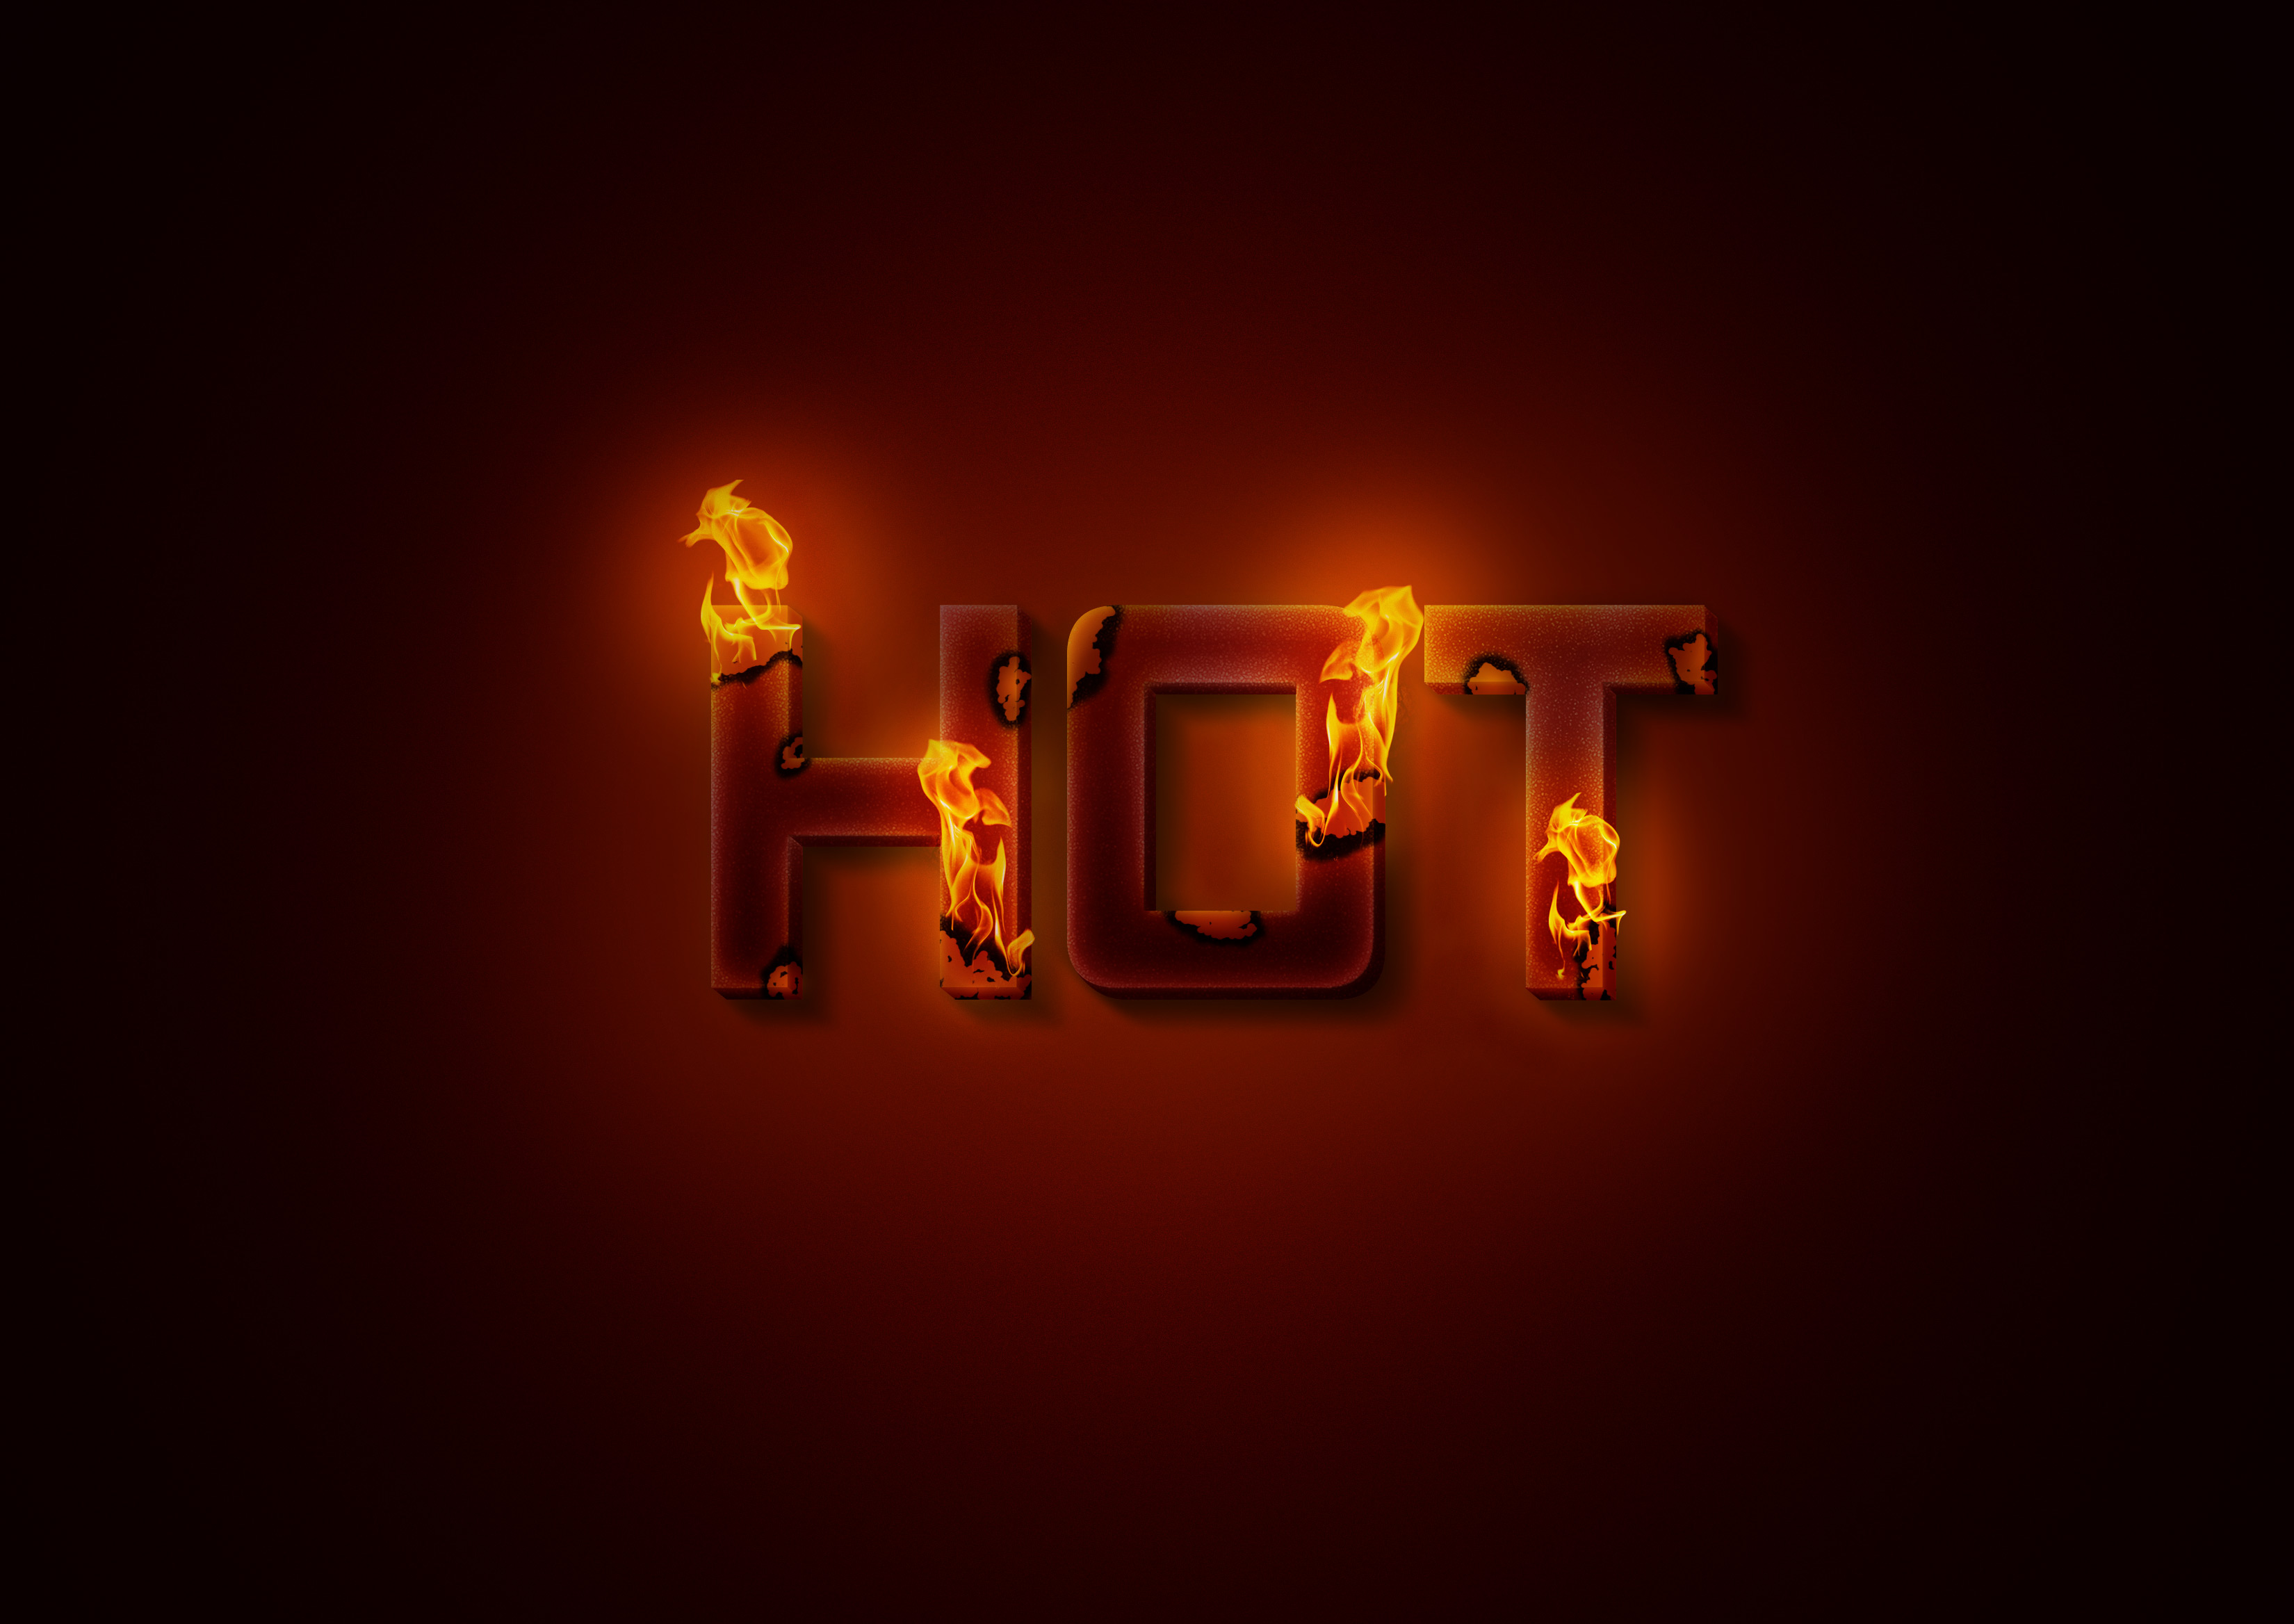
As Halloween approaches we bring you a hell-like burning text effect! Enjoy the tutorial!
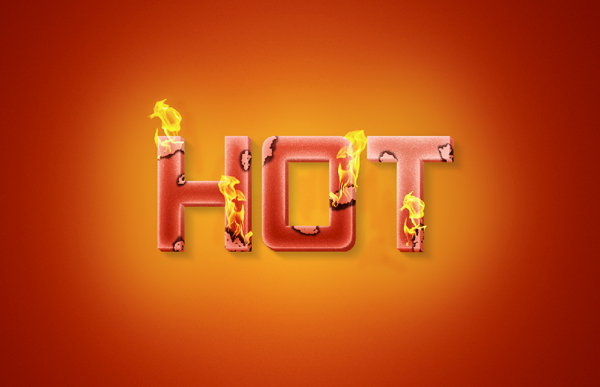
As always, this is the final image that we’ll be creating:

So let’s start with a new document of 3300 px width and 2336 px height at 300 resolutions. I created large document because I wanted to print it on A4 size.

Press U and select rectangle tool and create a rectangle of document size and apply gradient overlay with colors 890000 & ffb400. Now select transform tool and increase rectangle size from document size to 4515 px width and 3196px height.


Duplicate the rectangle and apply 10% transparency with normal mode. Your gradient will automatically transform and results will be like this.
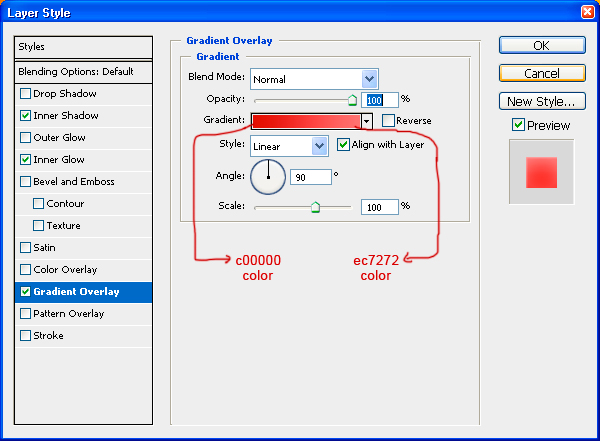
Now select type tool and write letter “H”. Font is your choice but I used here font Akashi of 180 pt weight. Go to the layer style option and reduce the Fill Opacity to zero in Advanced Blending. Now apply these layer styles.
Gradient overlay: color c00000 & ec7272
Inner glow: color fba8a8, opacity 76%, blending mode screen.
Inner shadow: color ffc7c7, 65% opacity and size 13px.


Now duplicate the letter H and name it emboss. Remove all layer style and fill opacity to 100%. Shift it slightly right and down to give it emboss look. Now ctrl + click on text layer “H” and press delete to remove unwanted area.

Ctrl + click emboss layer, right click and click on “Make Work Path”. Now select direct selection tool by pressing A and select anchor points. Adjust them and fill it with color d90000 to give it a real 3d look.

Now isolate all the faces of emboss layer like right face, bottom faces, and apply these layer style.


Apply layer style same as in step 5 here.

Now select the bottom of letter H and apply gradient overlay same as in step 5 with 90 degree angle.

Repeat step 3,4,5,6 & 7 in letter O and T. The result will look like this.

Merge all layers of text HOT and name it hot. Change its blending mode to overlay. Duplicate the HOT layer and change blending mode to darken name it HOT 1. Duplicate this HOT1 layer.

Ctrl + click HOT1 layer, select a soft brush of color black and size 100 px and paint the shadow of text considering the source of light on top left. Change its opacity to 10% and blending mode to multiply.

Now ctrl + click letter H, O, and T and save this selection to HOT and apply layer mask. Create new layer & name it shadow, load selection HOT and fill it with black color. Apply motion blur of -36 degree and decrease its opacity to 25% with multiply mode.

Copy HOT layer and change its blending mode to dissolve. Create a new Hue/Saturation adjustment layer with setting; Hue 6, Saturation 3, Lightness 0. Create clip mask by pressing alt + click on between the adjustment layer & HOT layer.

Duplicate HOT layer again and keep it on top go to Filter gallery choose Reticulation filter with these settings:
Density: 3
Foreground Level: 40
Background Level: 5
Change its blending mode to soft light. Name it R filter.

Looks good! Now select brush of 15 px size and 100% hardness, press F5 to access brush option and increase size jitter to 100% on Shape Dynamics. On the scattering option keep scatter 90%. Now click layer mask button bottom to layer pallet. Click on the layer mask, choose black color and hide the area where we’ll burn it.

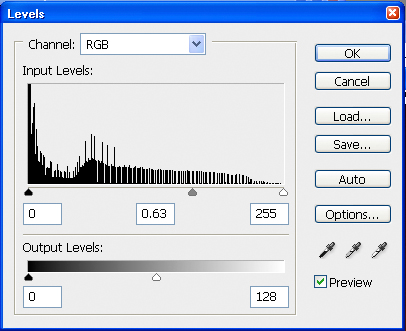
Create a level adjustment layer below R filter layer with these settings.

Click on layer mask, press ctrl + I. It will mask everything; now select a soft brush of size 20, color white, and opacity 70% and paint around hidden areas of R filter layer. Now ctrl + click on R filter layer and hide selected area. The result will look like this.

Add layer mask to HOT layer and hide the area outside burned texture. This will give a warmer feel to the text inside burning texture.

It’s time to add some fire on it. I used images from sxc.hu Drag images into document and change color mode to screen and duplicate image twice to get desired result.


We’re near to complete. Now it’s time to add some finishing. Create a new layer select gradient tool and use colors cb0b0b, f89d9d and f2acac. Add noise of 3px, monochromatic, distribution Gaussian. Keep color mode to multiply. Add layer mask and mask areas around text HOT by a smooth brush.

Create a level adjustment layer with these settings. Now we are facing a problem that is letter H & O is darker then T. To fix this problem add layer mask and hide area of H & O by painting soft 70% opacity brush.

Create curve adjustment layer with input 84 and output 100.

Now create another level adjustment layer with these settings and name it level 2.
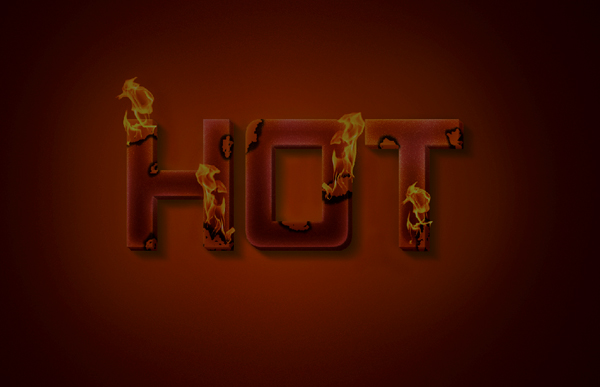
The result will look like this.
Nearly finished the whole effect but not looking very impressive right? Ok, apply layer mask to “level 2” adjustment layer, select large soft brush with color black and hide the area around fire. This will add life to the scene because we added fire’s light refracted on text and texture.
That’s all friends!
That’s the tutorial finished! I hope you’ve enjoyed it and learnt something useful. Click on the image below if you would like to view the full sized final image:
This text effect can be enhanced by adding further cracks and details. If you would like to learn how to do this, check out this text effect tutorial.

Narendra is a freelance graphic designer specializing in the fields of corporate identity (logo) design, print design, advertising and web designs. I'm currently living in India. I design because it's my passion and I love to do it. To know more about me please visit to my online portfolio.


Do you know the basic tools in Photoshop but feel that your work is still looking average? Join our creative community at FanExtra and get the direction you need to take your work to the next level.


Great tutorial Narendra. I love the final result!
What a brilliant tut! So well explained! love the outcome, looks great. Thanks for posting.
Thanks for commenting Bebop! I’m really glad that you enjoyed the tutorial, I love the outcome too .
.
nice tutorial, really fire HOT i enjoy tutorial
Nice effect given by narendra………….. good job……. i will try this effect……..keep it up!
Great tutorial dear Narendra. I love the final result!
thanx
Great post really like the style, looks like the font just came out of a blast furnace, I’ll try to implement the style in future projects.
Great post. Thank for share
Thanks for the comments everyone!
Vim: I hope that you’ll post your results here, I’d love to see them.
[...] Create a Unique Burning Text Effect « PSDFan Cool HOT Burning text tutorial – photoshop (tags: photoshop tutorial effect text howto photoshop-tutorials) [...]
great job u have done bro, keep it up, i saw ur old tutorials, it was great & this is super great,
Hi Narendra,
Highly appreciated your work…
Great job done by you same as before…Keep it up….
WOw i’ve been wondering abt this thanx!!!
Great!!!^^
Just Awesome Tutorial..
Keep it Up Narendra ..
this is really an awesome tutorial!
[...] Create a Unique Burning Text Effect [...]
Sorry for taking some time to look at this but I must say ….wow. WOW. How can I miss this! This is a well worth tutorial for everyone to get their hands on experience. Thank you for sharing this my friend!
Sick effect! I created a similar effect using a few different steps on photoshop.kingtutz.com
Preston,
Nice website with few great tutorial, just bookmarked.
very nice!
hey man great job
thanx 4 share the great tutorial
Awesome tutorial to learn. Very easy and well defined . thanks for sharing this nice post.
Great tutorial thanks for sharing. A lot of burning text effects look bad but this actually manages to look cool!
Interesting…. Thanks
THANKS FOR THIS TUTORIAL
VERY GOOD
….!!!!
i stuck at STEP 4, becouse how i can delete emboss layer (so only RASTER) and how make from it Path?? I cant, becouse i dont have that option (becaouse of raster?). I am using CS4.
Ajvngou,
You needn’t delete the whole emboss layer but the area behind the layer “H”. The motive is to add 3D look to the text so here no need the area behind layer H. So just click layer “emboss” and press ctrl + click on the layer “H”. Then you’ll be able to select the area coming behind layer H which we need to delete.
Now just select layer “emboss” and ctrl + click layer “emboss”. Then you just need to convert selection into a work path which you can do with path layer. Still if you feel problem then just go for path tutorials to know how to make path from selection.
Man, thank god u mentioned: “Still if you feel problem then just go for path tutorials to know how to make path from selection.” that was problem. I looked here: “http://www.layersmagazine.com/make-a-path-from-selection.html” and i got it. Thanks.
P.S. next time put this steps in tutorial .)
awesome tutorial. I am from Indonesia say thanks for your posting
this is the best Burning Text Effect i have seen for a long time. Usually the burning effect is so ugly that you are happy to see it burn .
.
Can you provide the Video tutorial for that Please ?
Sorry dude, at the moment I don’t have video tutorial but I’ll think on it and will work whenever get time. Thanks for appreciation to all.
VERY GOOD TUTORIAL
nice hot thanks for share.
cool
Horrible tutorial, u need to be a level 10 in photoshop to follow this one along!
davit,
No problem dear, you can ask me whatever problem you face while following this tutorial. By the way thanks for your view. I would be happy to help you.
I like the effect. It’s so real. thanks Narendra for the tutorial.
wow nice tut..^_^ oh its so hot and im burning…. love this tut narendra thanks
the effect was great and the result looks like real..^_^ whew
Awesome tutorial man
I like this effect very much, but tutorial is like hangover- there are something, but theres also something missing, so you don’t have complete picture, because lot of details are missing. Like when you want to create work path of selection you have to first select Marquee Tool and then you can create work path of selection. Yea, if you don’t have resterized layer, then you can do like you say in tutorial, but you can’t delete wanted area if layer isn’t resterized.
So if you arent advance user, level 10 in photoshop (like some one comment before), you probably wont get desired effect.
Useless for photoshop everryday user.
Good for photoshop advance user.
hi… i try this tut but i got 50% to 70% only got like that..
great job from u…
yes
it is precisely what I started thinking about as well
it is rather clear when you do think about that
Is this a repost or something, wasn’t this published two years ago, i don’t understand, please someone clarify me…
Hey Rajasegar, yes sometimes we republish some of our classic old posts, as the tutorials may have been missed by many of our newer readers. We generally only republish tutorials with techniques that are still applicable and relevant.
Awesome tutorial
Thanks so much for sharing it
Very nice burning text effect
You make Photoshop More Interesting
keep up good work
God bless you
You really make it seem really easy together with your presentation however I to find this topic to be really something that I think I might by no means understand. It seems too complicated and extremely wide for me. I am looking forward for your next submit, I’ll attempt to get the cling of it!
Dear Narendra.
Let me tell you it’s an excellent finish but not a great tuto, as we have seen many people comment that it is good, the best, but if put to make sure that does not advance much ..!
My problem is in paragraph 15, I have come to 14 which is this: http://fotos.subefotos.com/8029145b30f9ed3173b581d76b97ae32o.jpg is a little different than your point, but I go there ..!
I would like you to help me with the point 15 to be a little more specific and detailed in the movements you do …!! And that that level adjustment layer obscures the whole picture me with the values ??that I’m there, here’s a sample: http://fotos.subefotos.com/14233476d118db20fd34cfa6ab32a6cdo.jpg failed to get the final effect of point 15 those leftovers go black but I follow what it says about 15 and would be very nice to receive direct assistance from who made the effect and the Institute ..!
Thank you in advance the cooperation lent me, and if necessary I’ll leave my email: anthony_dagc@hotmail.com
Greetings.
hi…i cant delete the part of emboss layer which is behind the letter H … without rasterizing it … if i rasterize i cant create a work path… what shall i do … please help … thanks
like this one
hottt
Its really hot tutorial. Excellent tutorial to give burning effect to any text.
Hello! Thanx for the tutorial! Can anybody help me with this step: “Ctrl + click emboss layer, right click and click on “Make Work Path”. Now select direct selection tool by pressing A and select anchor points. Adjust them and fill it with color d90000 to give it a real 3d look.” Please shine a light on how, god damn it, i can properly “adjust” anchor points! Thanks, again:)
Step 14 has me stumped! Something is missing here. I cannot get anything but a pink colored brush stroke. What layer am I setting the mask for, and what mode should it be in? The brush should be black, right? Should I not get the lightening effect I see in your example?
i think your tutorials is good bt there are few problem when someone fallow this… if you show layer in each screen than it should be more easy & problem in
step 4 need to rasterize layer..any way thank you and very nice…thx men
this looks really awesome! however i can’t seem to find the same images in sxc.hu
can anyone explain me the step 5? i just didn’t get it
Doesn’t really work well. Few steps are missing, if you have an understanding of PS you might be able to fill in the blanks. Not well written.
Awesome… Great job. I like your tutorials! Very helpful.