
Have every post delivered to your inbox and get access to hundreds of useful design freebies.
Today you’ll learn how to create a fantasy floating island scene using various photo manipulation techniques. As well as creating a beautiful landscape, you’ll learn how to construct a detailed flying machine from scratch, using advanced drawing, texturing and lighting techniques.
Overall this tutorial will teach you important techniques for image blending, creating artificial lighting and how to use your creativity to manipulate every day objects and photos.
Let’s dive right in!
As always, this is the final image that we’ll be creating:

Start by creating a new document with size of 1312 pxl wide and 984 pxl high. Activate the gradient tool by hitting G on the keyboard and choose radial gradient. Set the foreground color to #eaf8f2 and #76ccf9 for the background. Start to fill the document with the radial gradient by clicking, holding and dragging the tool to the direction as shown in the red arrow:

Create a new layer above the background (Shift+Ctrl+N) and activate the radial gradient again. Open the gradient picker and choose neutral density gradient. Fill the new layer with the selected gradient. Set this new layer to normal blending option at 100% opacity. I named this layer black.

In this step we will add objects to the scene. Start by opening the tennis ball image and choose elliptical marquee tool to make selection on the ball
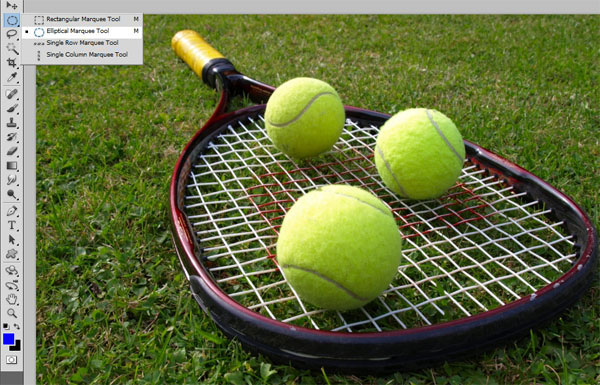
Proceed to select the ball with the tool by placing the cursor right in the center of the biggest ball and then, while pressing the Shift+Alt keys on the keyboard, click, hold and drag the tool to select the ball. After making selection, hit Ctrl+J to duplicate the selection into a new single layer.
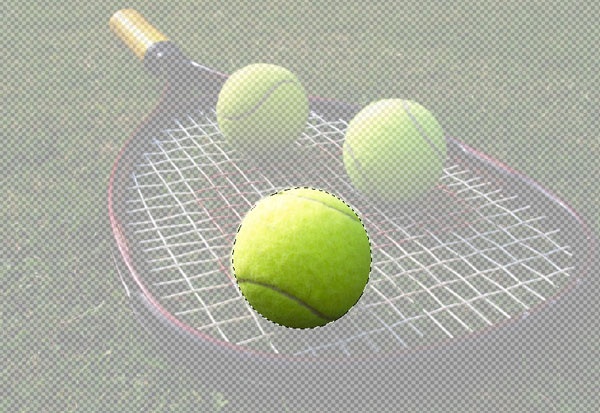
Next, add the ball to the main scene. With free transform tool, scale its size as needed.

Take the ellipse tool in the tool panel and set the color to #89a725. Start to create an ellipse shape in the center of the ball. I named this shape layer green surface.

Select the ball layer again and give this layer a layer mask by clicking the layer mask icon located in the bottom of the layer panel. Start to mask the upper part of the ball as highlighted in red to hide it.

Here is the result will look like so far:

Finally, select the green surface layer and give the layer a layer style by going to layer > layer styles > bevel and emboss. Set the style as shown in the screenshot:

Open another source image: bonsai. Then, go to selection > color range. Point the cursor on the background of the bonsai image and when the cursor changes into a eye drop icon, click the cursor to sample the color to be selected. Set the fuzziness to about 67 and click Ok. This will select the background of the bonsai image.

To clean the background, hit Del on the keyboard. The result should like this:

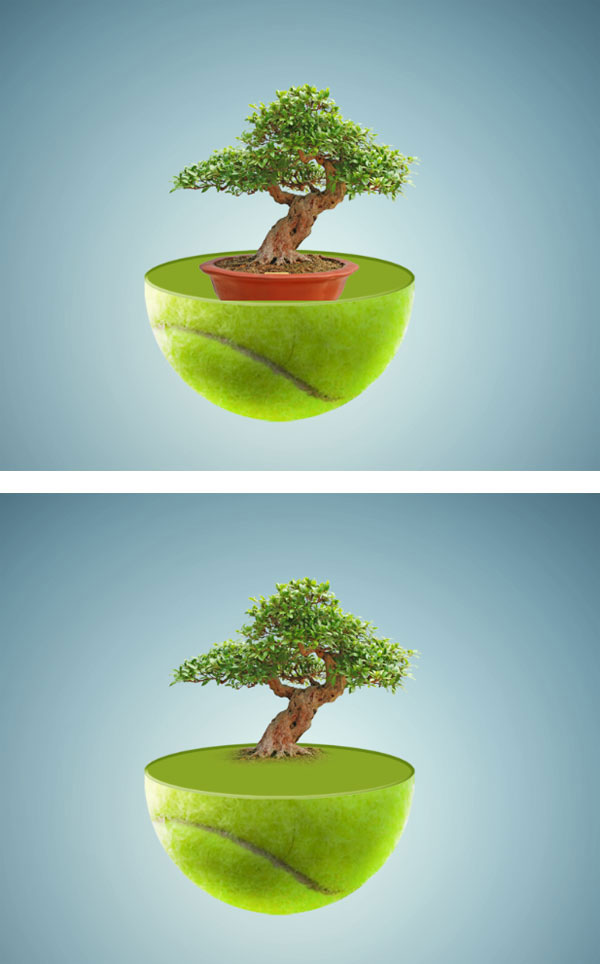
Add the extracted bonsai to the main scene. Make sure to place this bonsai layer above the green surface layer in the layer panel. Scale the size as desired and mask the unneeded part.
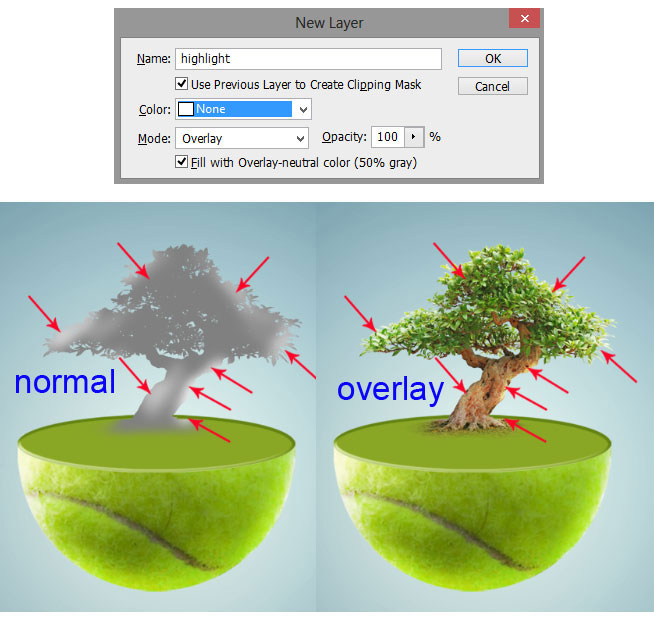
Next, create a new layer (Shift+Ctrl+N) above the bonsai layer. Make sure to give this new layer a clipping mask by checking the use previous layer to create clipping mask. Set its blending mode to overlay and fill it overlay neutral color (50% gray). Finally, on this new layer, paint soft white color to some areas on the bonsai tree as pointed by red arrows. This will give the tree some highlight. The screenshot below shows us the different result of this layer set to the normal and the overlay blending.
Now duplicate the ball layer as many as needed. Vary the sizes of the duplicates as desired and place them in the positions we like. Set them to normal blending at opacity varied to 30 and 60%.

Select all the ball layers and the tree layer. Hit Ctrl+G to group them in a group layer. I named this group planets. Finally, set this group to normal blending at 60% opacity. The result should like this:

From this step on, we will create a custom craft to be added to the scene. I used one of the dirigibles brush as the reference of the craft to be created.

This is what we should do: firstly, create another new document with size of 1500 pxl wide and 2100 pxl high. On this document, create some new layers on which we will use them as layers for the parts of the craft like body, wings, funnel, carrier, crosses, wing frames and ropes

Start by creating the body. Take the pen tool and create the path of the body shape. When the path is done, right click on it to show path command options. Choose fill path. Use dark gray color to fill the path.

With the pen tool, create the other parts of the craft like the wing and funnel. Do this on different separated layers.

Next activate custom shape tool and choose one of the shape to create the tail of the craft:
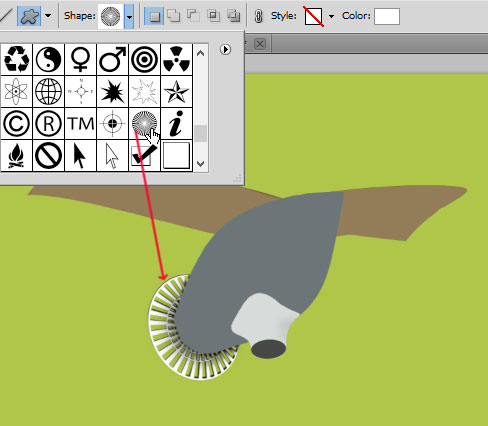
Create the other new layers, and on each layer, create the other parts of the craft like carrier, ropes, crosses and the frames of the wings.

After creating the frame, go to layer > layer styles > bevel and emboss as set here:

This is the frames should look like:

Proceed to create some tied on the frames. On a new layer above the frames layer, start by painting the shape of the tied with very dark gray color:

Take the dodge tool and set the tool as shown in the screenshot. With a very soft round brush, apply the dodge tool to the tied to give it some highlight.

After finishing the tied, duplicate it as many as needed. Activate the move tool (V) and while pressing the Alt key on the keyboard, click the tied and drag it to the position along the frames:

Do the same to complete the other tied on the other frames:

In this step we will create texture for the wing. We will simply use filter for this purpose. Create a new document with 1000 X 1000 pxl. Right click on the background layer and choose Layer From Background to change the background into layer 0. Make sure to set the color of the foreground to black and white for the background. Go to filter > render > fibers:

Go back to the craft document and select the wing layer. Give the wing some shadow:

Now add the texture to the craft document. Place this texture layer above the wing layer and give this texture layer a clipping mask. Set the layer to soft light blending:

Proceed to give some highlight to the ropes. Use the combination of dodge and burn tool to define the shape of the ropes:

Then, with the custom shape tool, paint some hooks for the ropes. Define the highlight and shadow on the hooks by applying dodge and burn tool.

Create a new layer behind the wing layers. On this new layer we will create frameworks. Take the pen tool and create a curve path. Right click on the path and when the path command option shows, choose stroke path and use brush as the tool of stroking with dark color.

With the same way, finish the framework as the one I created:

This is the craft I created so far:

To define the highlight and shadow on the body and carrier of the craft, I applied the dodge tool combined with burn tool. Here is the result:

I decided to give texture to the body and carrier. I used the mail box image to do this purpose. Extract the box from its background:

Add the box to the main scene. Take free transform tool. With the tool, alter the shape of the box to fit the perspective of the carrier:

Here is the carrier:

Use the box to create textures for the body and funnel of the craft:

Select the texture for the funnel, and go to layer > layer styles > bevel and emboss:

After adding the style, right click on the eye icon of the style in the layer panel. When the style command option shows, choose create layers. This will create new layers below the funnel layer:

Mask the two layers on the unneeded parts:

Here is the final result of the craft I created after painting some lines on the body and wings:

Add the craft to the main scene. Let the craft to normal blending at opacity about 40-50%.

Next we will add a ladder to the main scene. To do this purpose, paint the ladder with pen tool and use light gray for the color.

Then, start give some highlight and shadow to the ladder. Use dodge and burn tool for this purpose:

Here is the result I created:

Now we will add cloud to the main scene. Open the cloud image. Select the cloud by using the color range. Set the fuzziness to 100. When the cloud is selected, hit Ctrl+J to duplicate it into a new single layer.

Add the cloud to the scene. Place this cloud layer above all the other layers. Scale and position it as needed. Give this layer a layer mask and mask some unneeded cloud. Finally, set this cloud to normal at 60% opacity:
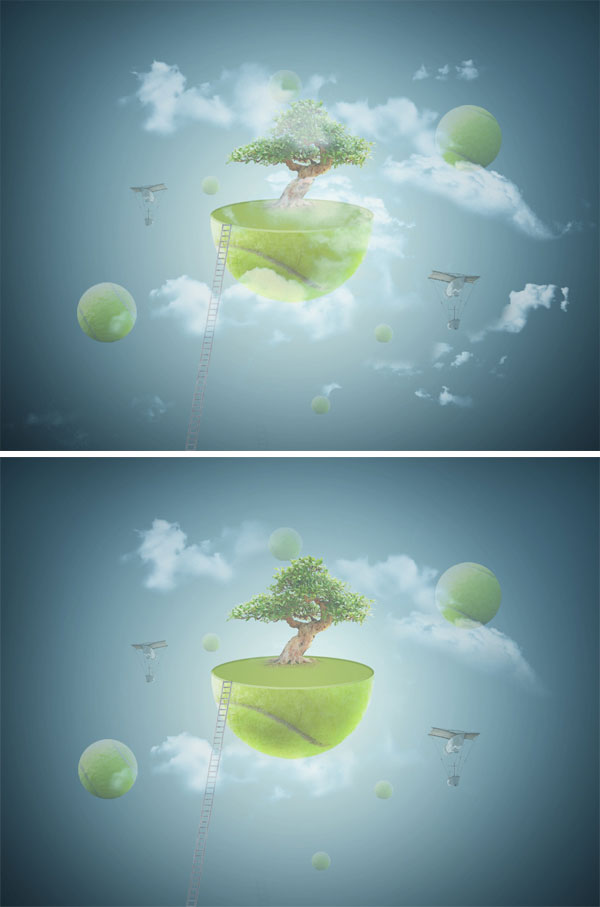
Duplicate the cloud layer two times. Scale and position them where desired. Mask some unneeded cloud from the two duplicates. Set the opacity of the two clouds at about 90-100% in normal blending.
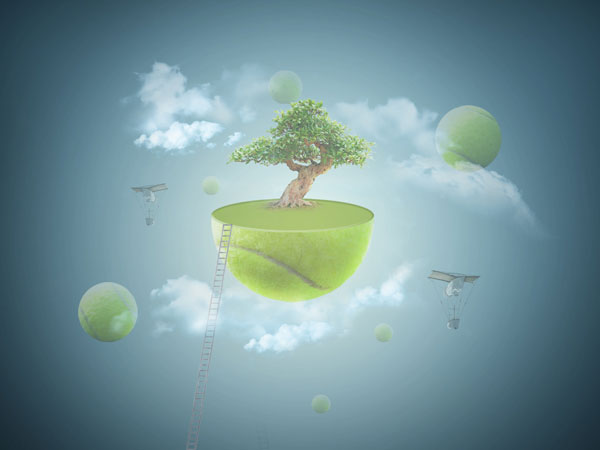
Create another new layer above all the other layers. On this layer, paint a very soft black color around the edges of the scene. Use a very soft round brush set to 10_20% opacity to do this purpose:

Go to layer > new adjustment layers > photo filter. Set this layer to normal at 80% opacity.

Then, give another adjustment layer: curves. Set this layer to normal blending at 90% opacity.

Finally, one more adjustment layer: gradient map. Set this layer to soft light at 80%

This is the result should look like:

In this step we will add texture to the scene. Open the texture image to the document. Place this texture layer between the planet group layer and the black layer in the layer panel. Mask a little bit on the middle part of the texture. Set this texture to hard light blending at 60% opacity.

Duplicate the texture layer and set this duplicate to multiply at 40% opacity. This is the result:

Finally, merge all layers by pressing Shift+Ctrl+Alt+E. This will merge all layers into a new single layer. Convert this layer to smart object and give this layer a smart filter by going to filter > sharpen > unsharp mask. Set this smart filter blending option to normal at 80% opacity.
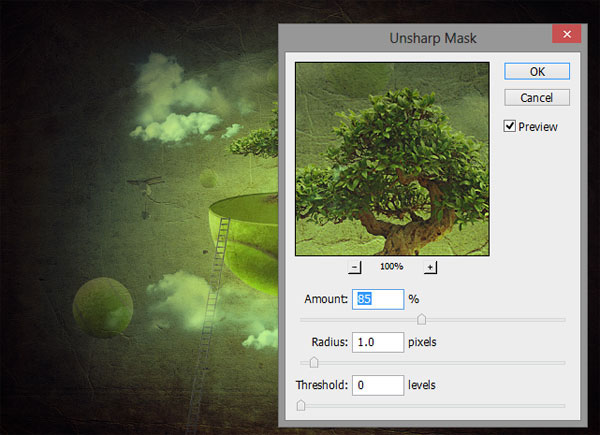
Give another smart filter: high pass. Set this smart filter blending option to overlay at 60%.
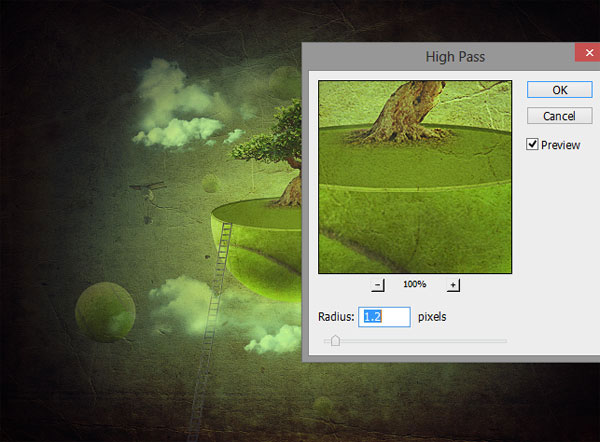
Here is the result:
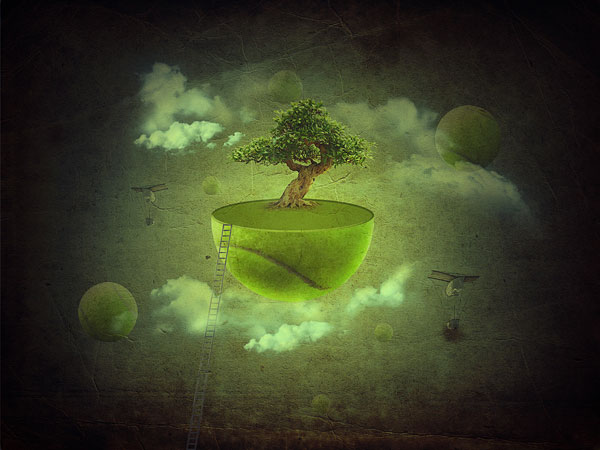
You can view the final outcome below. I hope that you enjoyed this tutorial and would love to hear your feedback on the techniques and outcome.

The source files for this tutorial are available to our FanExtra members community. If you want to access the source files for this tutorial (and all of our tutorials + thousands of other resources) then sign up here.
If you’re already a FanExtra member then you can login here to access the source files.
I am a self-taught photoshop hobbyist from Bali, Indonesia. Photo manipulation is something I am keen on most and a music lover as well. Meet me here http://wprabu.blogspot.com/
Do you know the basic tools in Photoshop but feel that your work is still looking average? Join our creative community at FanExtra and get the direction you need to take your work to the next level.
Wow!!!This is awesome. I love this. pls psdfan, keep up the good work